


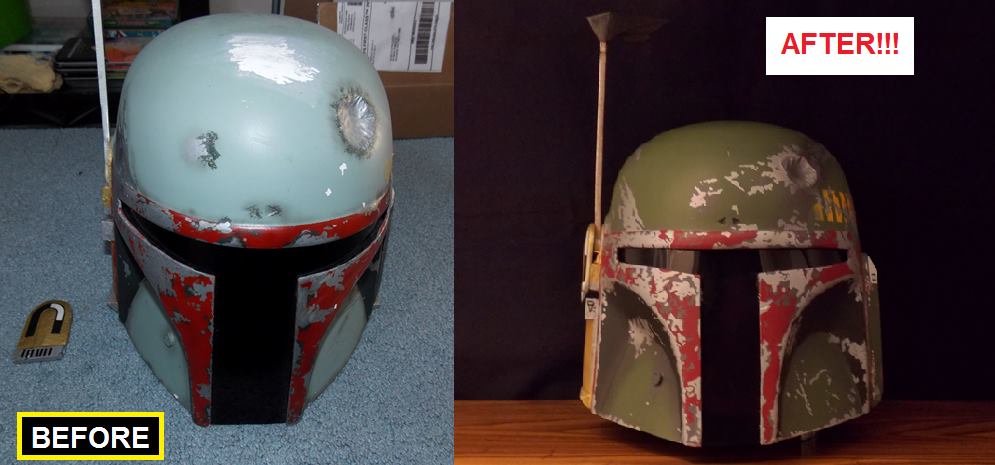
Custom Boba Fett Helmet
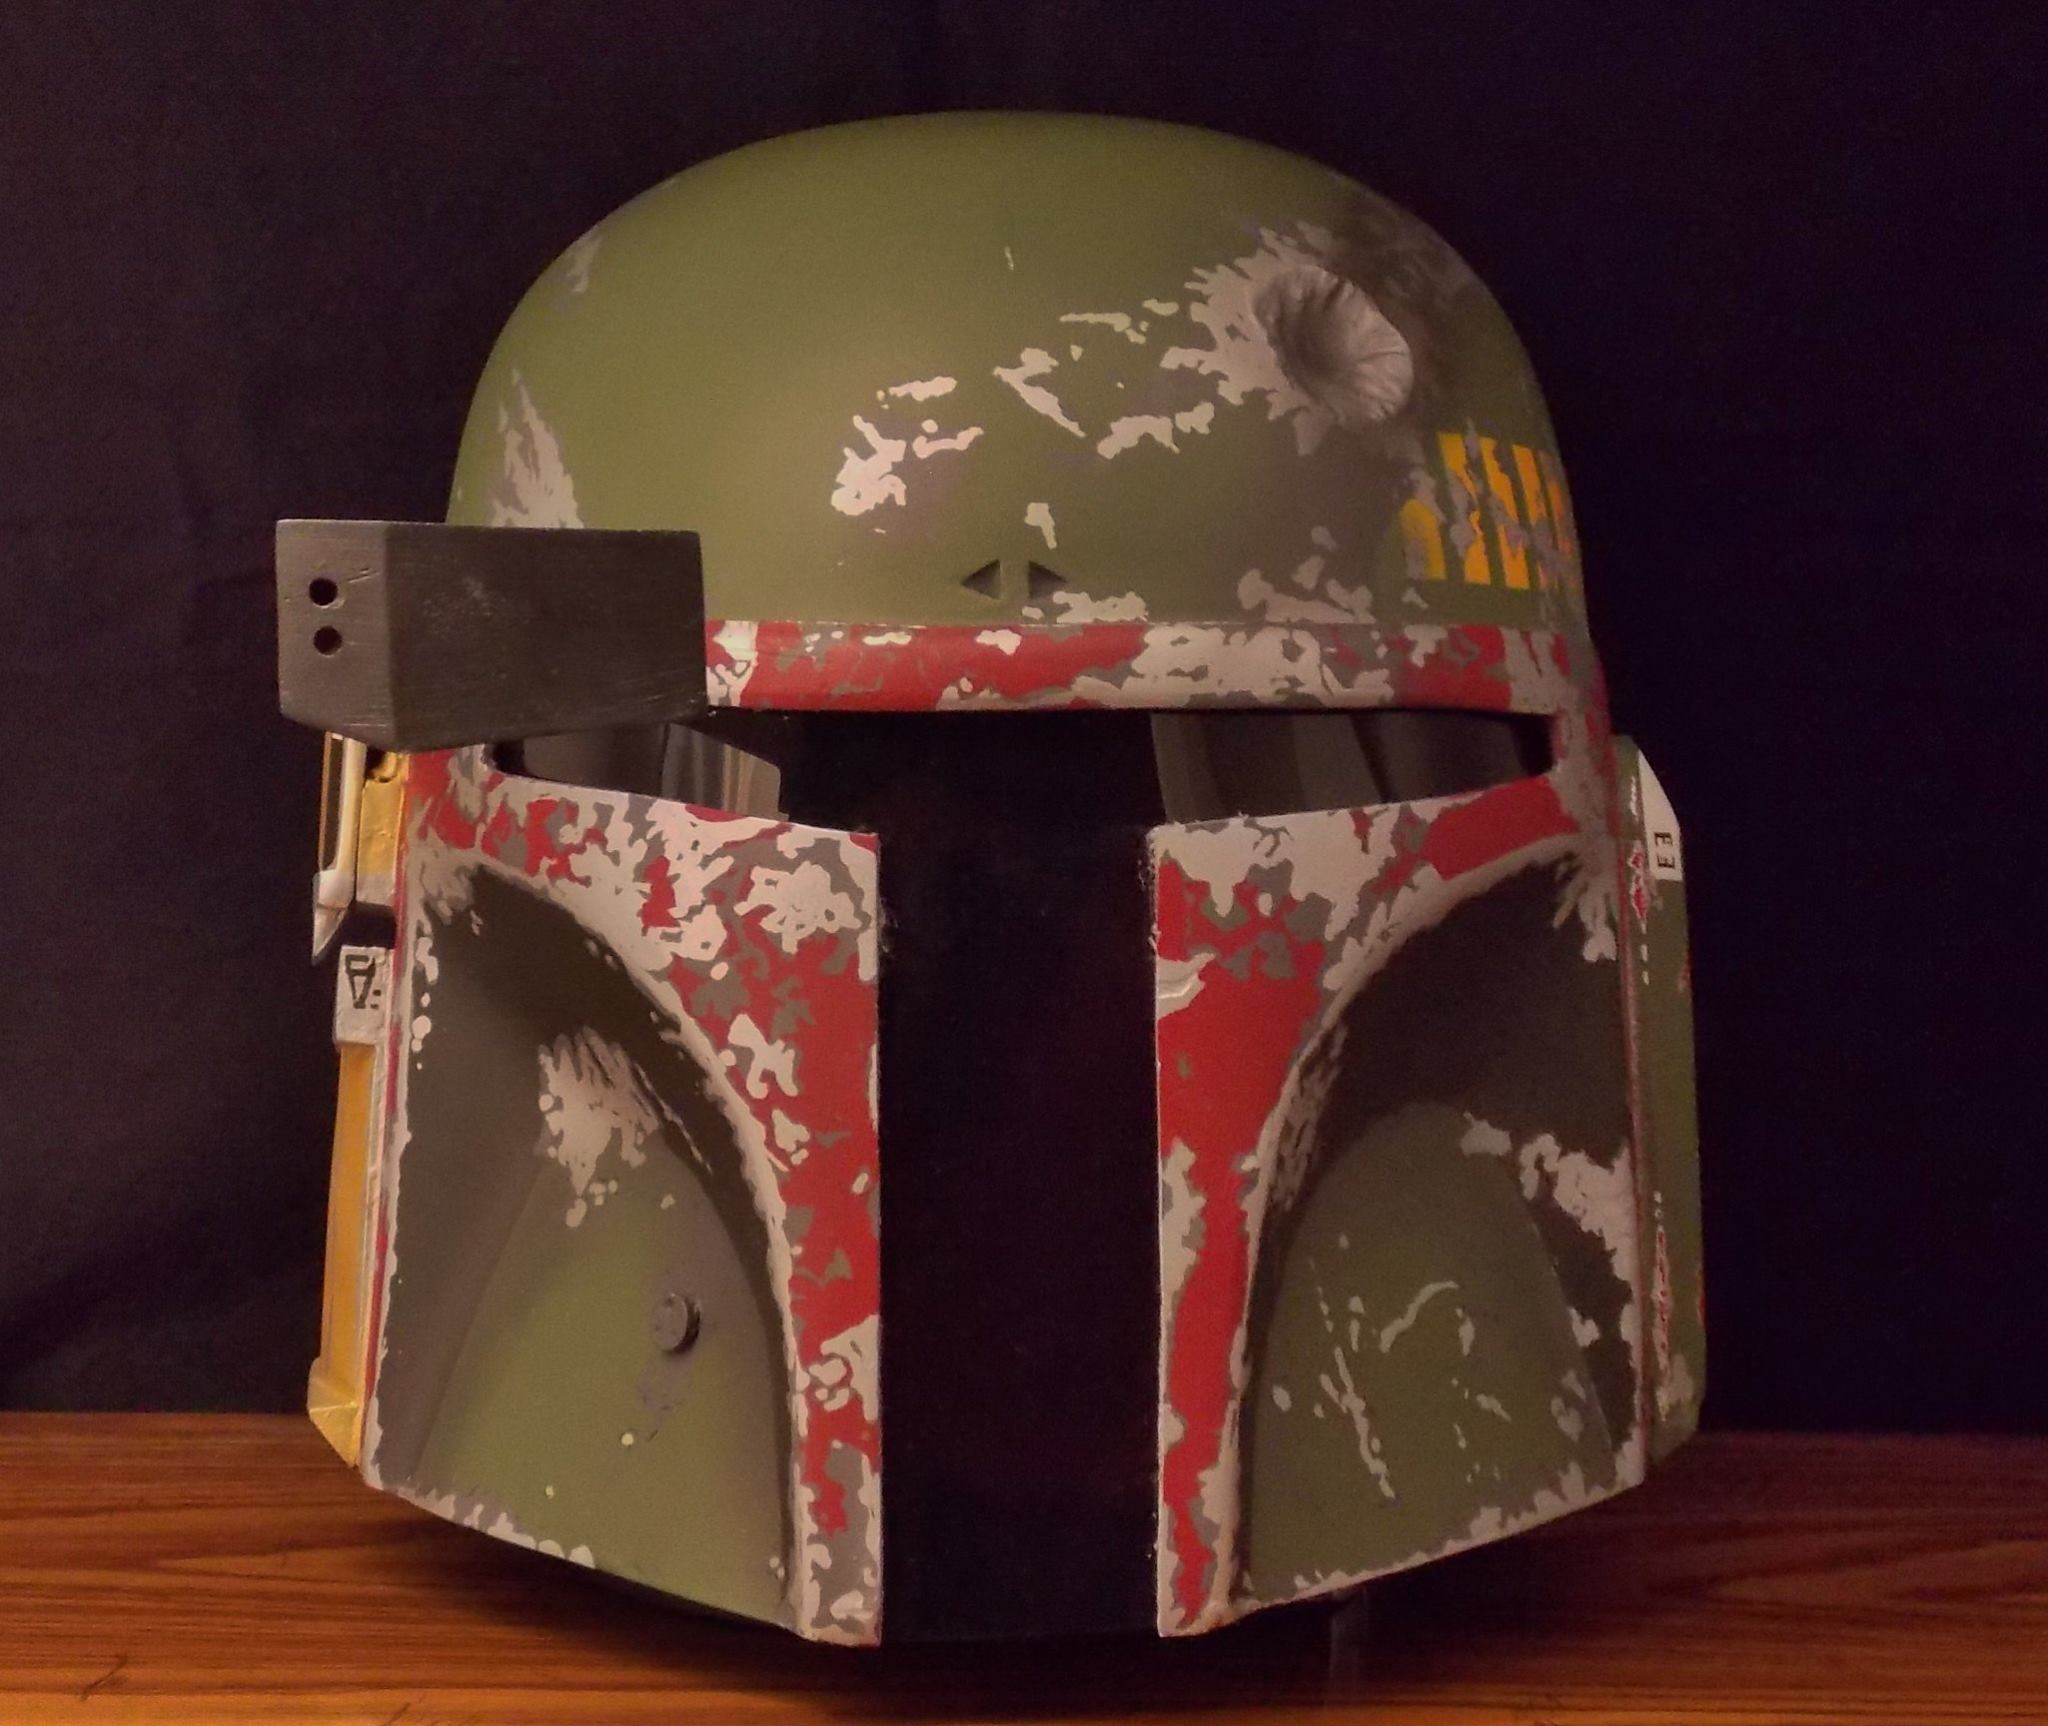
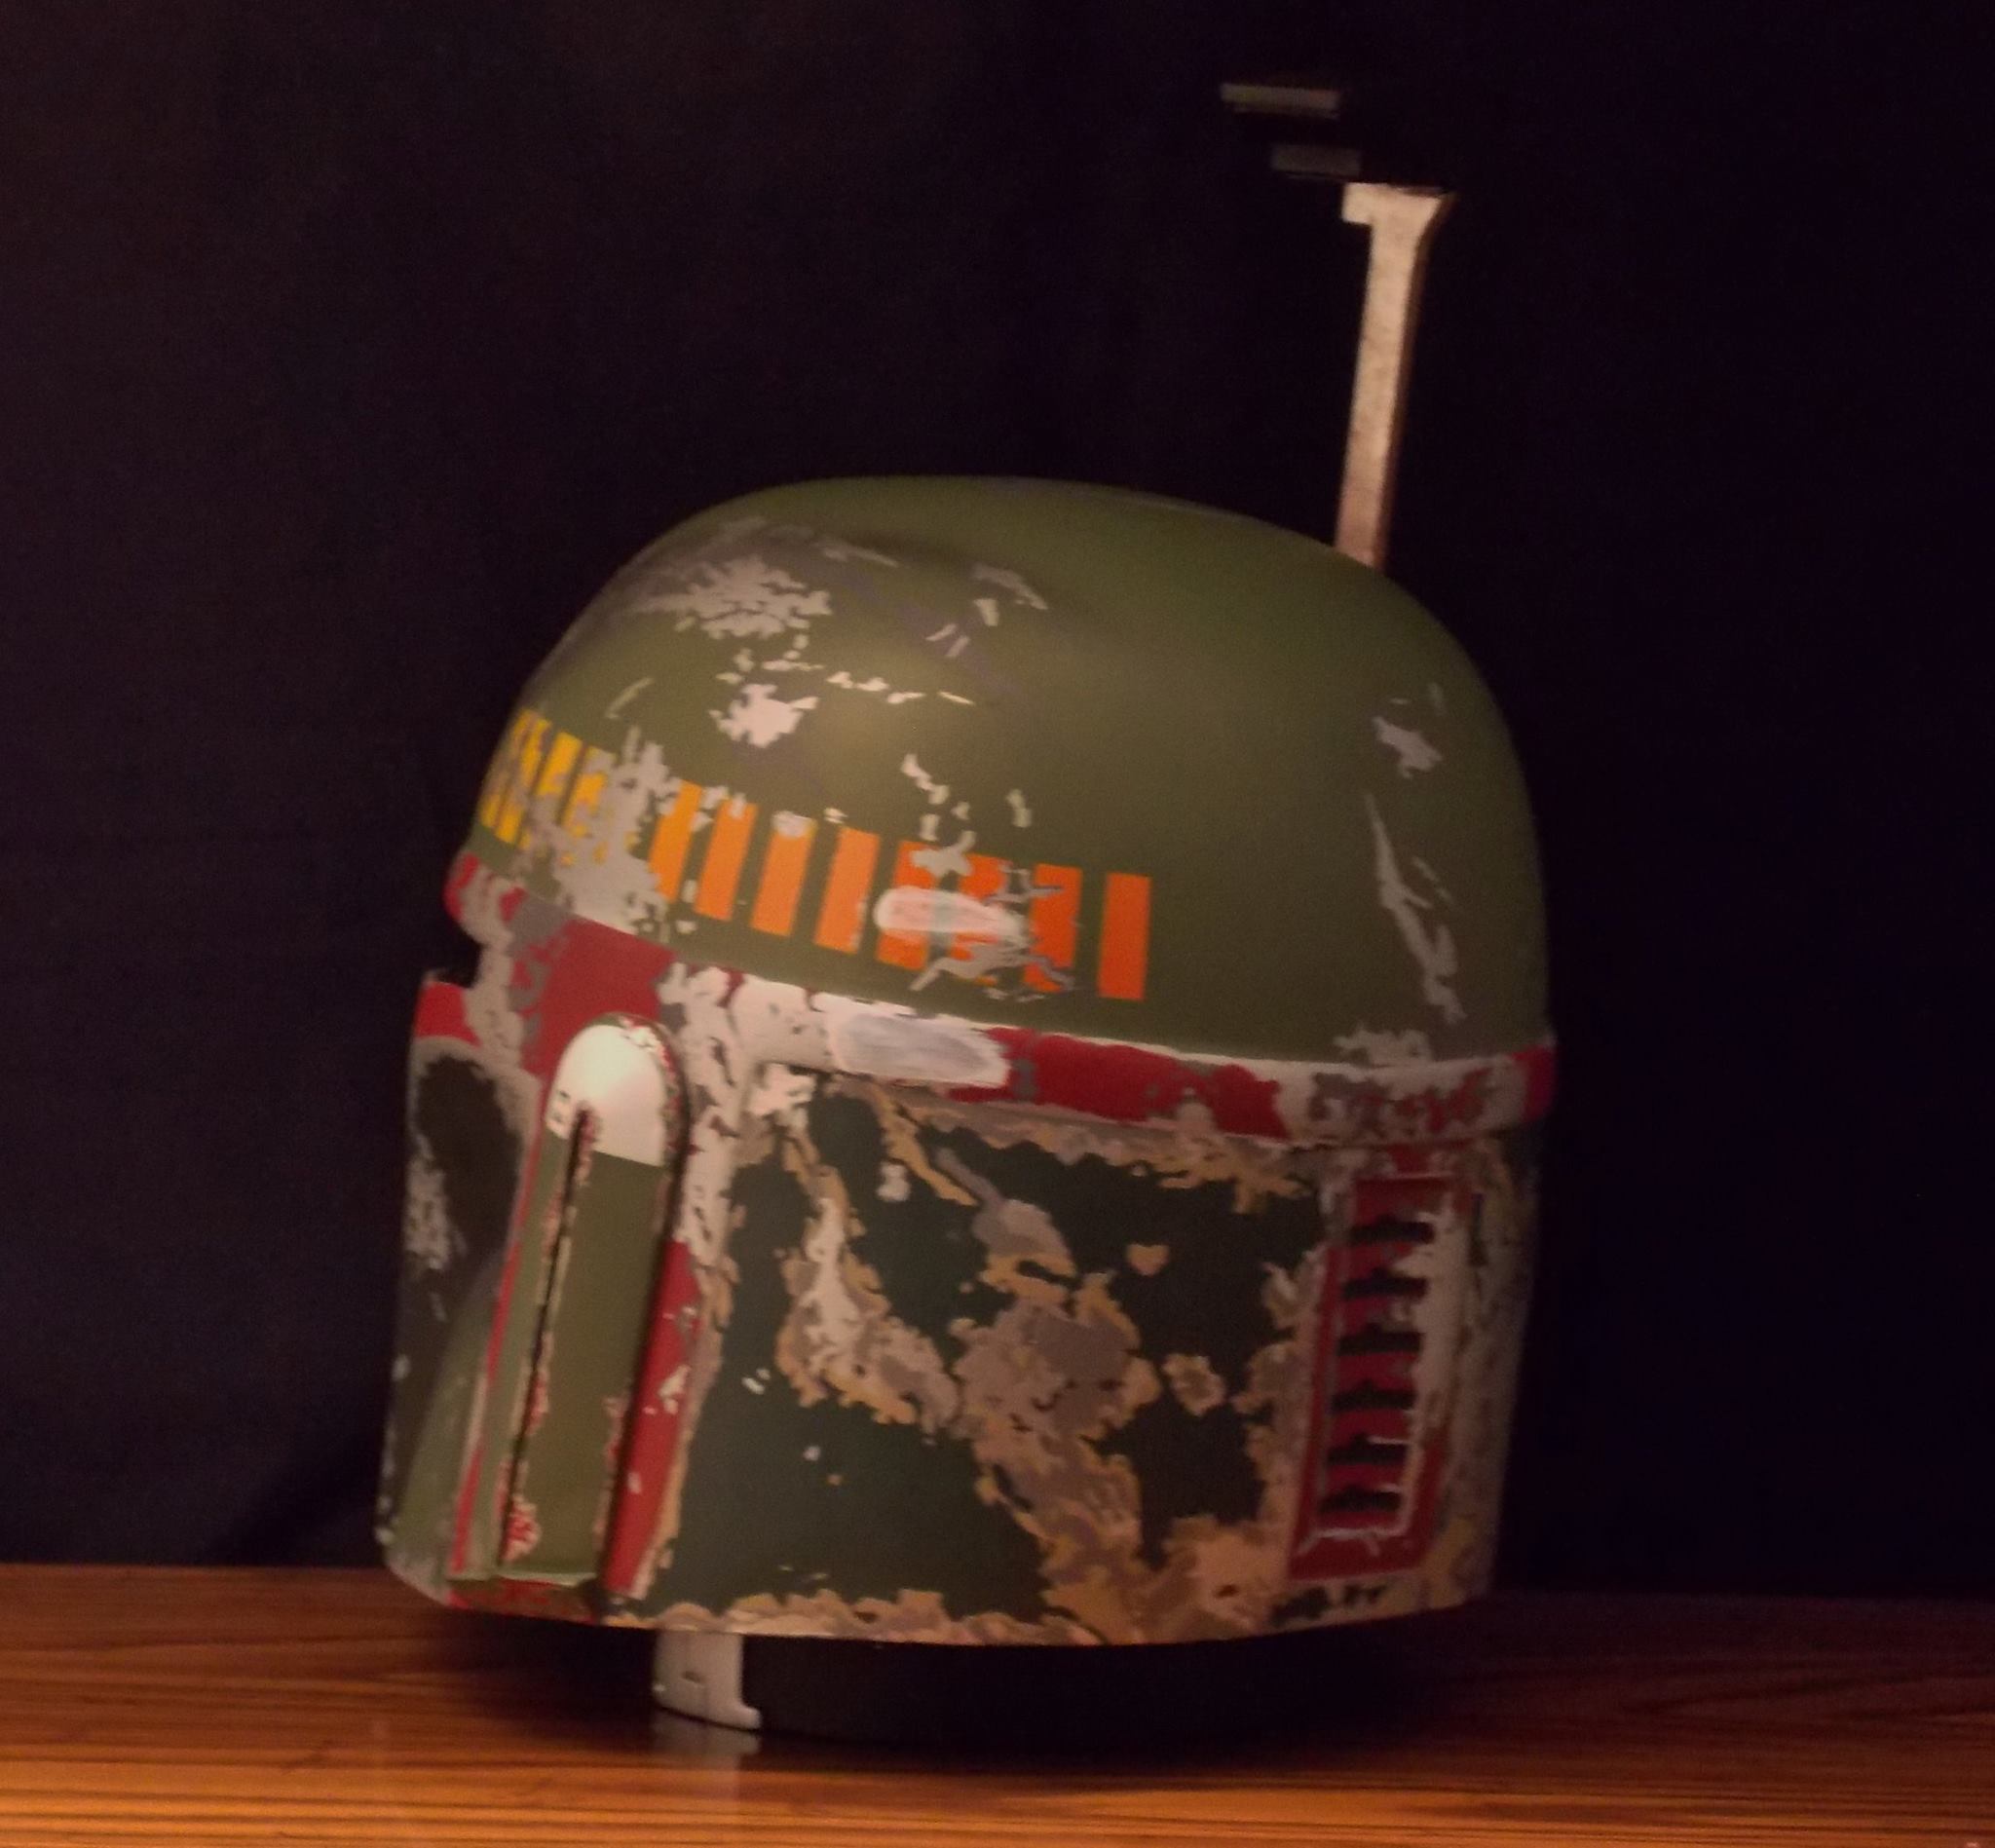
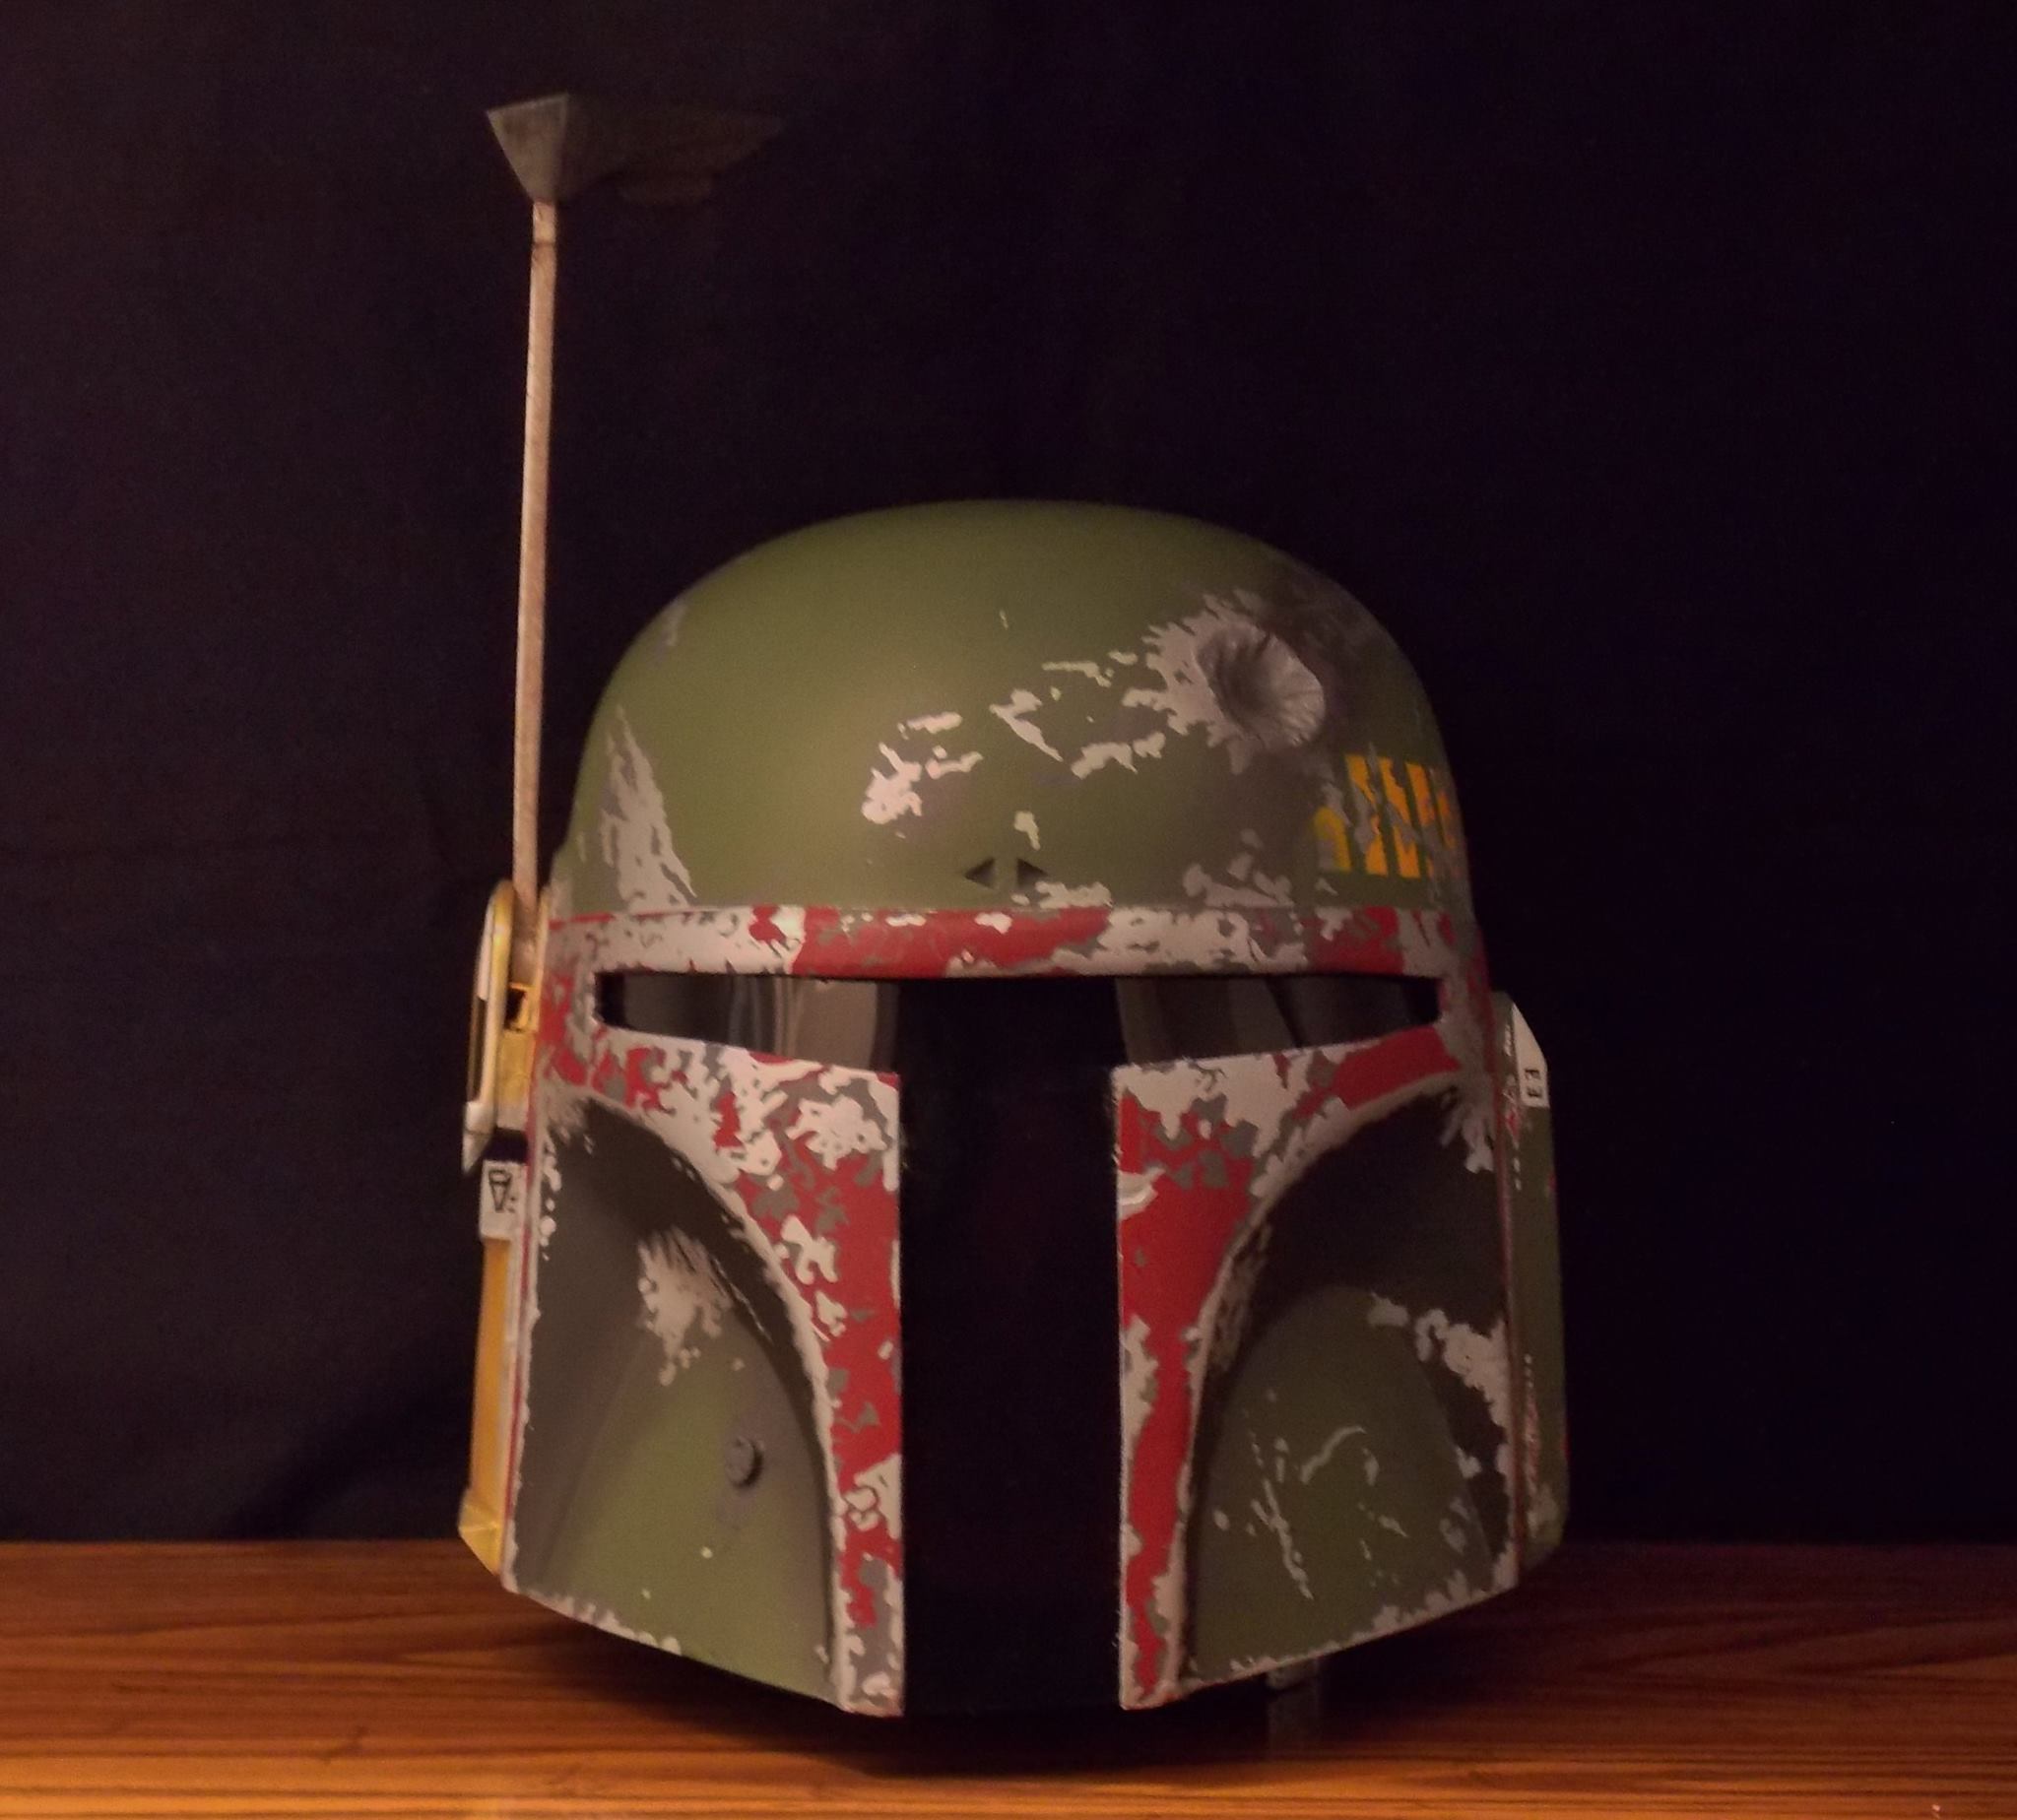
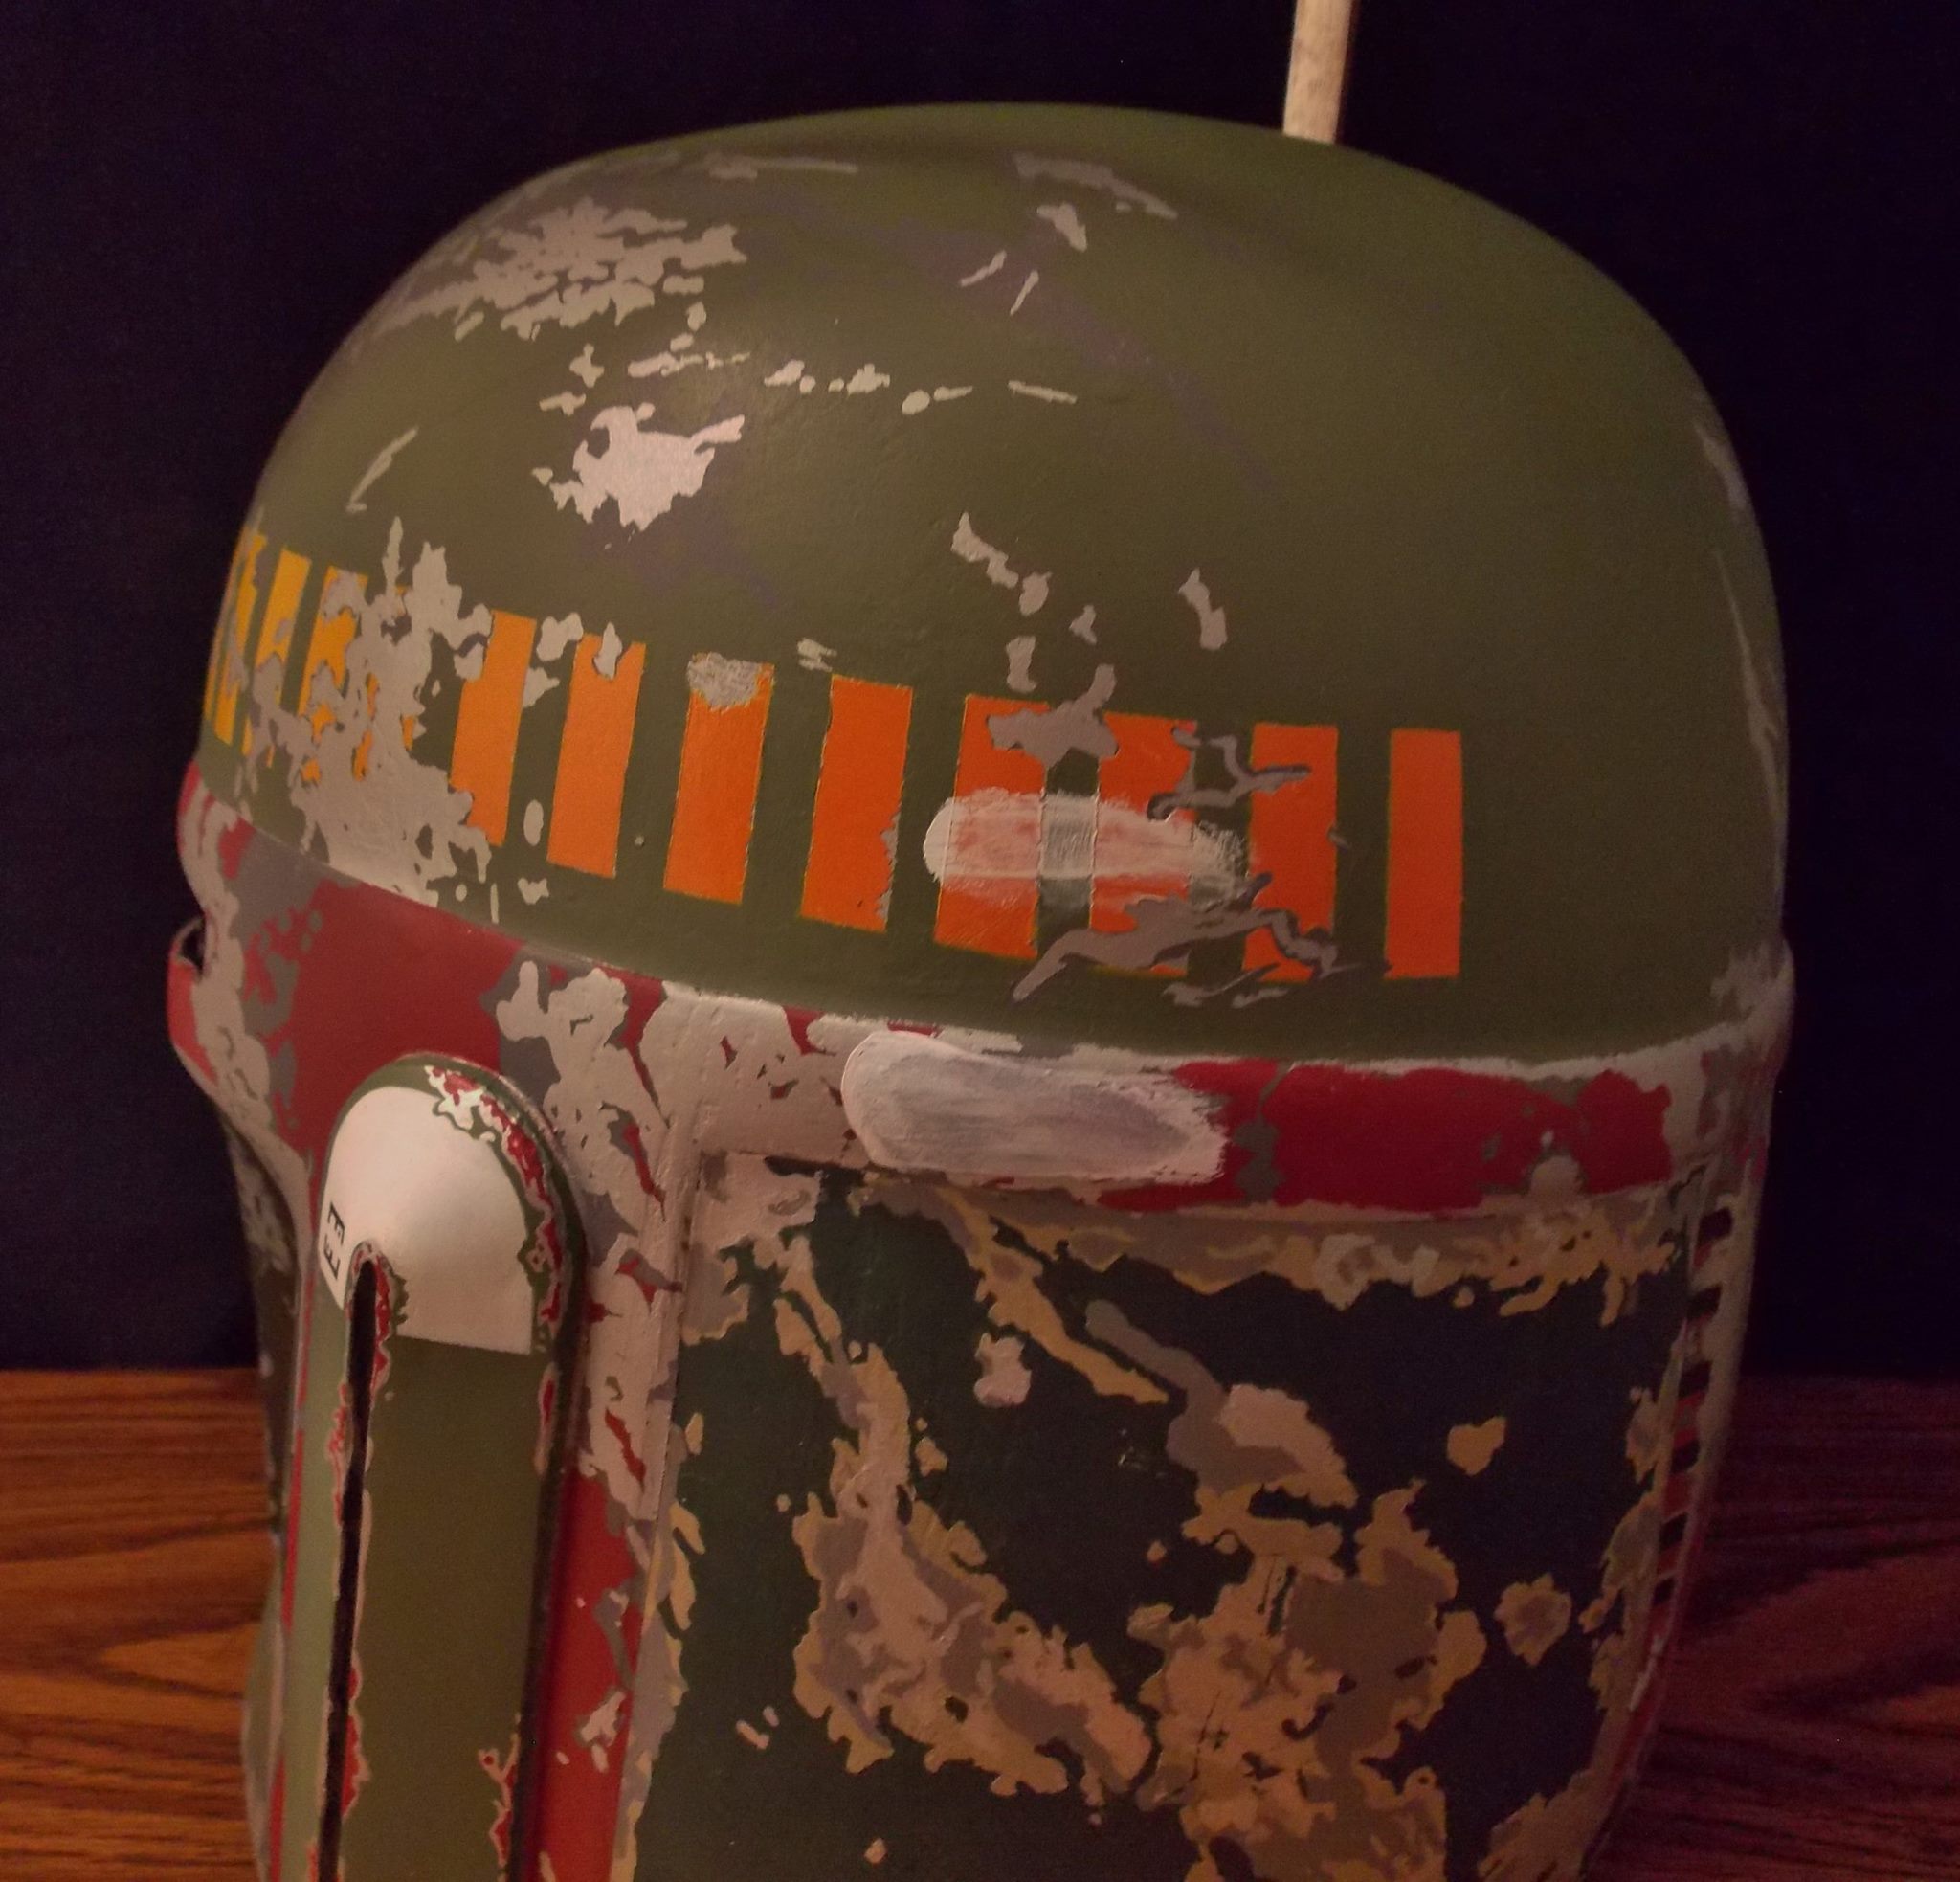
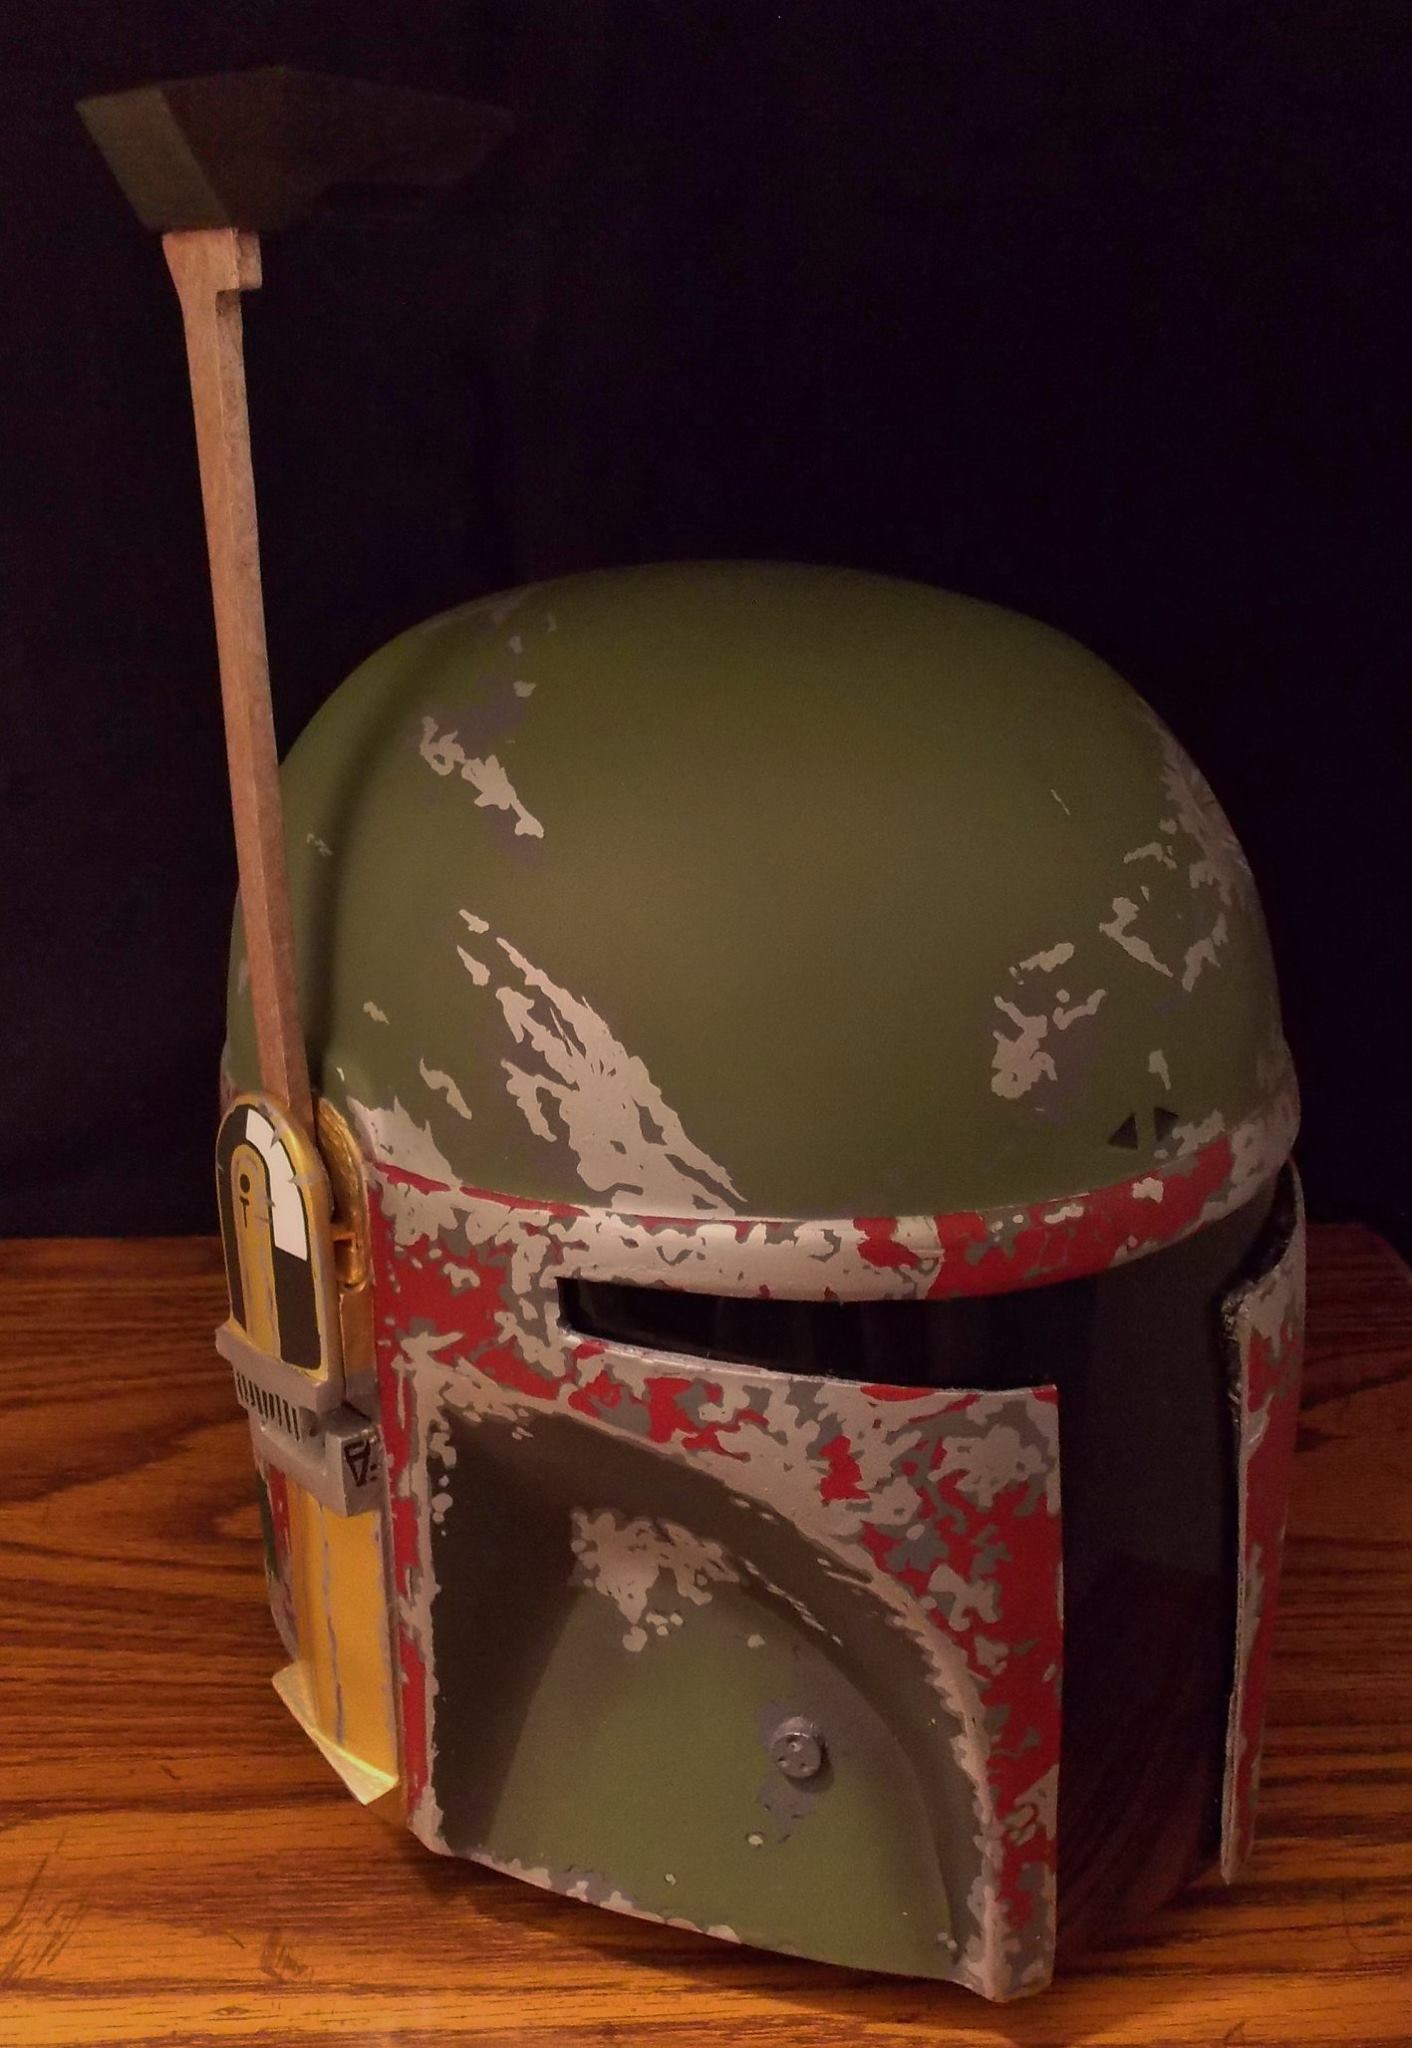
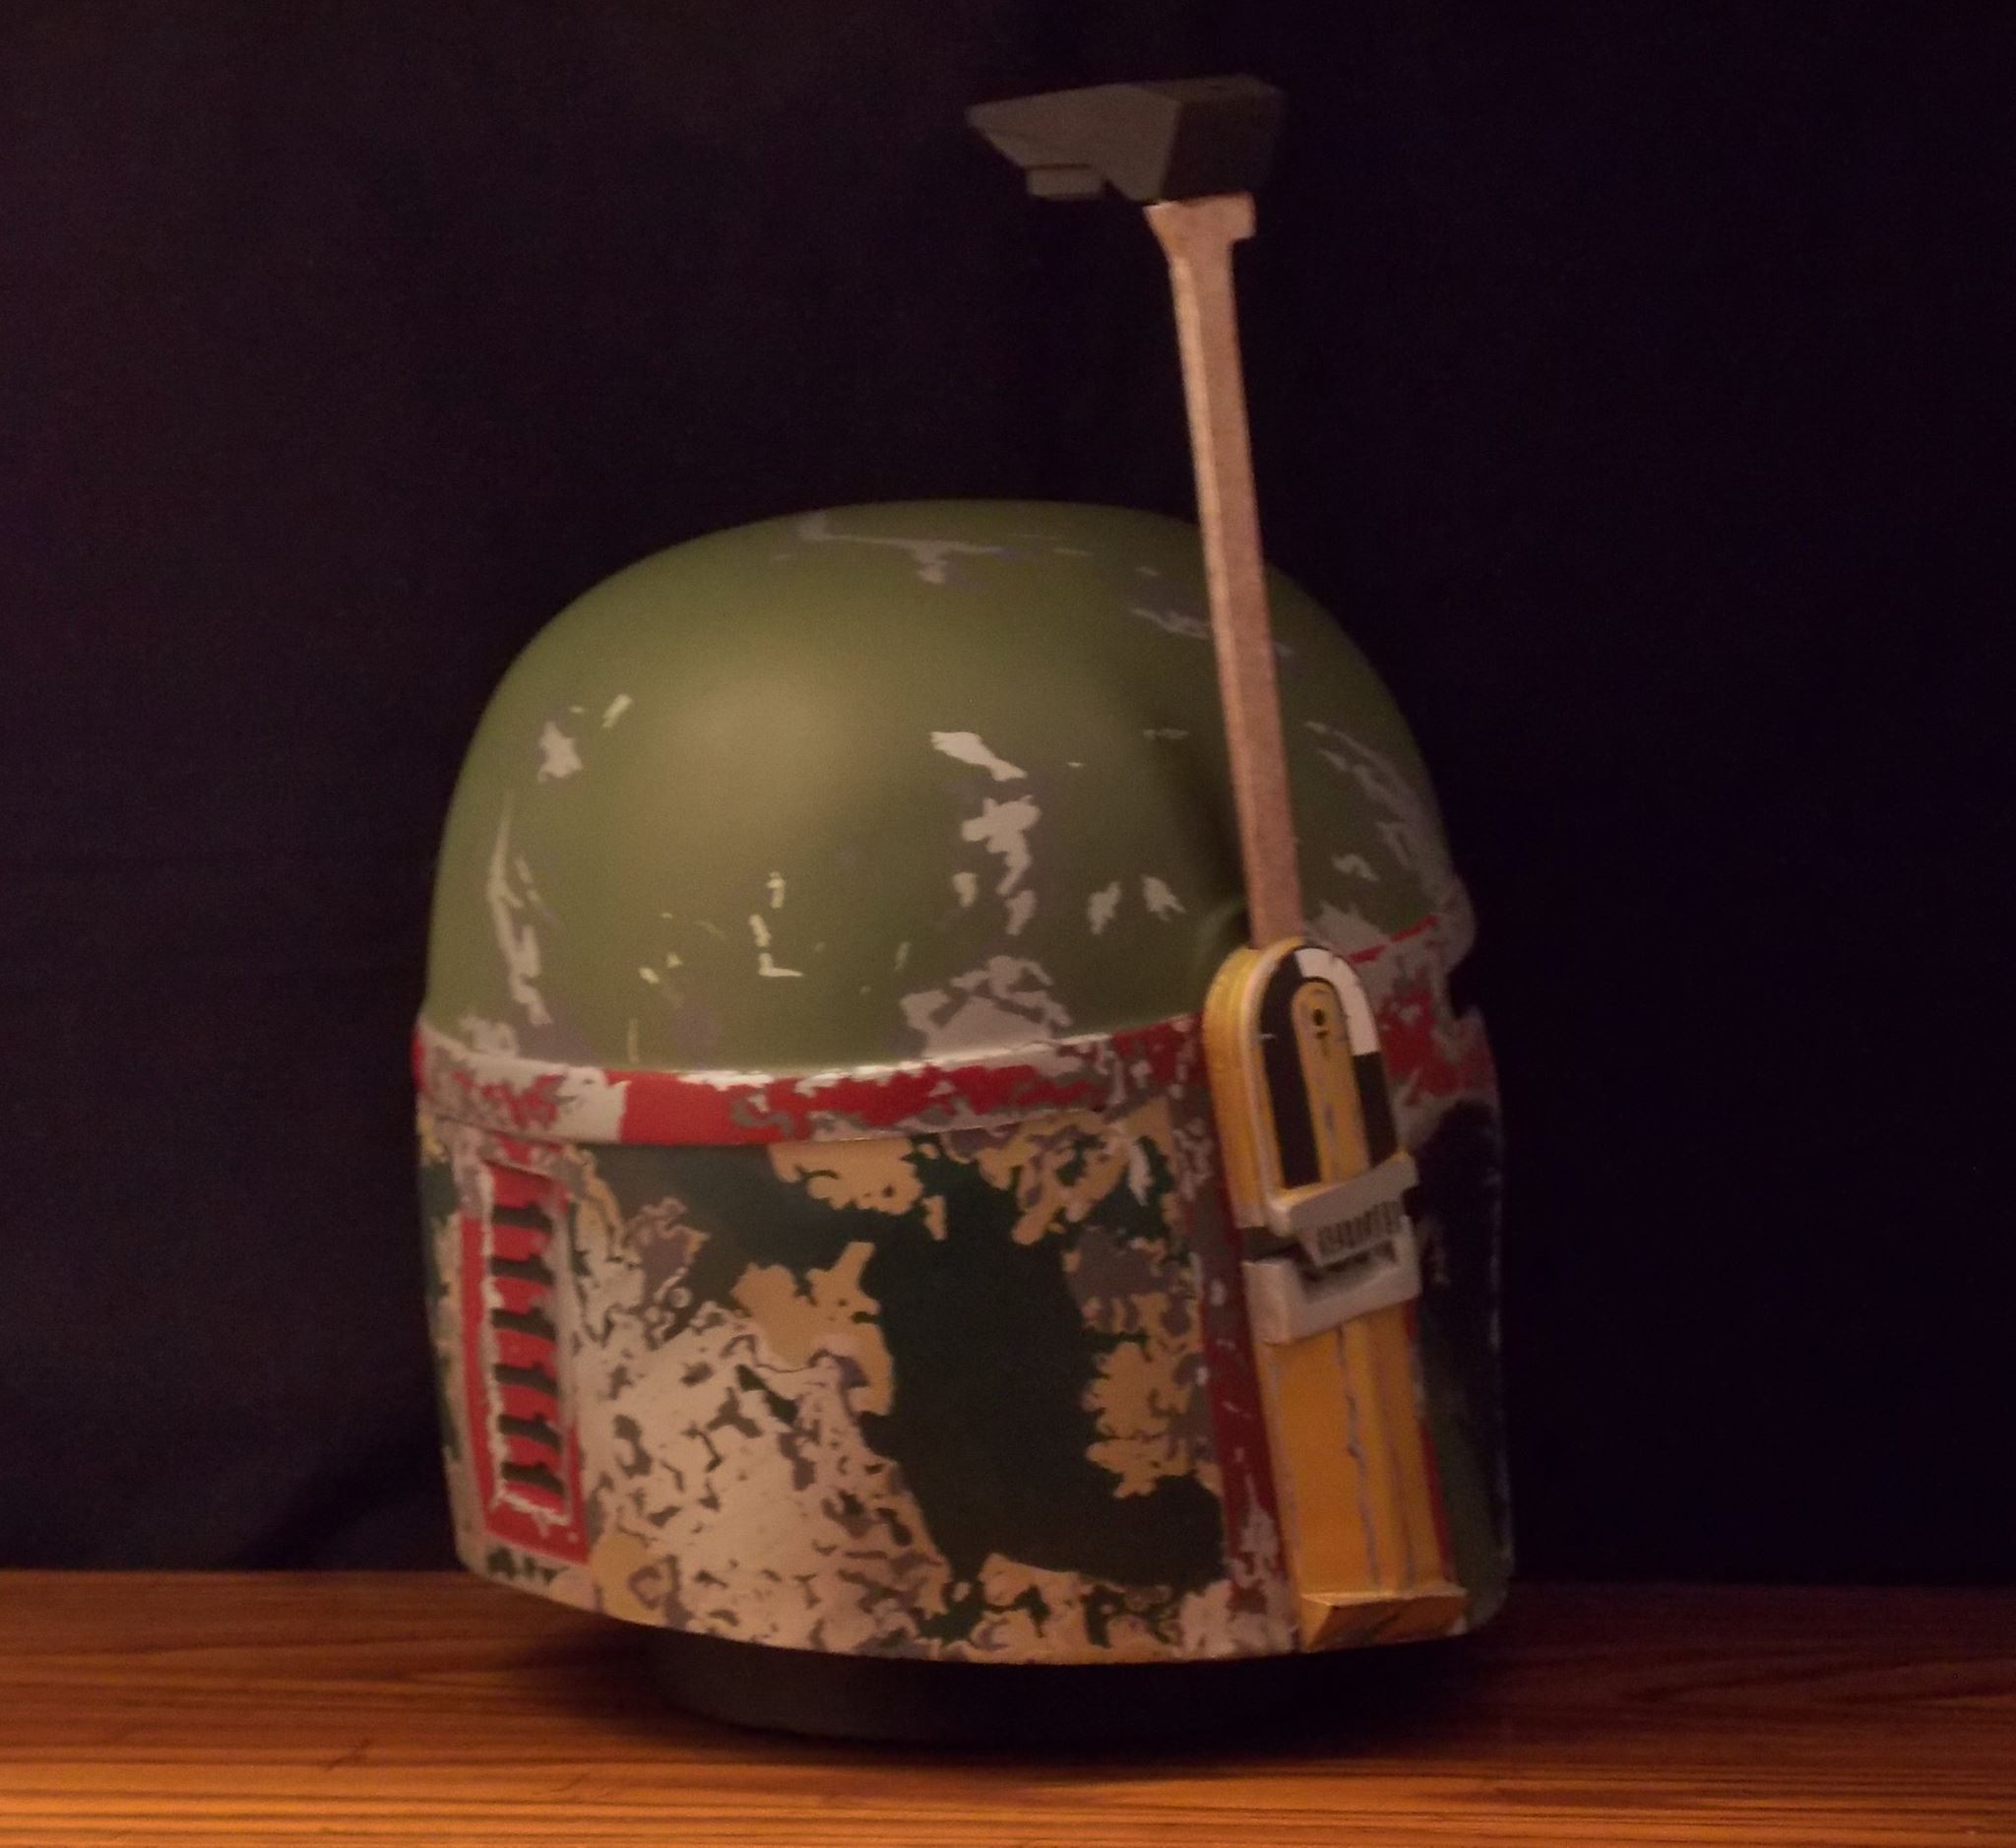
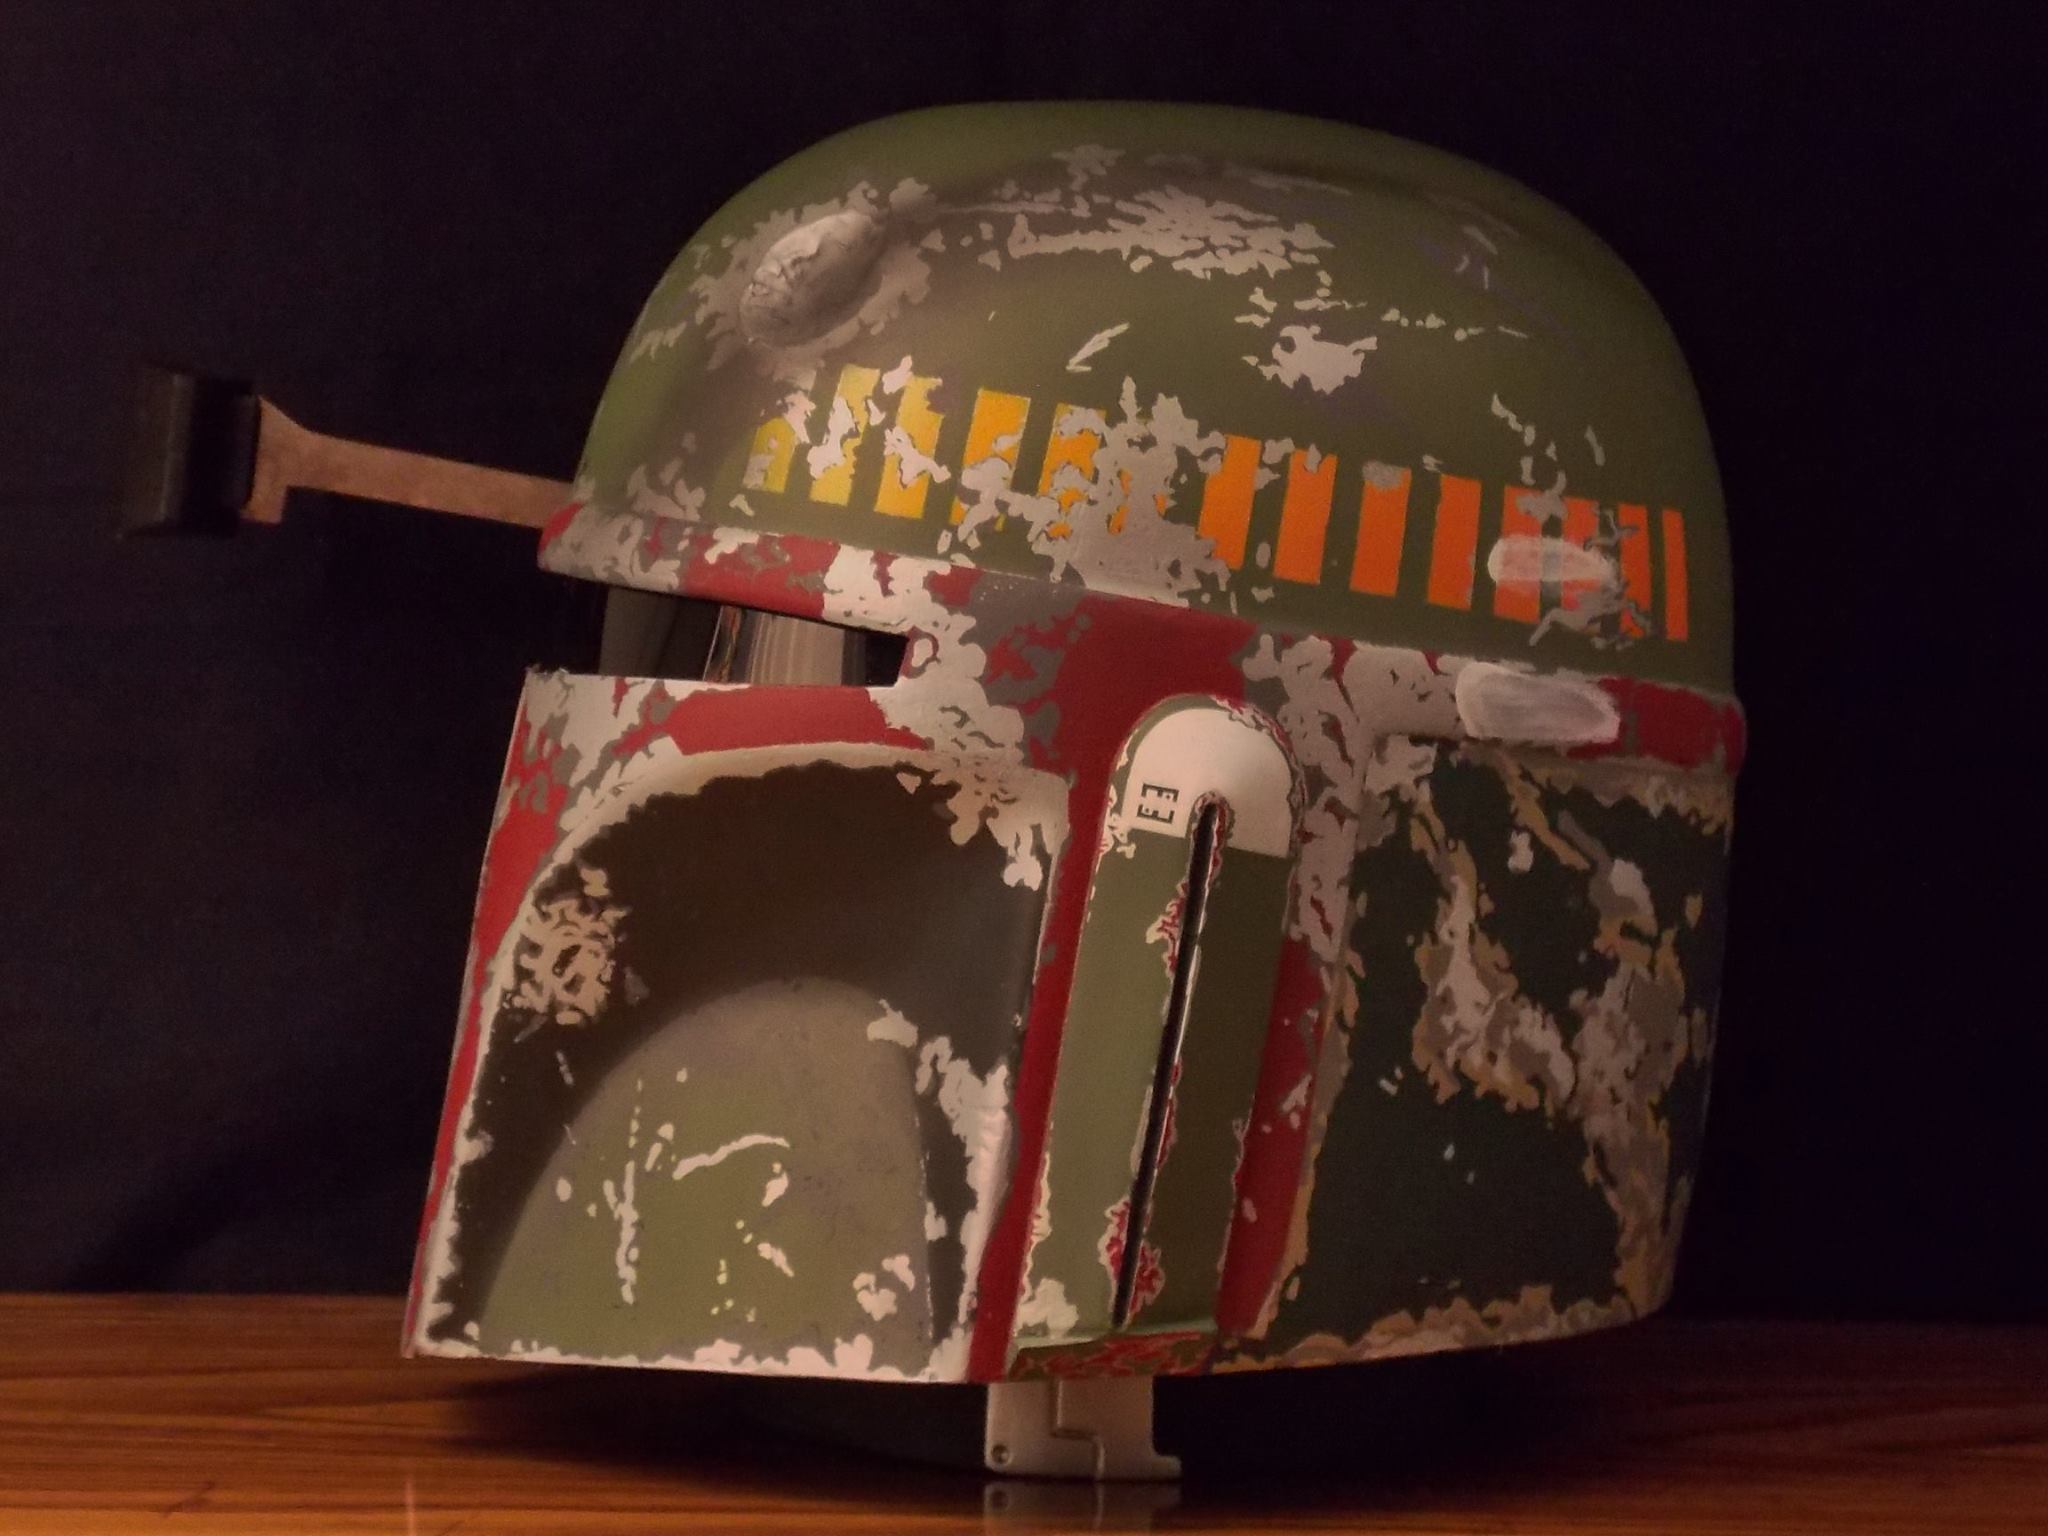
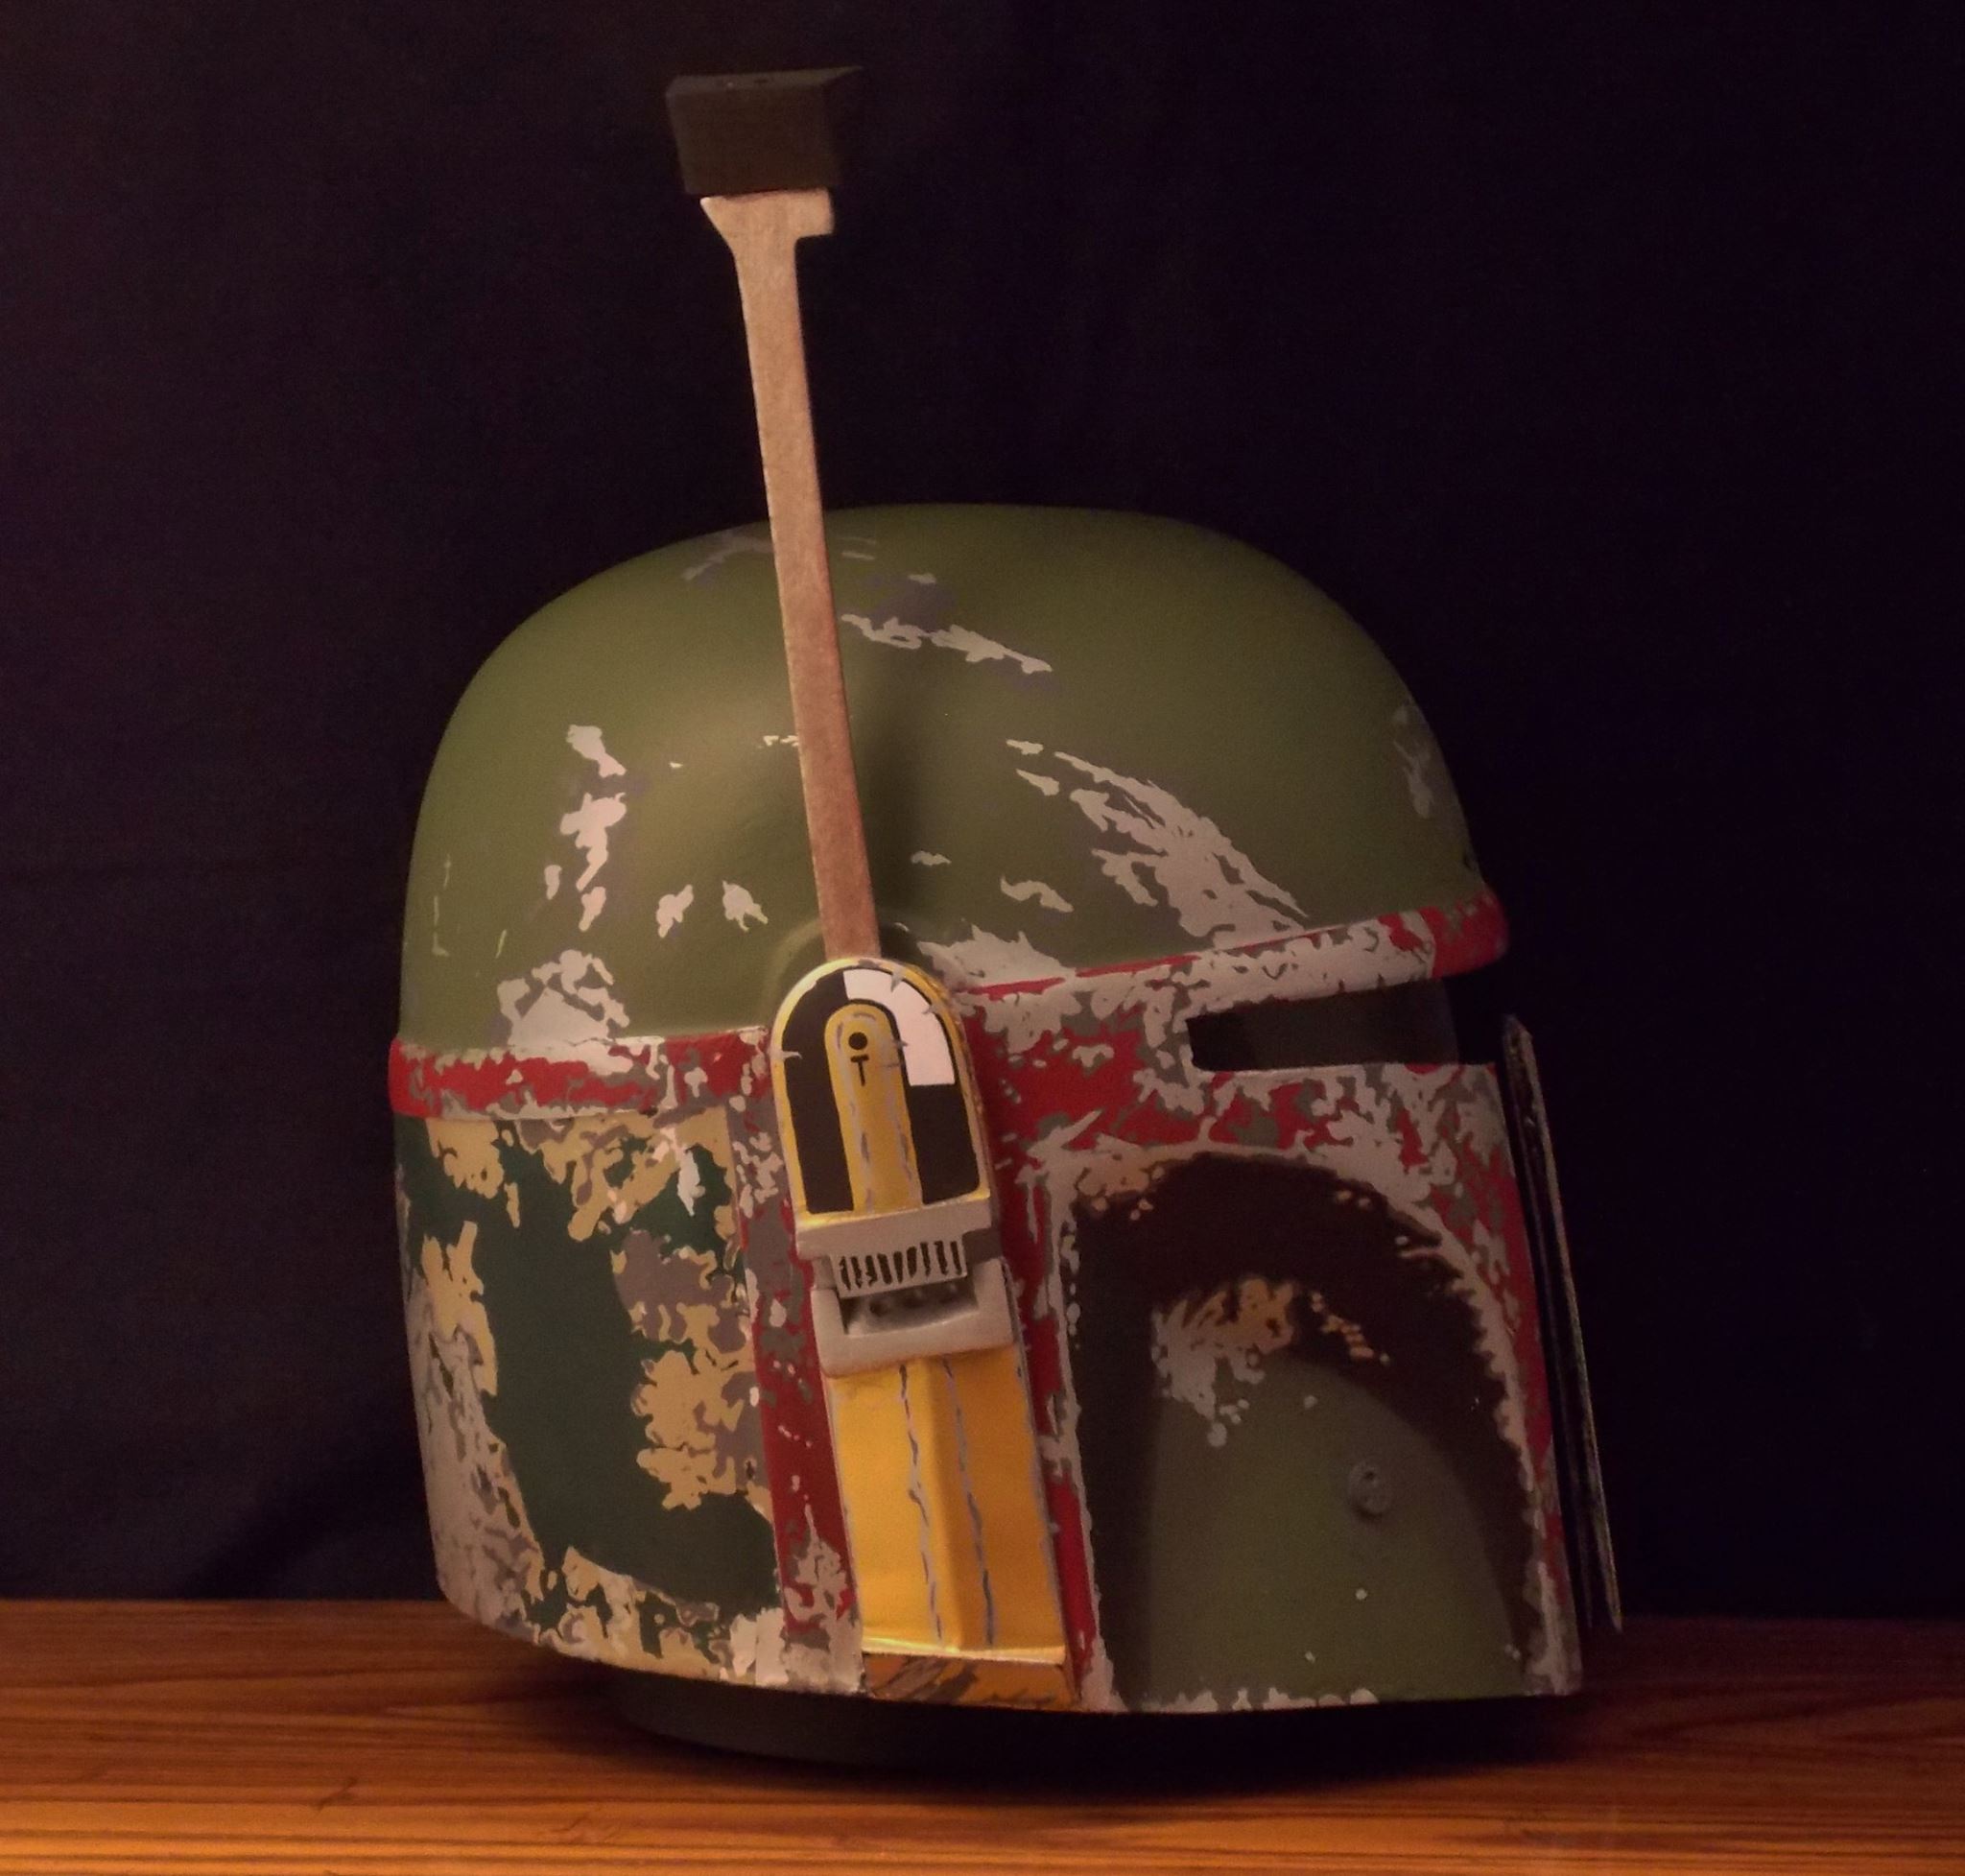
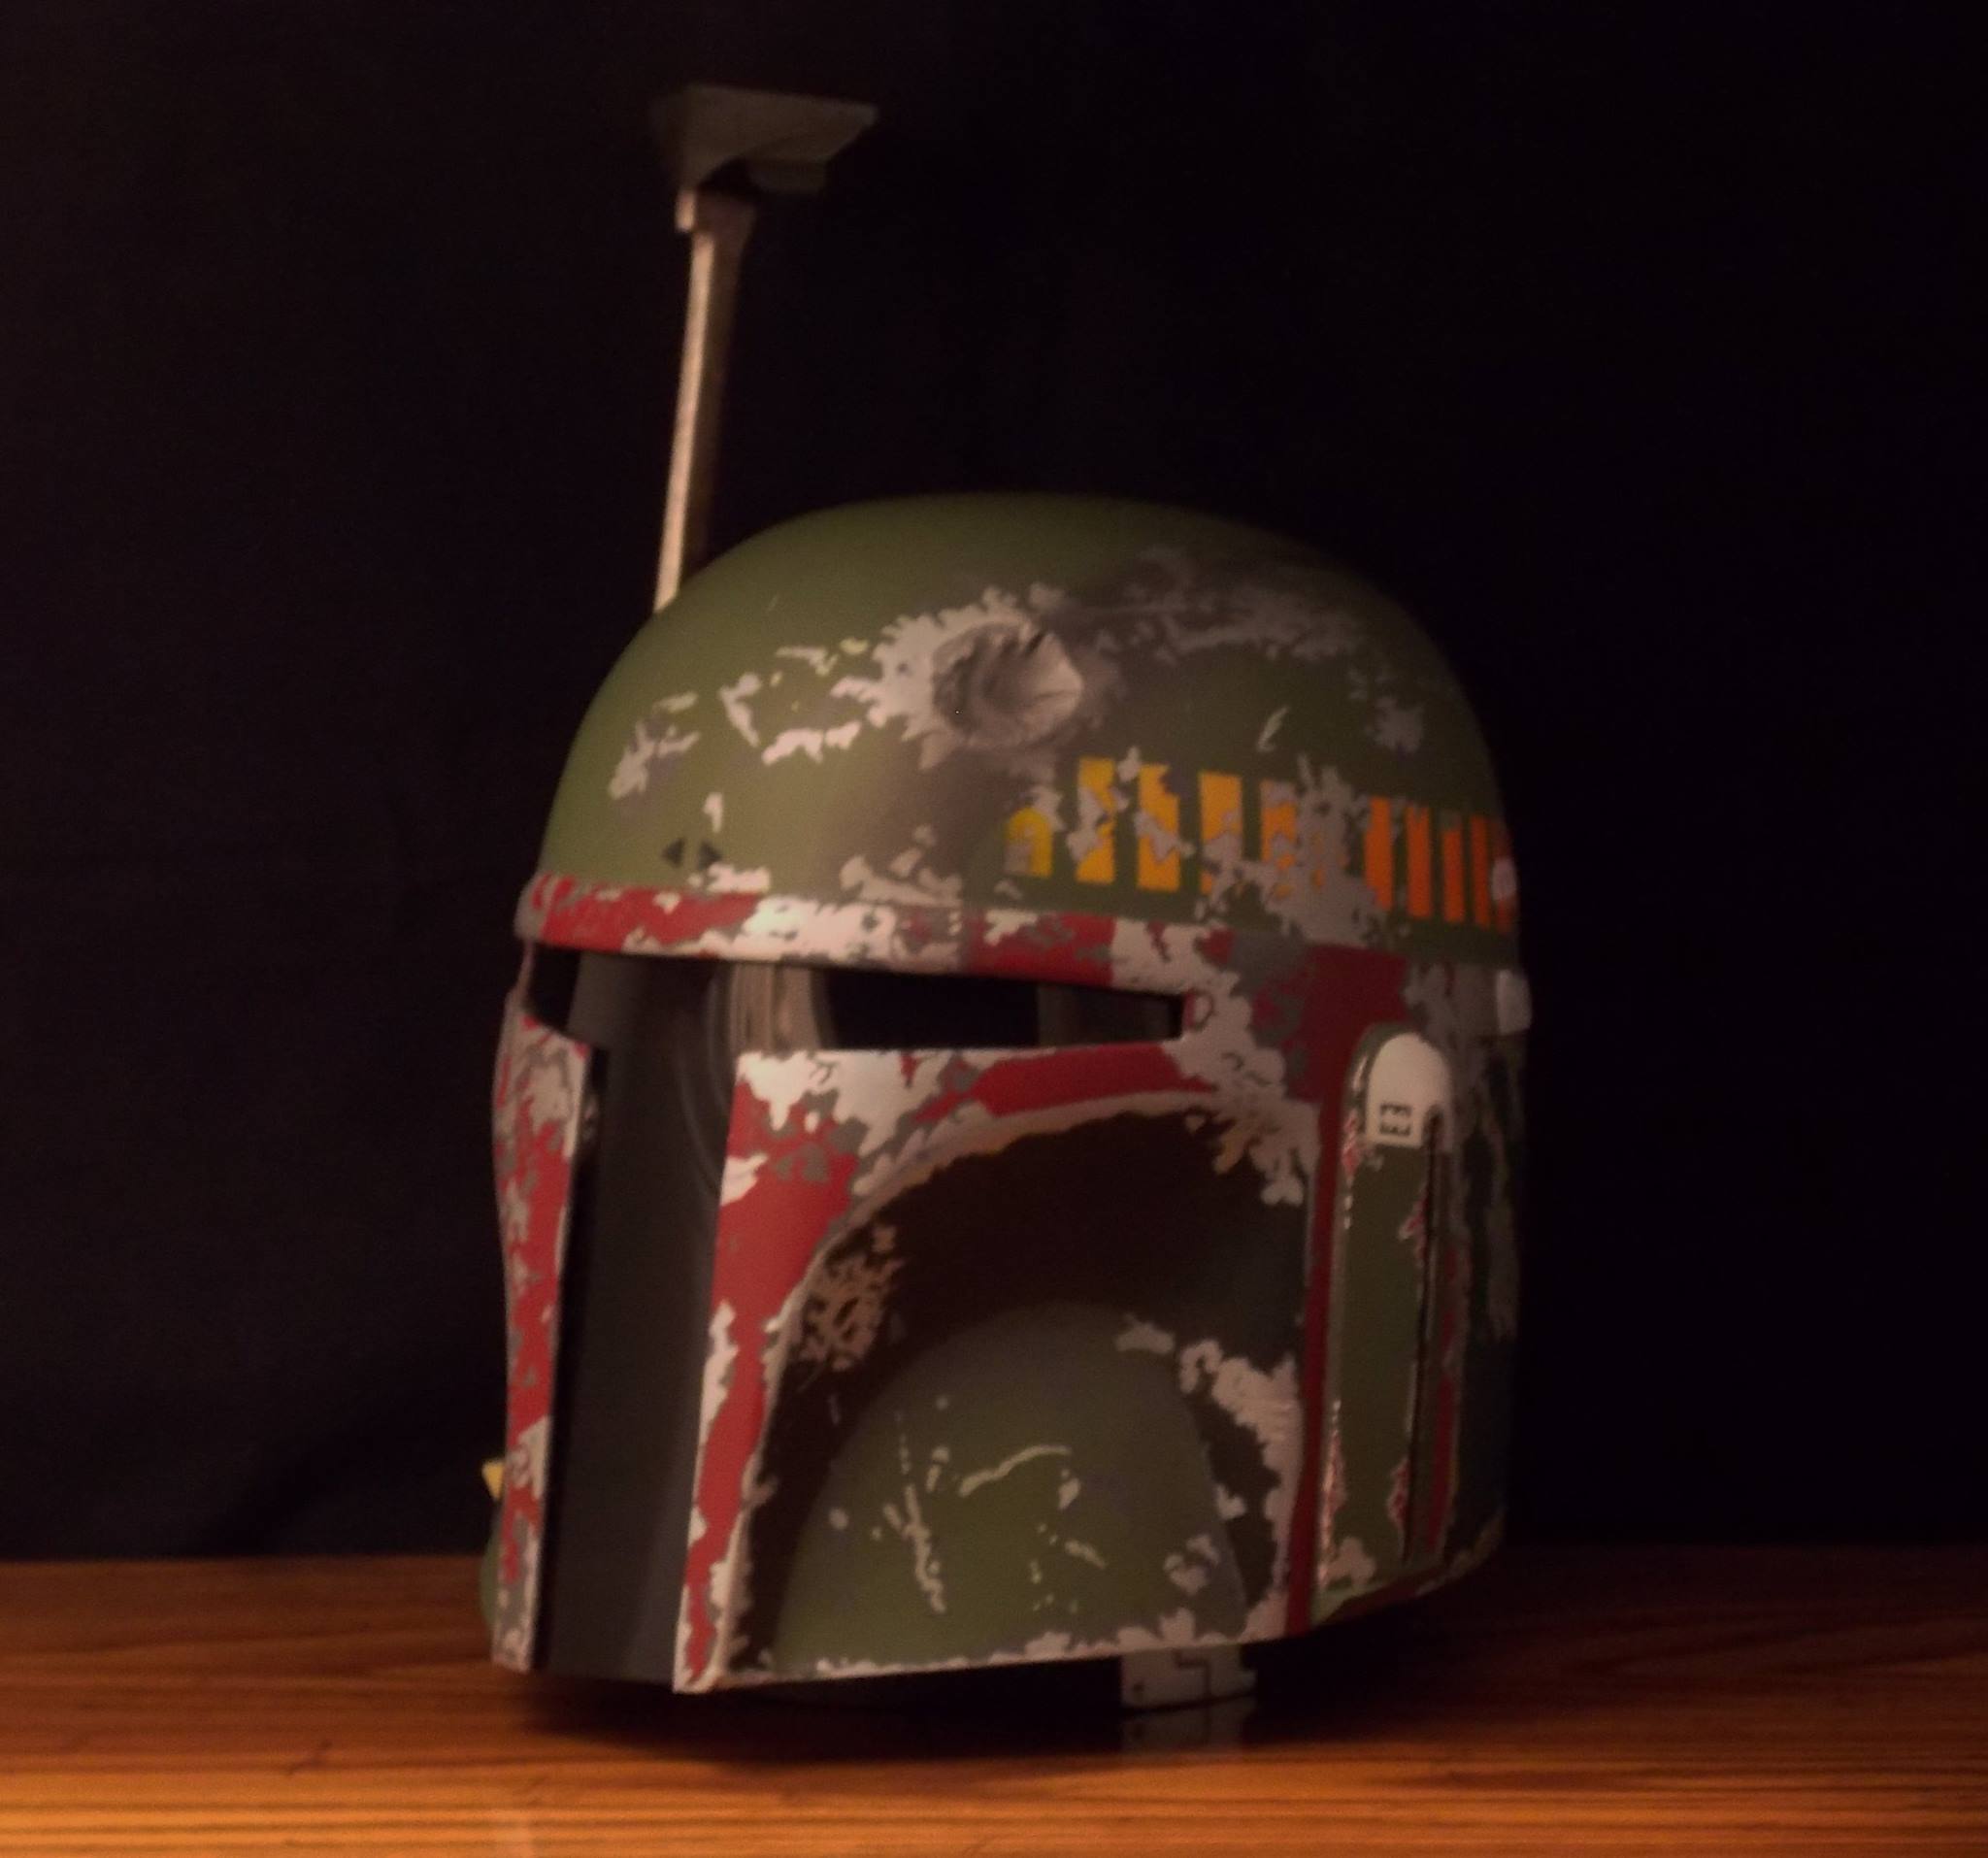
This is a life size, wearable replica of Boba Fett’s helmet that follows the color scheme and battle damage/weathering from Empire Strikes Back.
This was another project done for Law Tarello and I couldn’t be happier to be done with it. Not only did this take almost 5 years to complete (I’ll get to that, there’s a good reason I swear) but I’m sure Law couldn’t be happier that it’s finished too.
Law had been given the helmet as a gift from a friend, and while the sculpt and likeness of the helmet was excellent he felt that the paint job could use an improvement. I’m not going to knock the kind soul who gave him the helmet, I was just asked if I could give it a new paint job. Well, I did just that and more which Law came to discover when it got back to him.
When I had first received the helmet I was attending SUNY Brockport during the fall 2012 Semester along with working almost full time at Target during the winter holiday season. Afterwards the following semester had me stage managing two of the main stage productions for the 2013 Festival of Ten. Tragically at the end of the semester while preparing for finals and multiple written assignments and projects; I had lost one of my best friends and greatest inspirations to a 9 month battle with AML Leukemia. As a result I slowed down production of the helmet…
This was followed with my final semester where Law and I pulled out all the stops, and had pretty much forgotten what the Hell sleep was since he was my advisor for my Senior project, thanks again man, and he got drafted into the 2013 mainstage production of Avenue Q. Law killed it on stage and I was drafted (also while doing finals, projects and working a winter holiday season at Target once again) into building a foam suit of the Empire State Building for a member of the cast to wear and dance in during a musical number of the show. It was built from the ground up from scratch and done in less than three days with the costume being completed seconds before the end of the intermission of opening night. Just in time for the scene in which it was needed.
The following two years I had been preparing for a comic convention to sell some other works, and had been looking for a new job since retail has jaded me so deeply. And while all of this had been happening I would try to find time to chip away at the paint job for this helmet… Unfortunately along with herniating two discs in my spine and spending all of 2016 on pain killers and performing physical therapy, I ran into some snags when it came to some details about the helmet I was given and how they clashed with the helmet as it was shown in the movie.
I realized that while very close, the sculpt was not an exact match for the real thing, which lead to several problems while adding the weathering and damage. Several large areas of color would end up misaligned and as a result I ended up starting my paint job over from the beginning TWICE, essentially painting the helmet a total of three times to arrive at this final piece.
The second time I started over was because the method I had been using to paint the helmet left me very unhappy with the finish of the paint since I was using a topical method by layering the battle damaged parts on top of the colors that were supposed to have been painted over metal. As a result silvers along with gray and khaki primer colors were built up on top of, and some times a little too thickly, over the greens and red that would have been layered on top of the silver body and primers as it is done in reality with helmets, armor and other custom painted metals.
This lead me to strip all of the paint off one final time and make as many adjustments to the sculpt as I needed before moving on to painting.
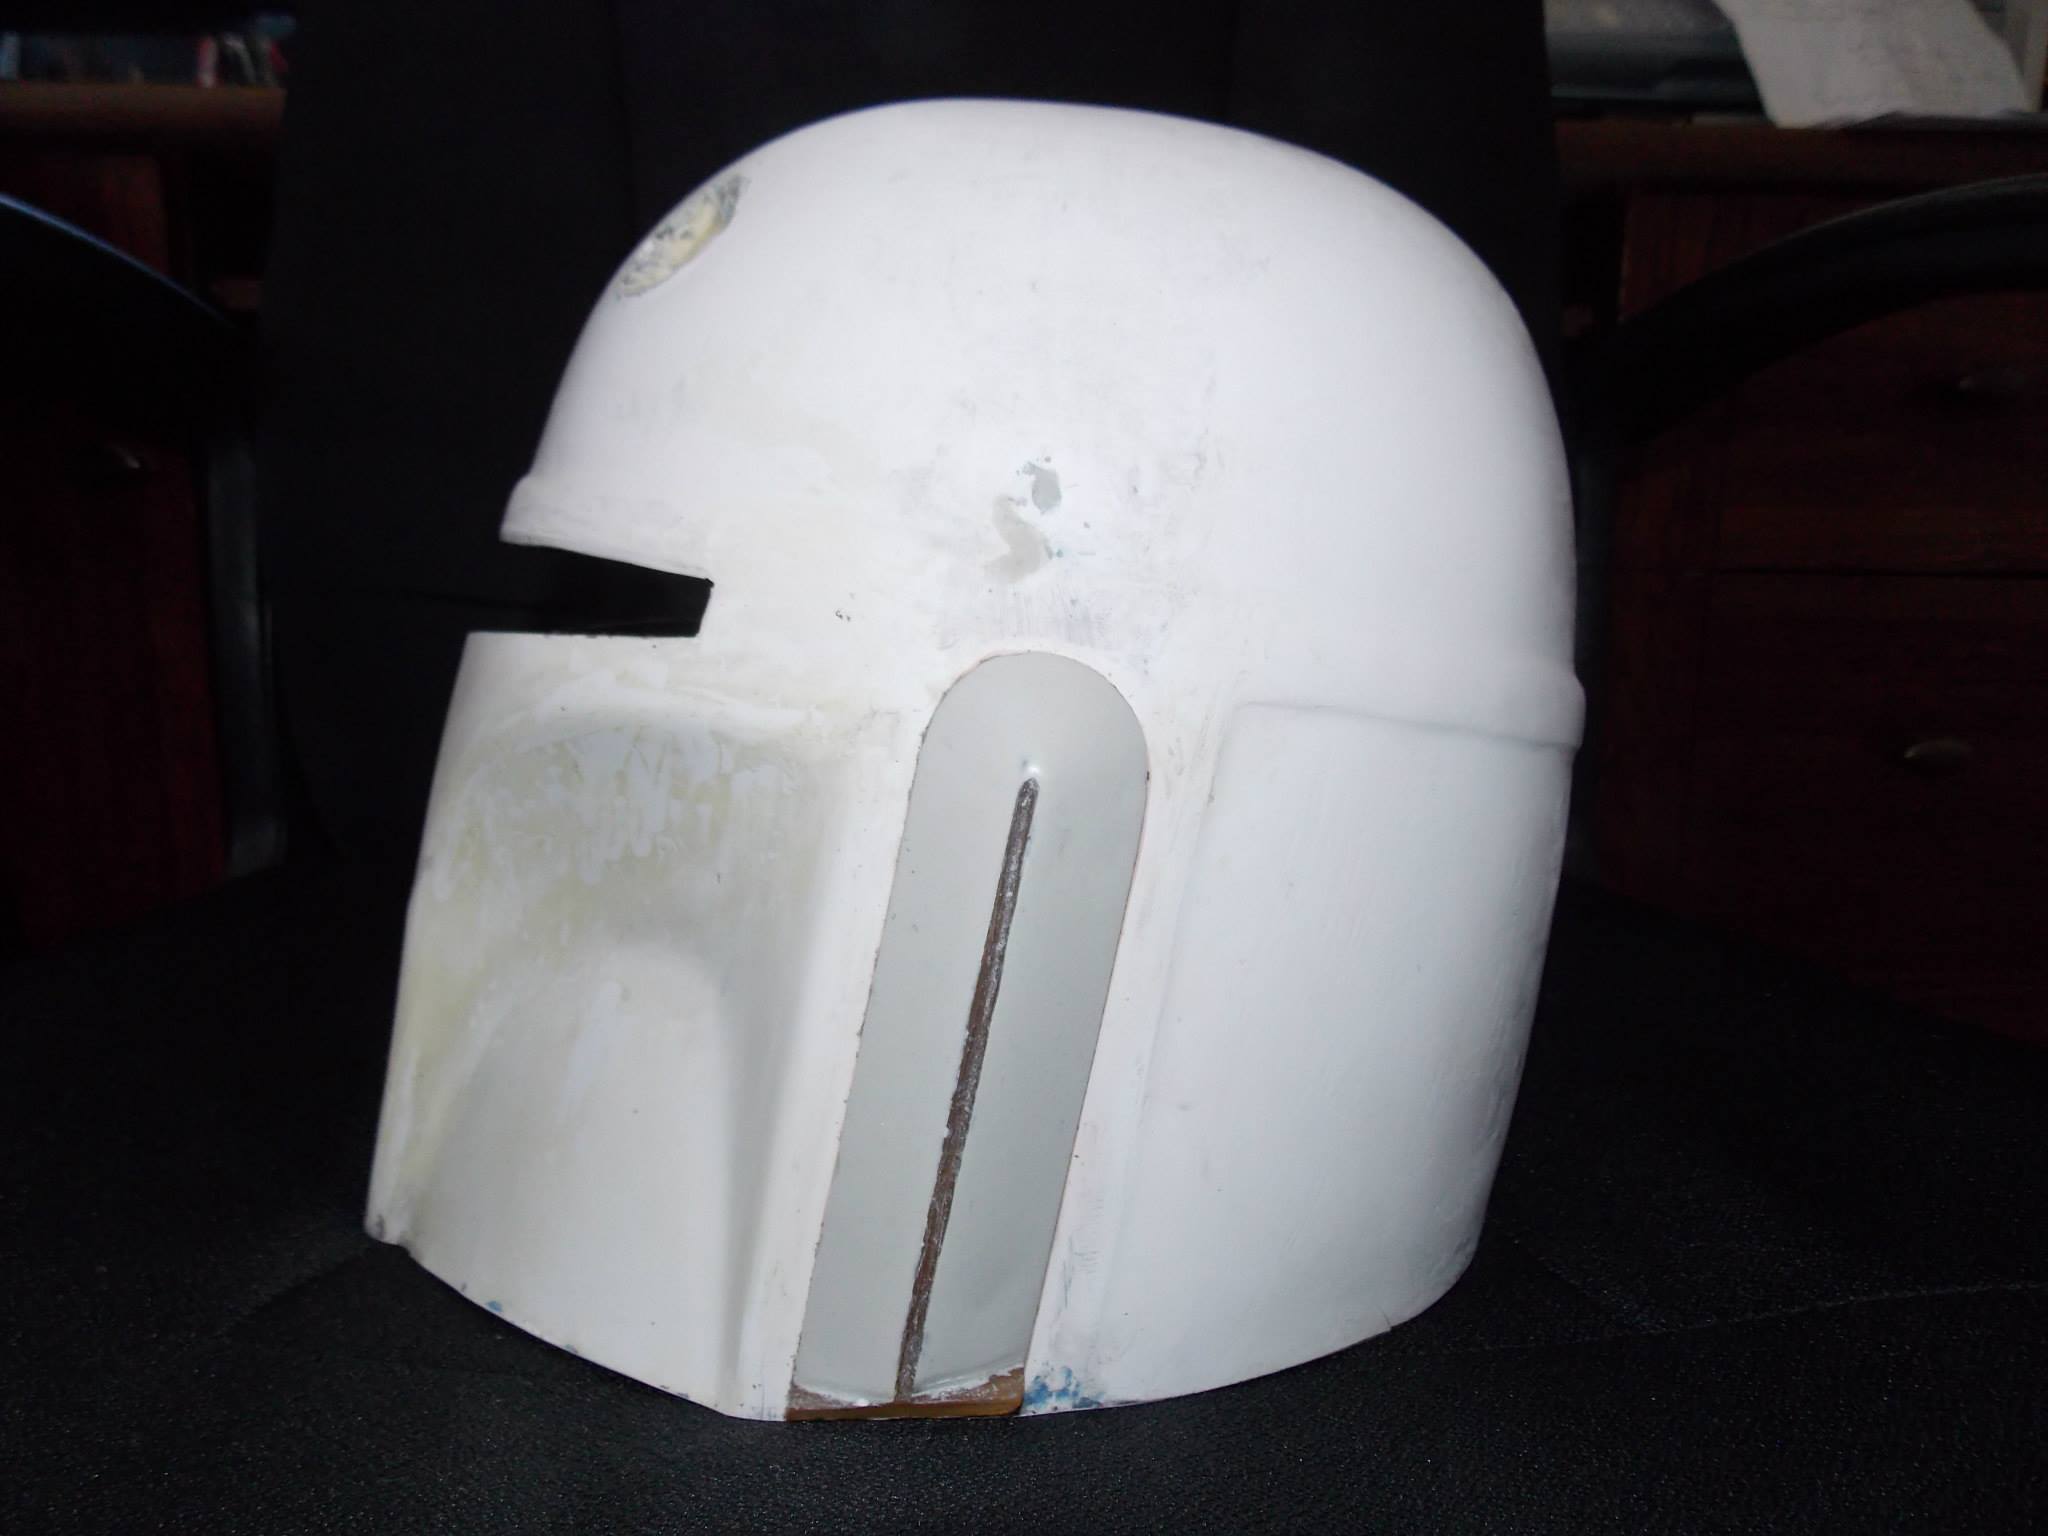
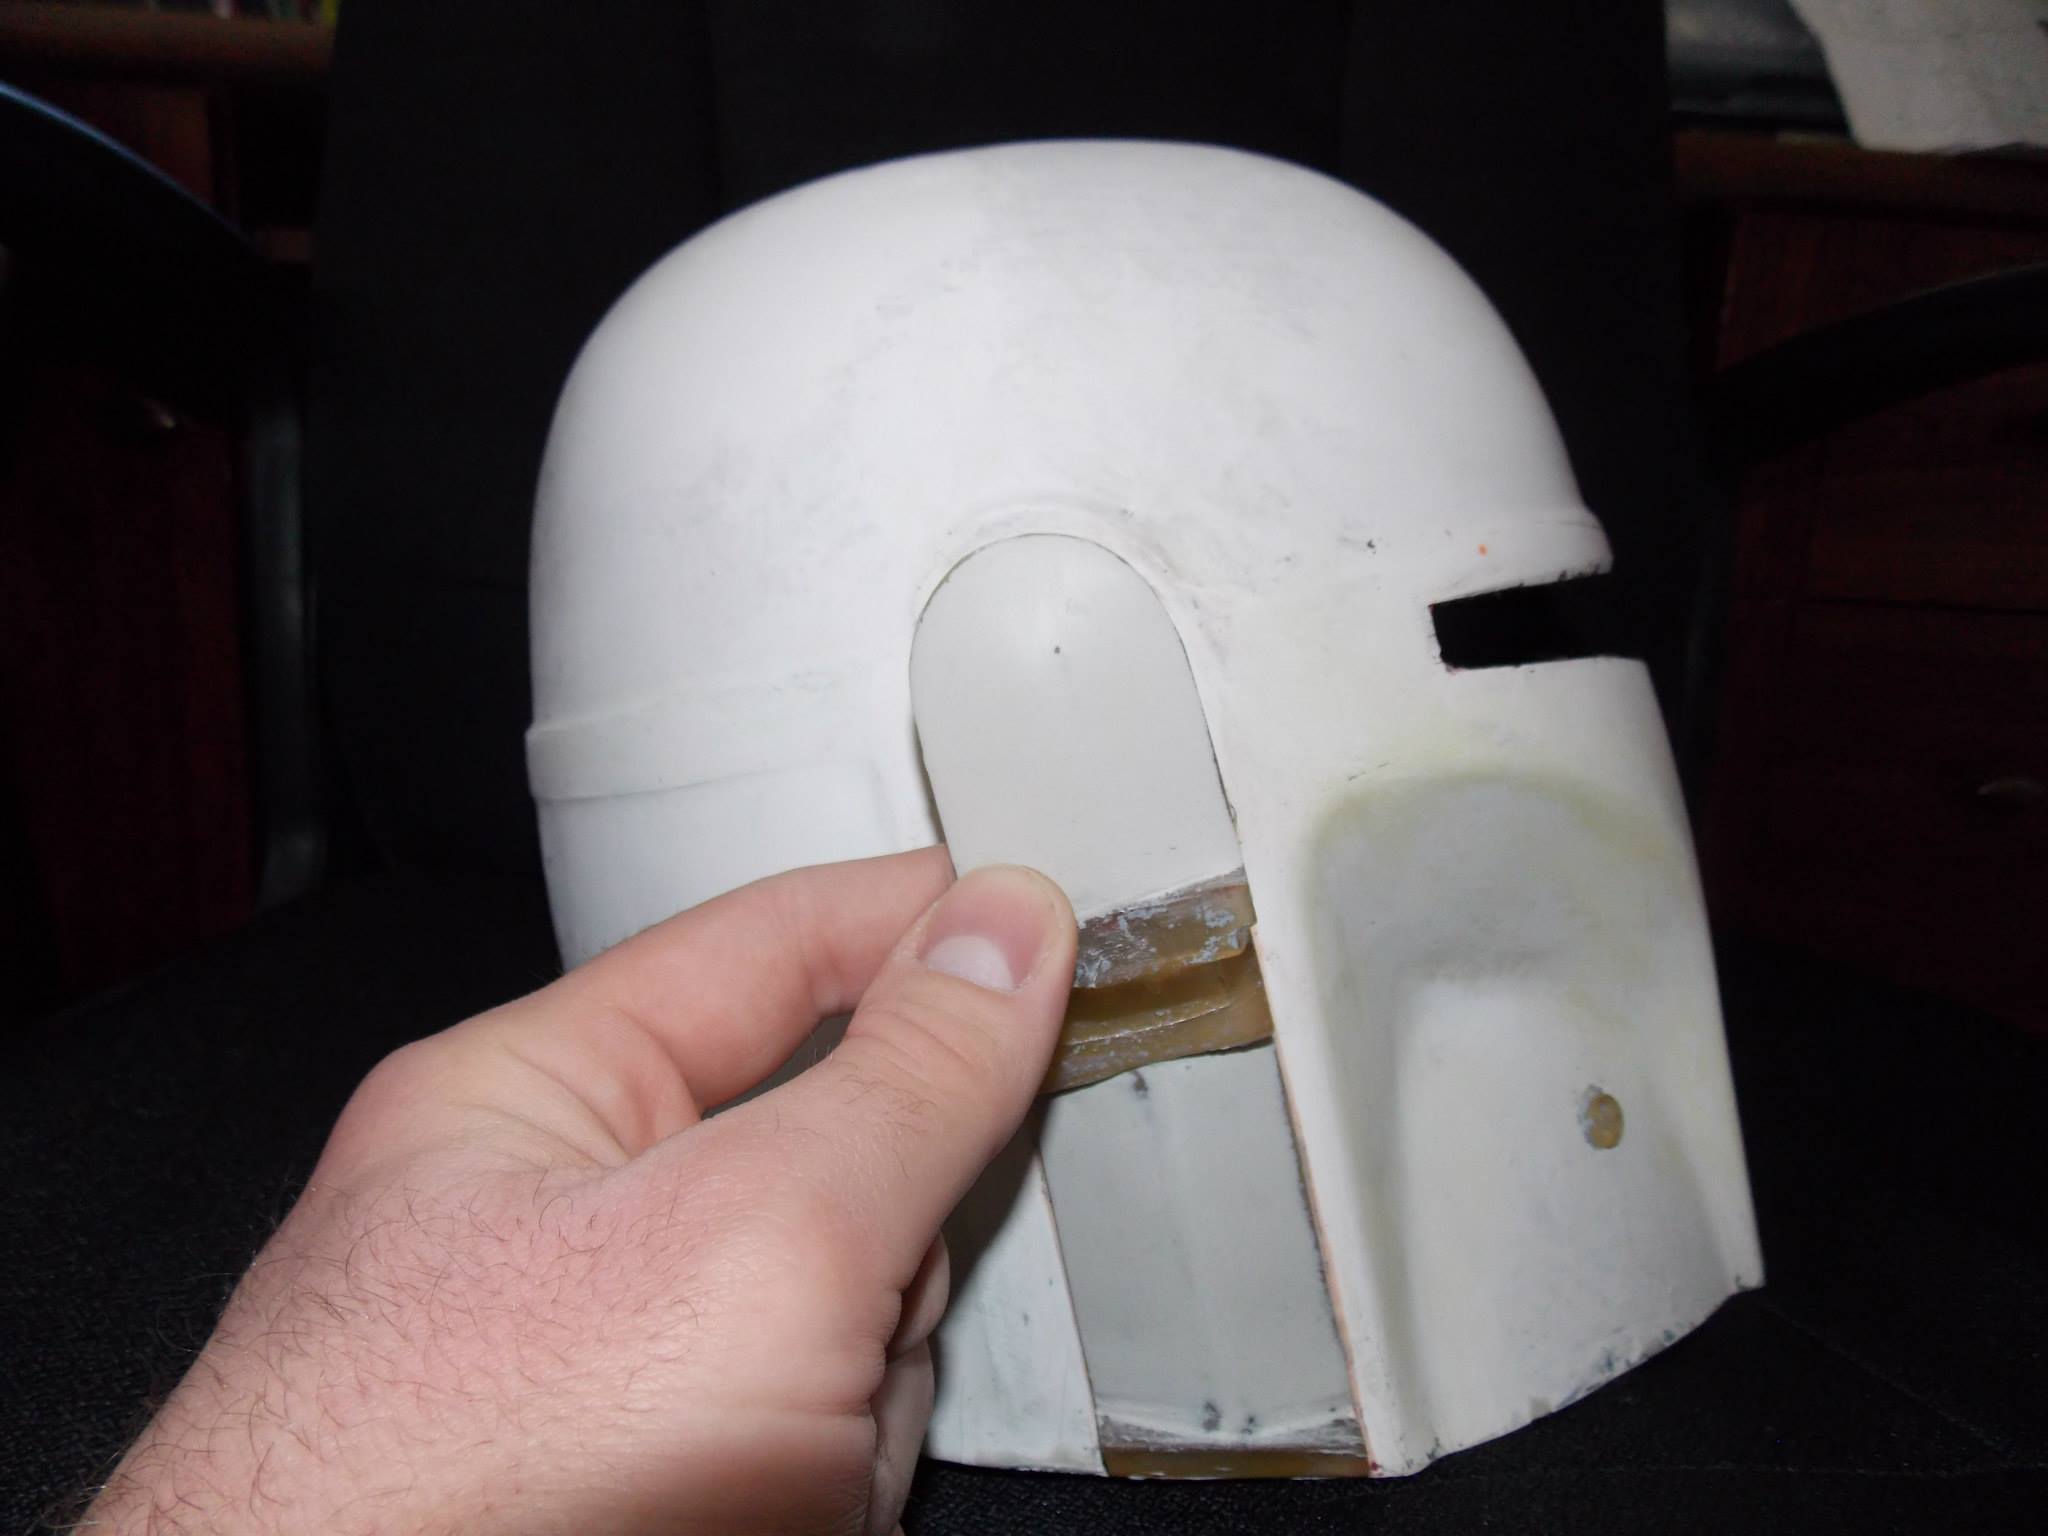
I had also noticed that there were sections of the sculpt that had been made out of gel epoxy which had produced large air pockets as the result of bubble formations. My solution was to fill in and smooth out these areas with Aves Fixit sculpt. You can see the results in the work in progress photos, both ears and some odd indentations were the areas that I focused on.
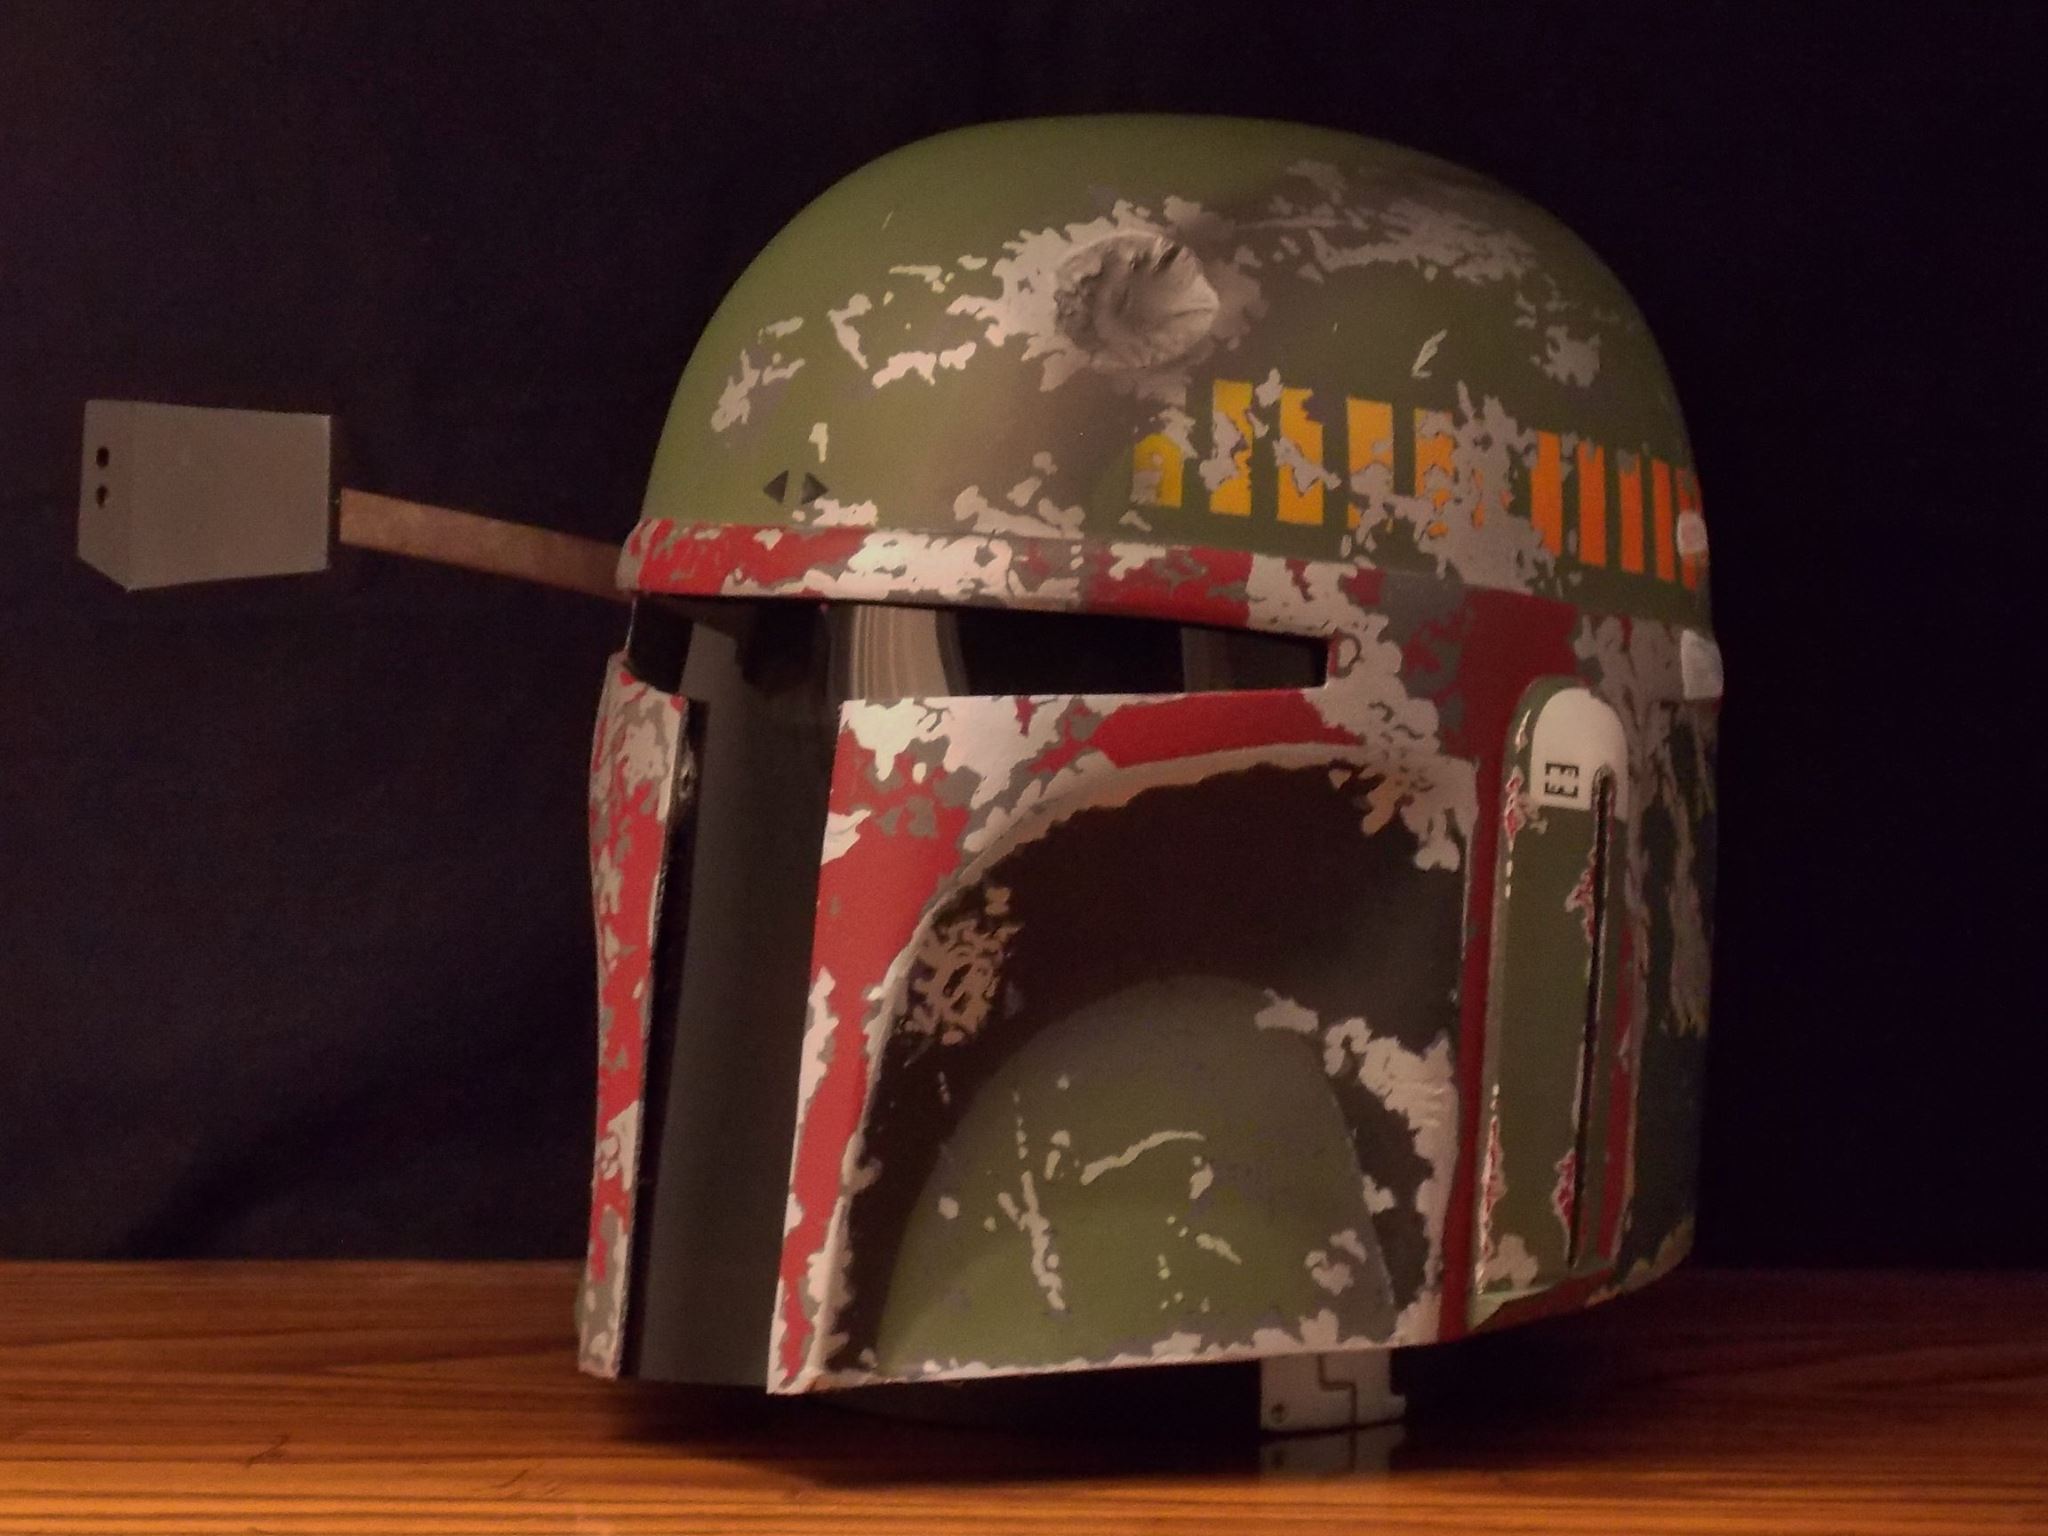
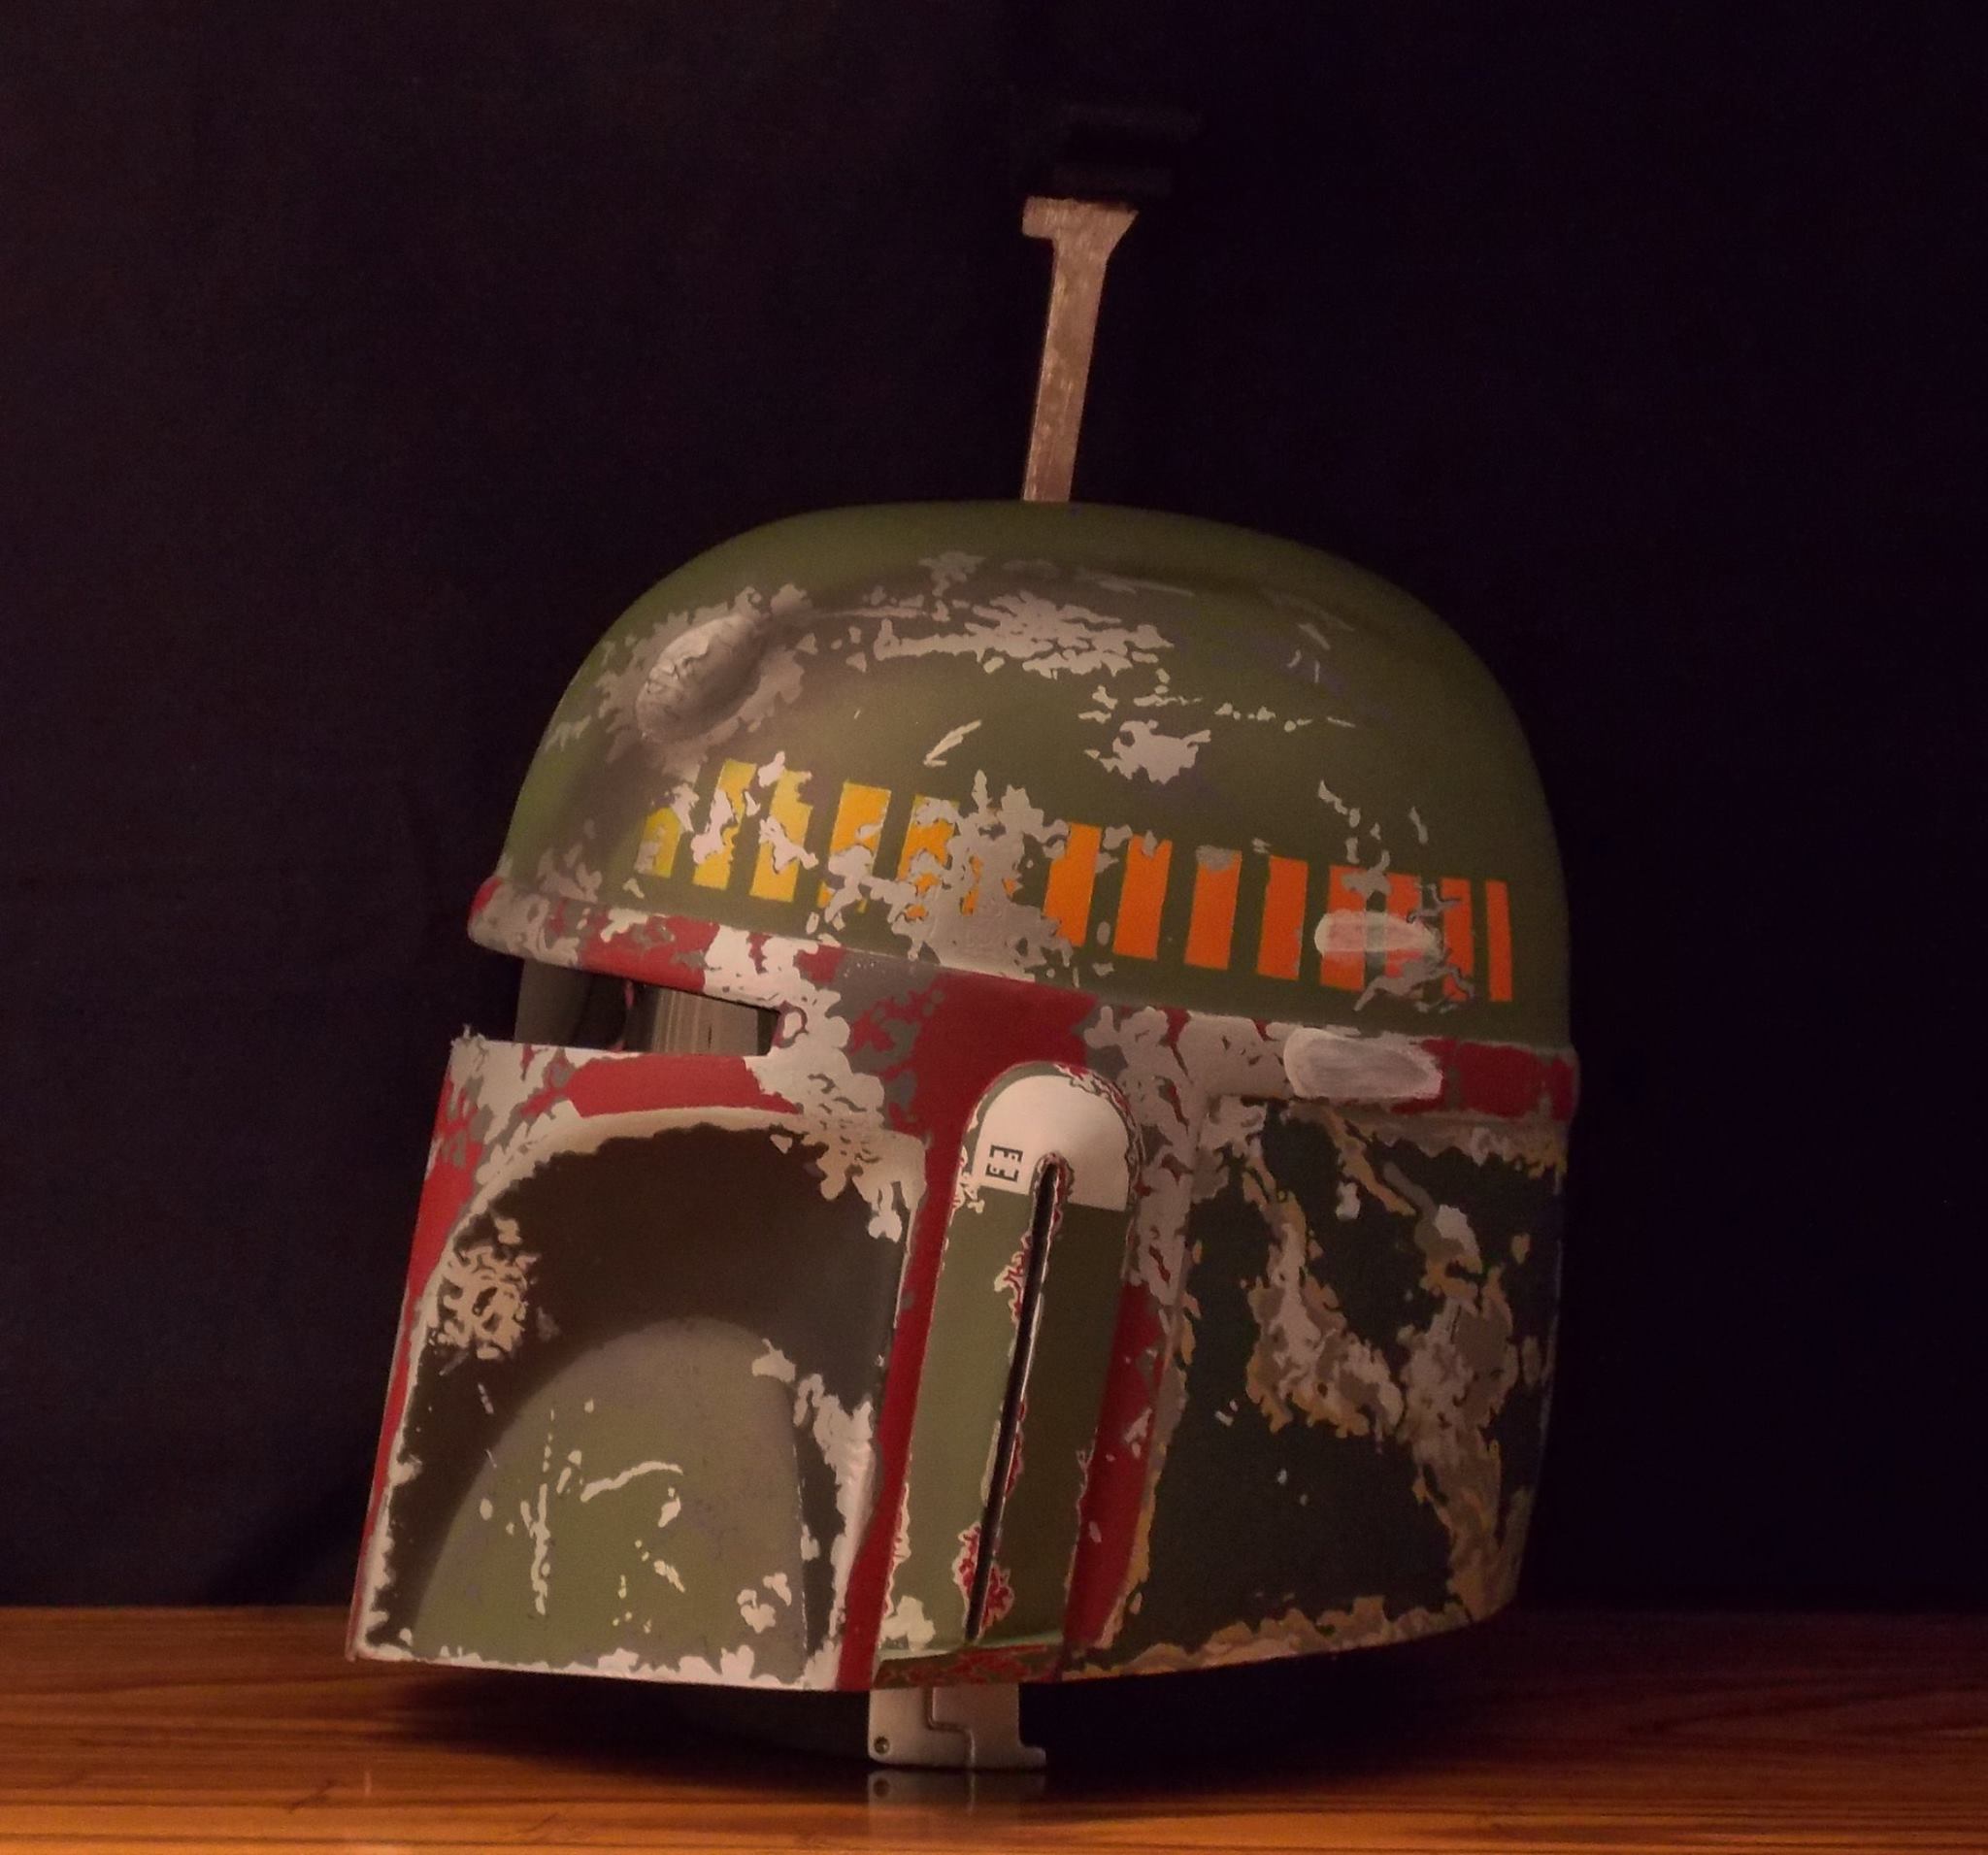
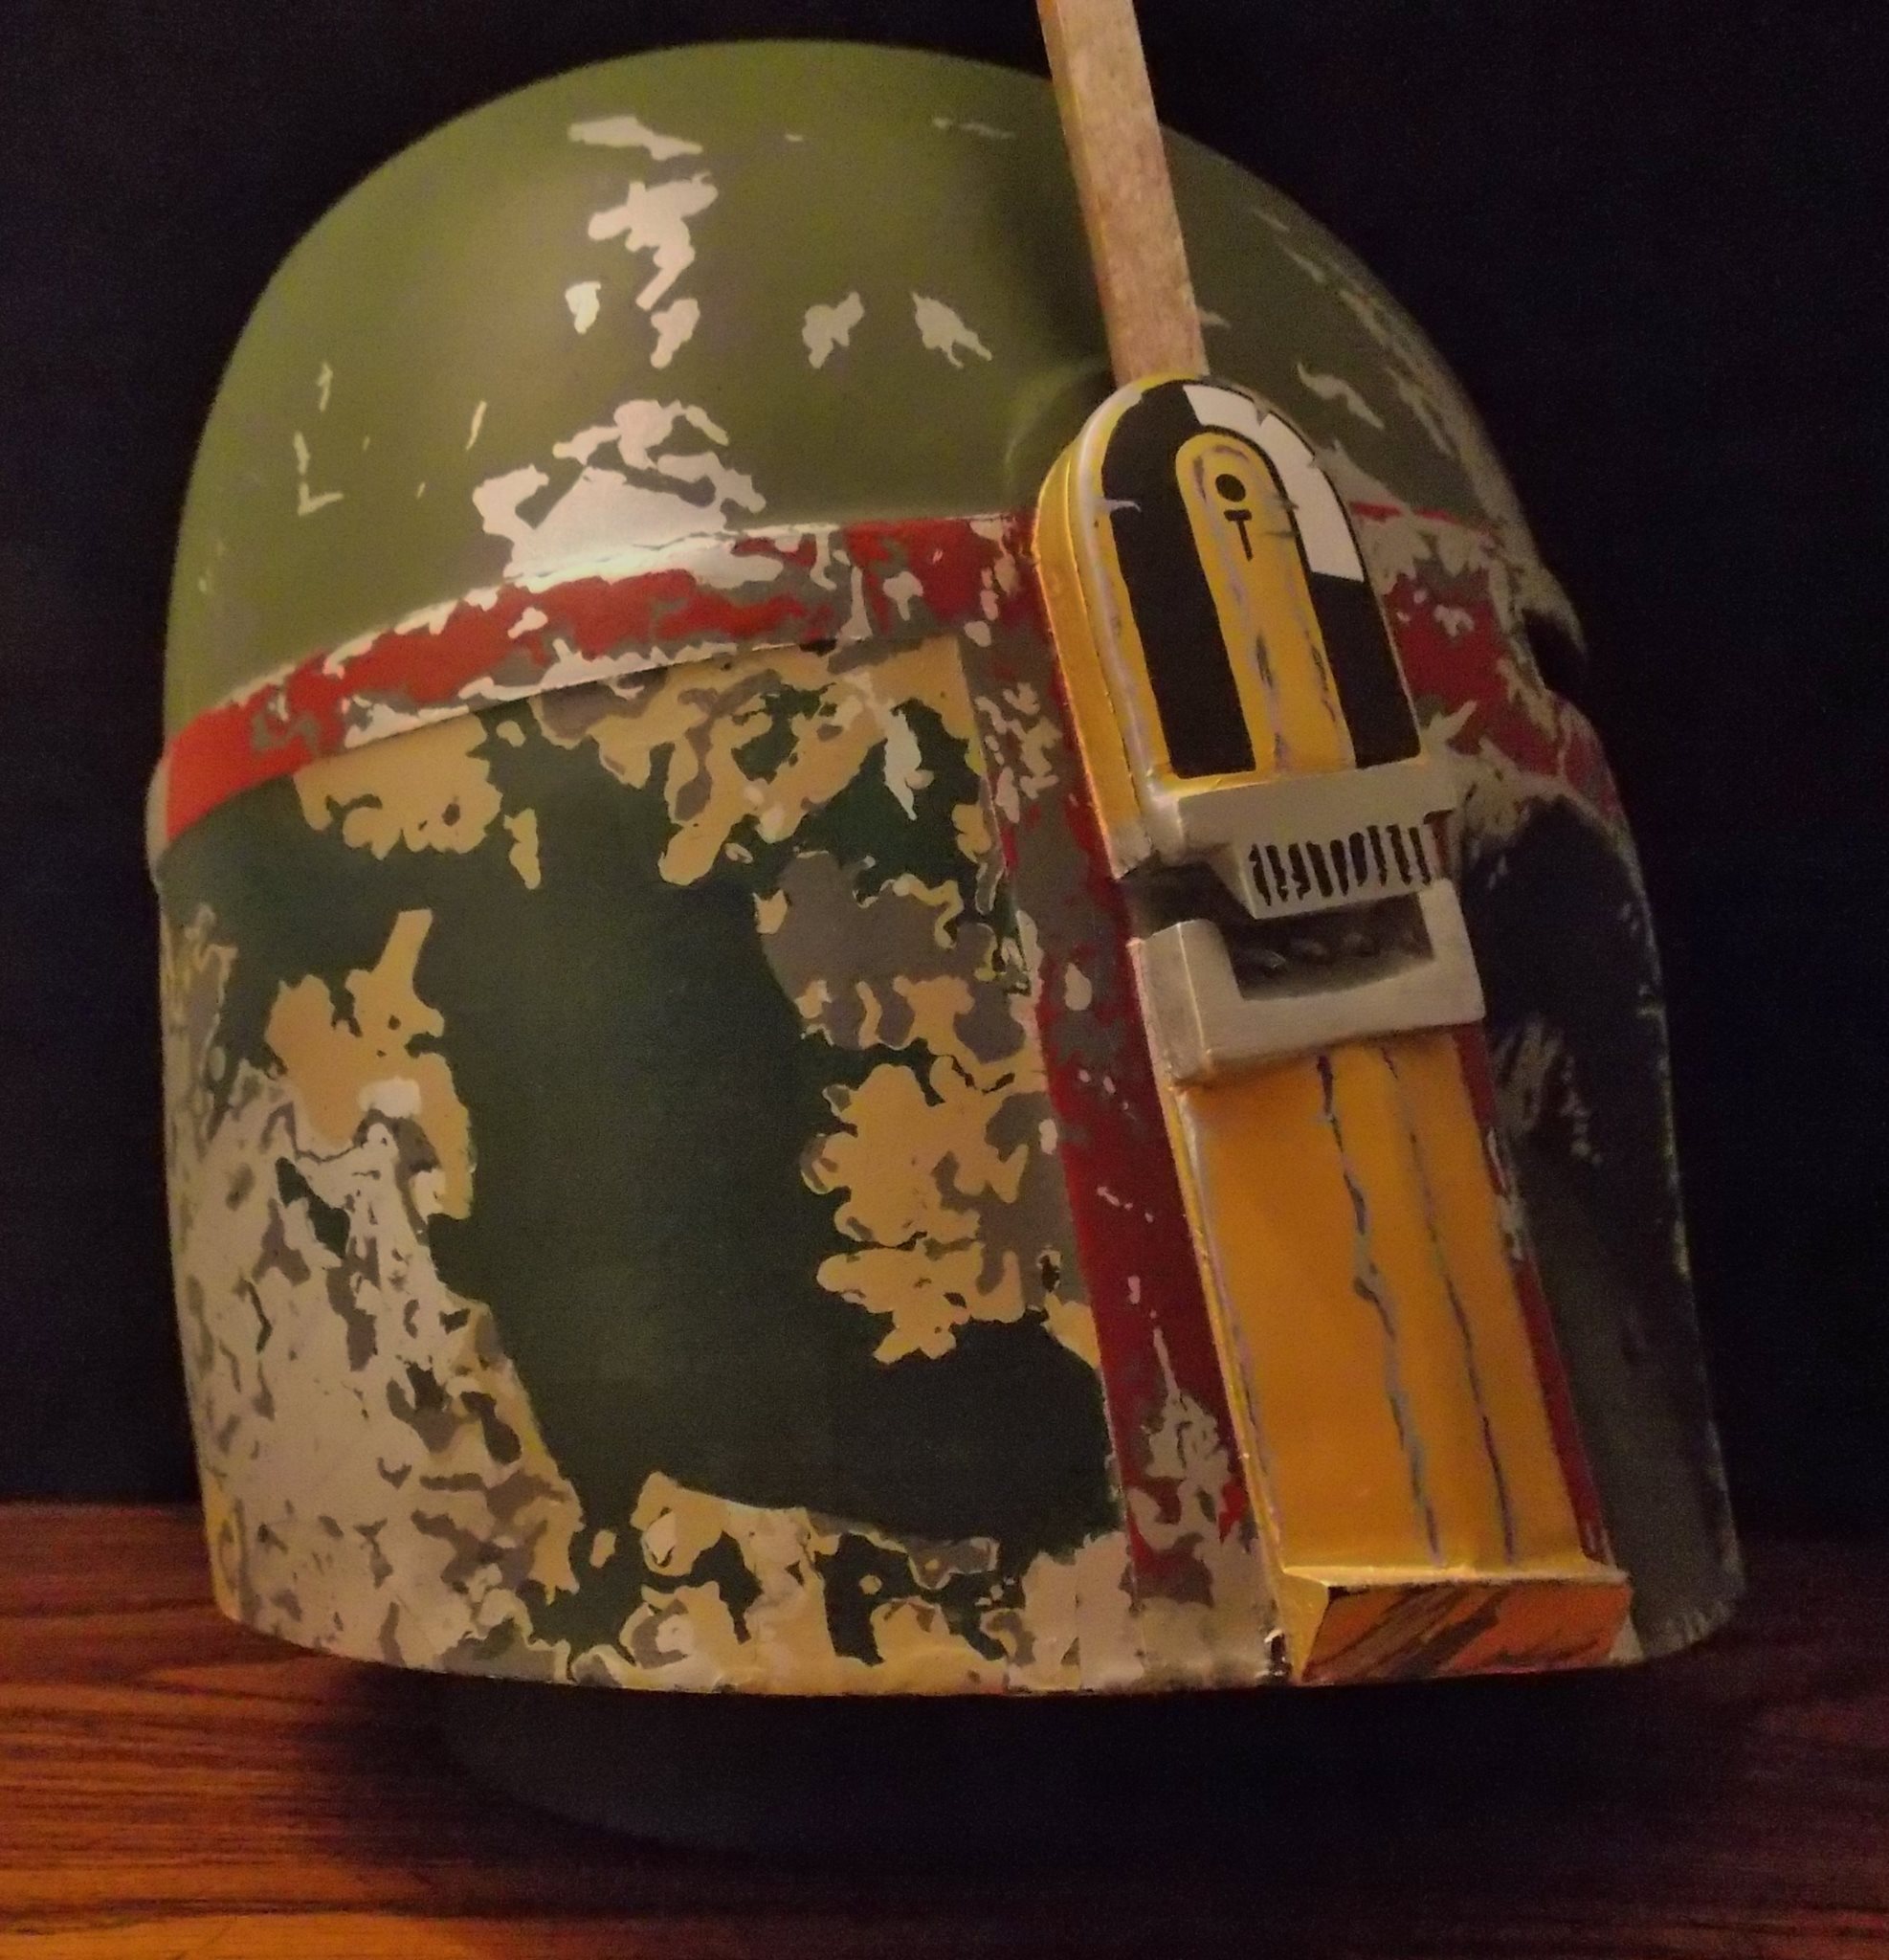
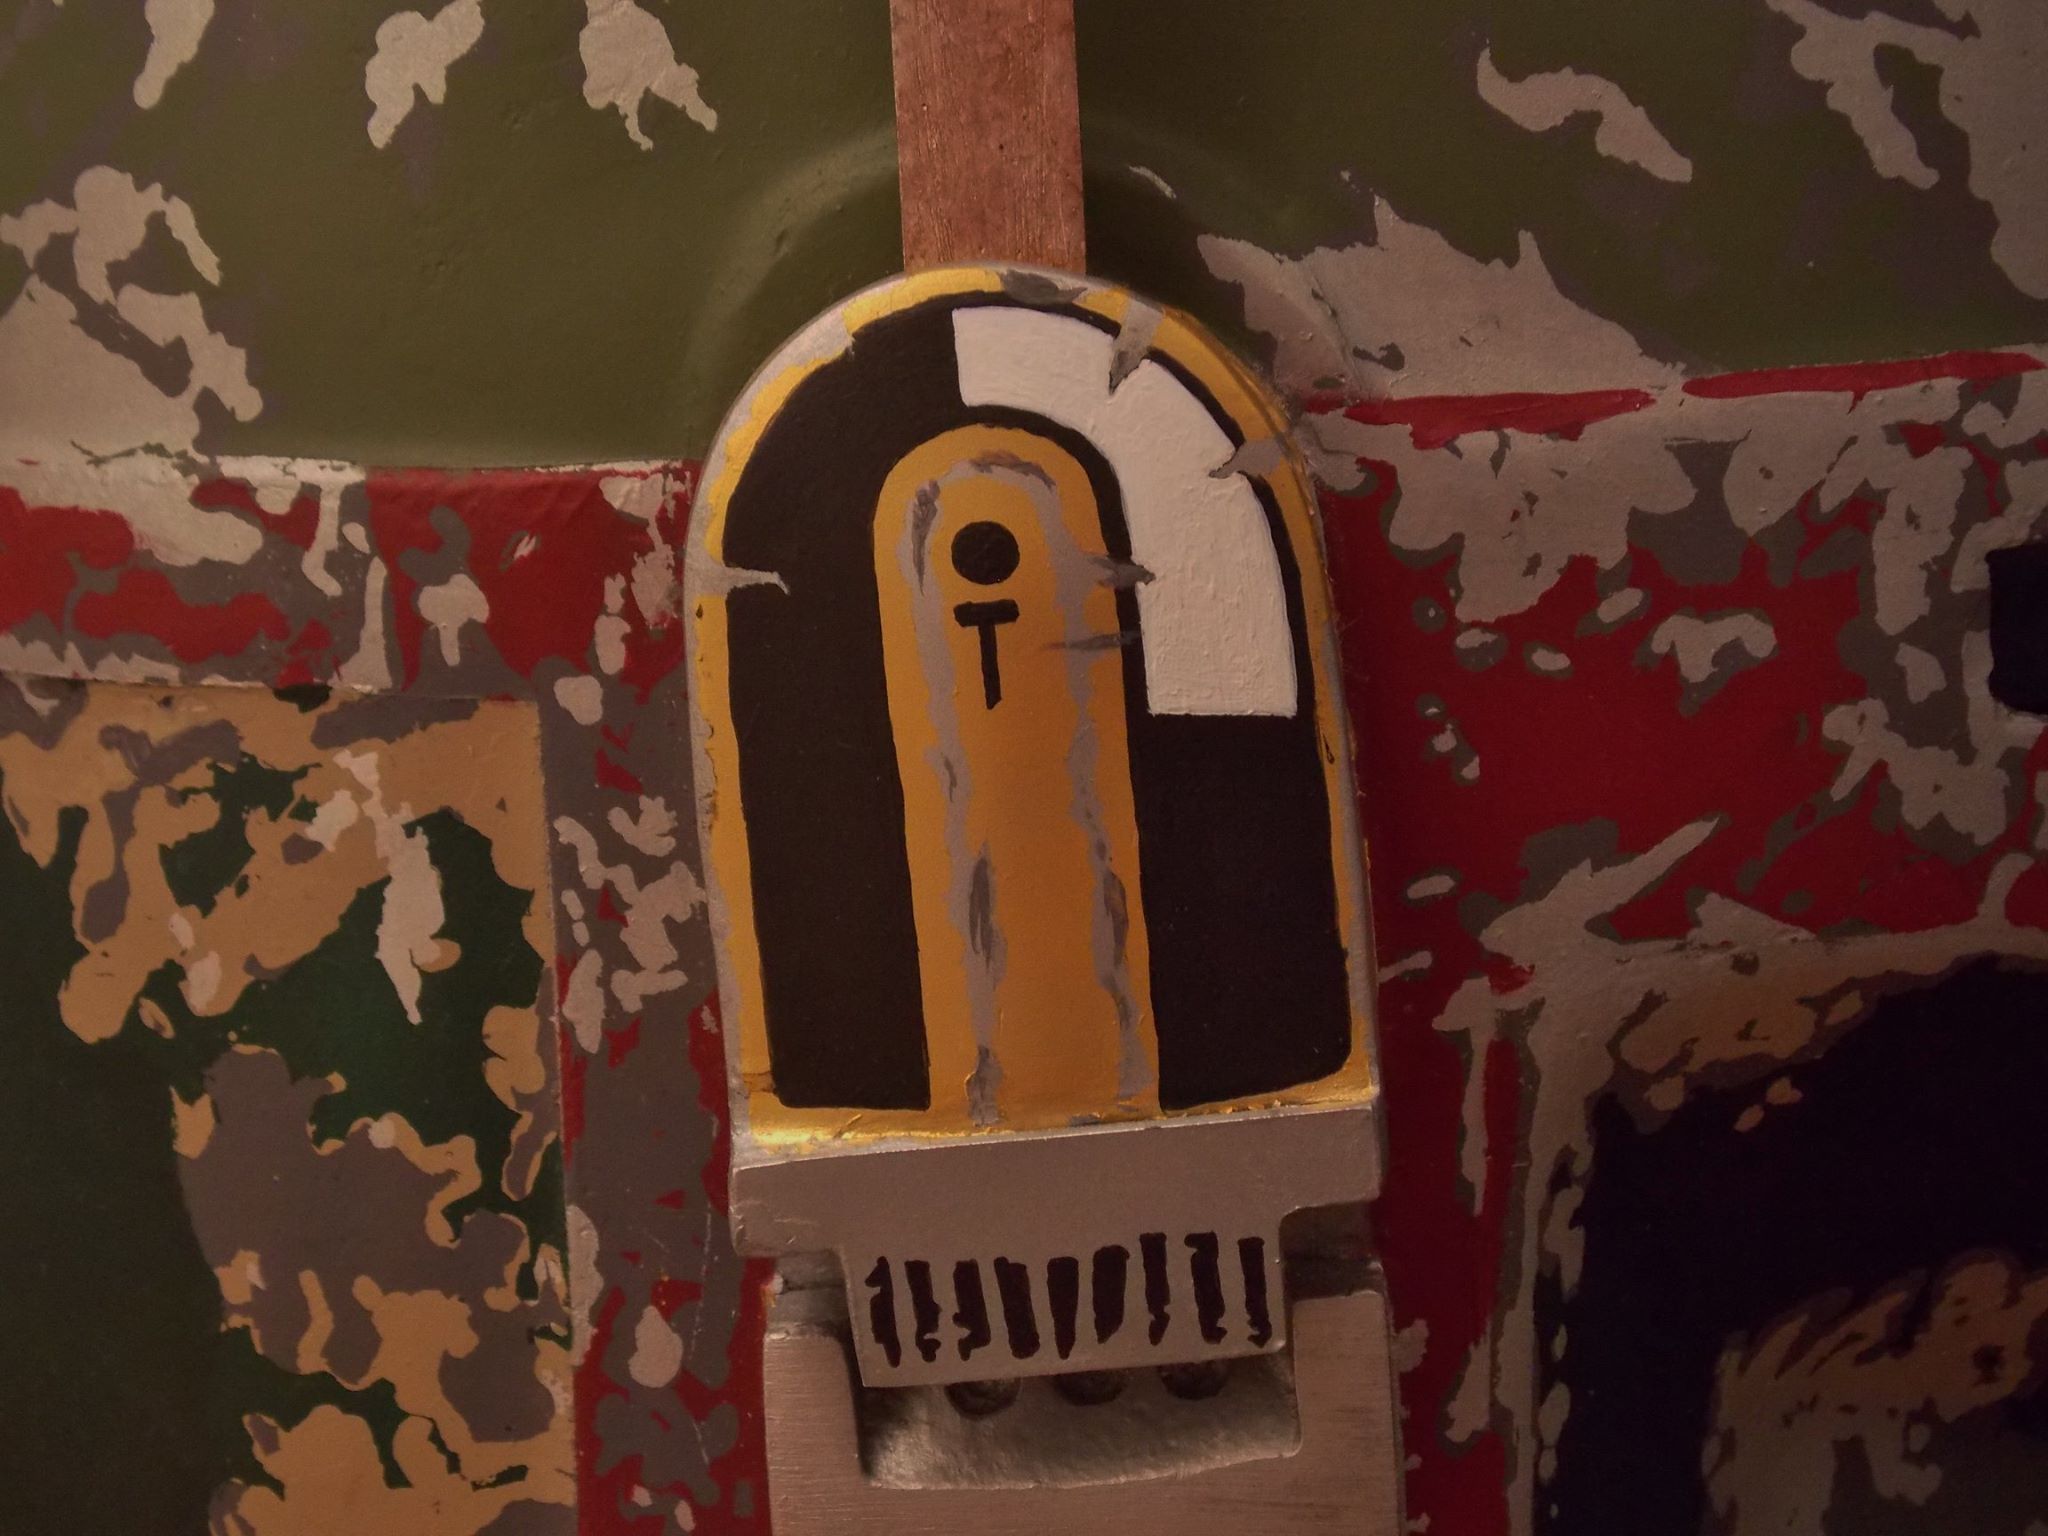
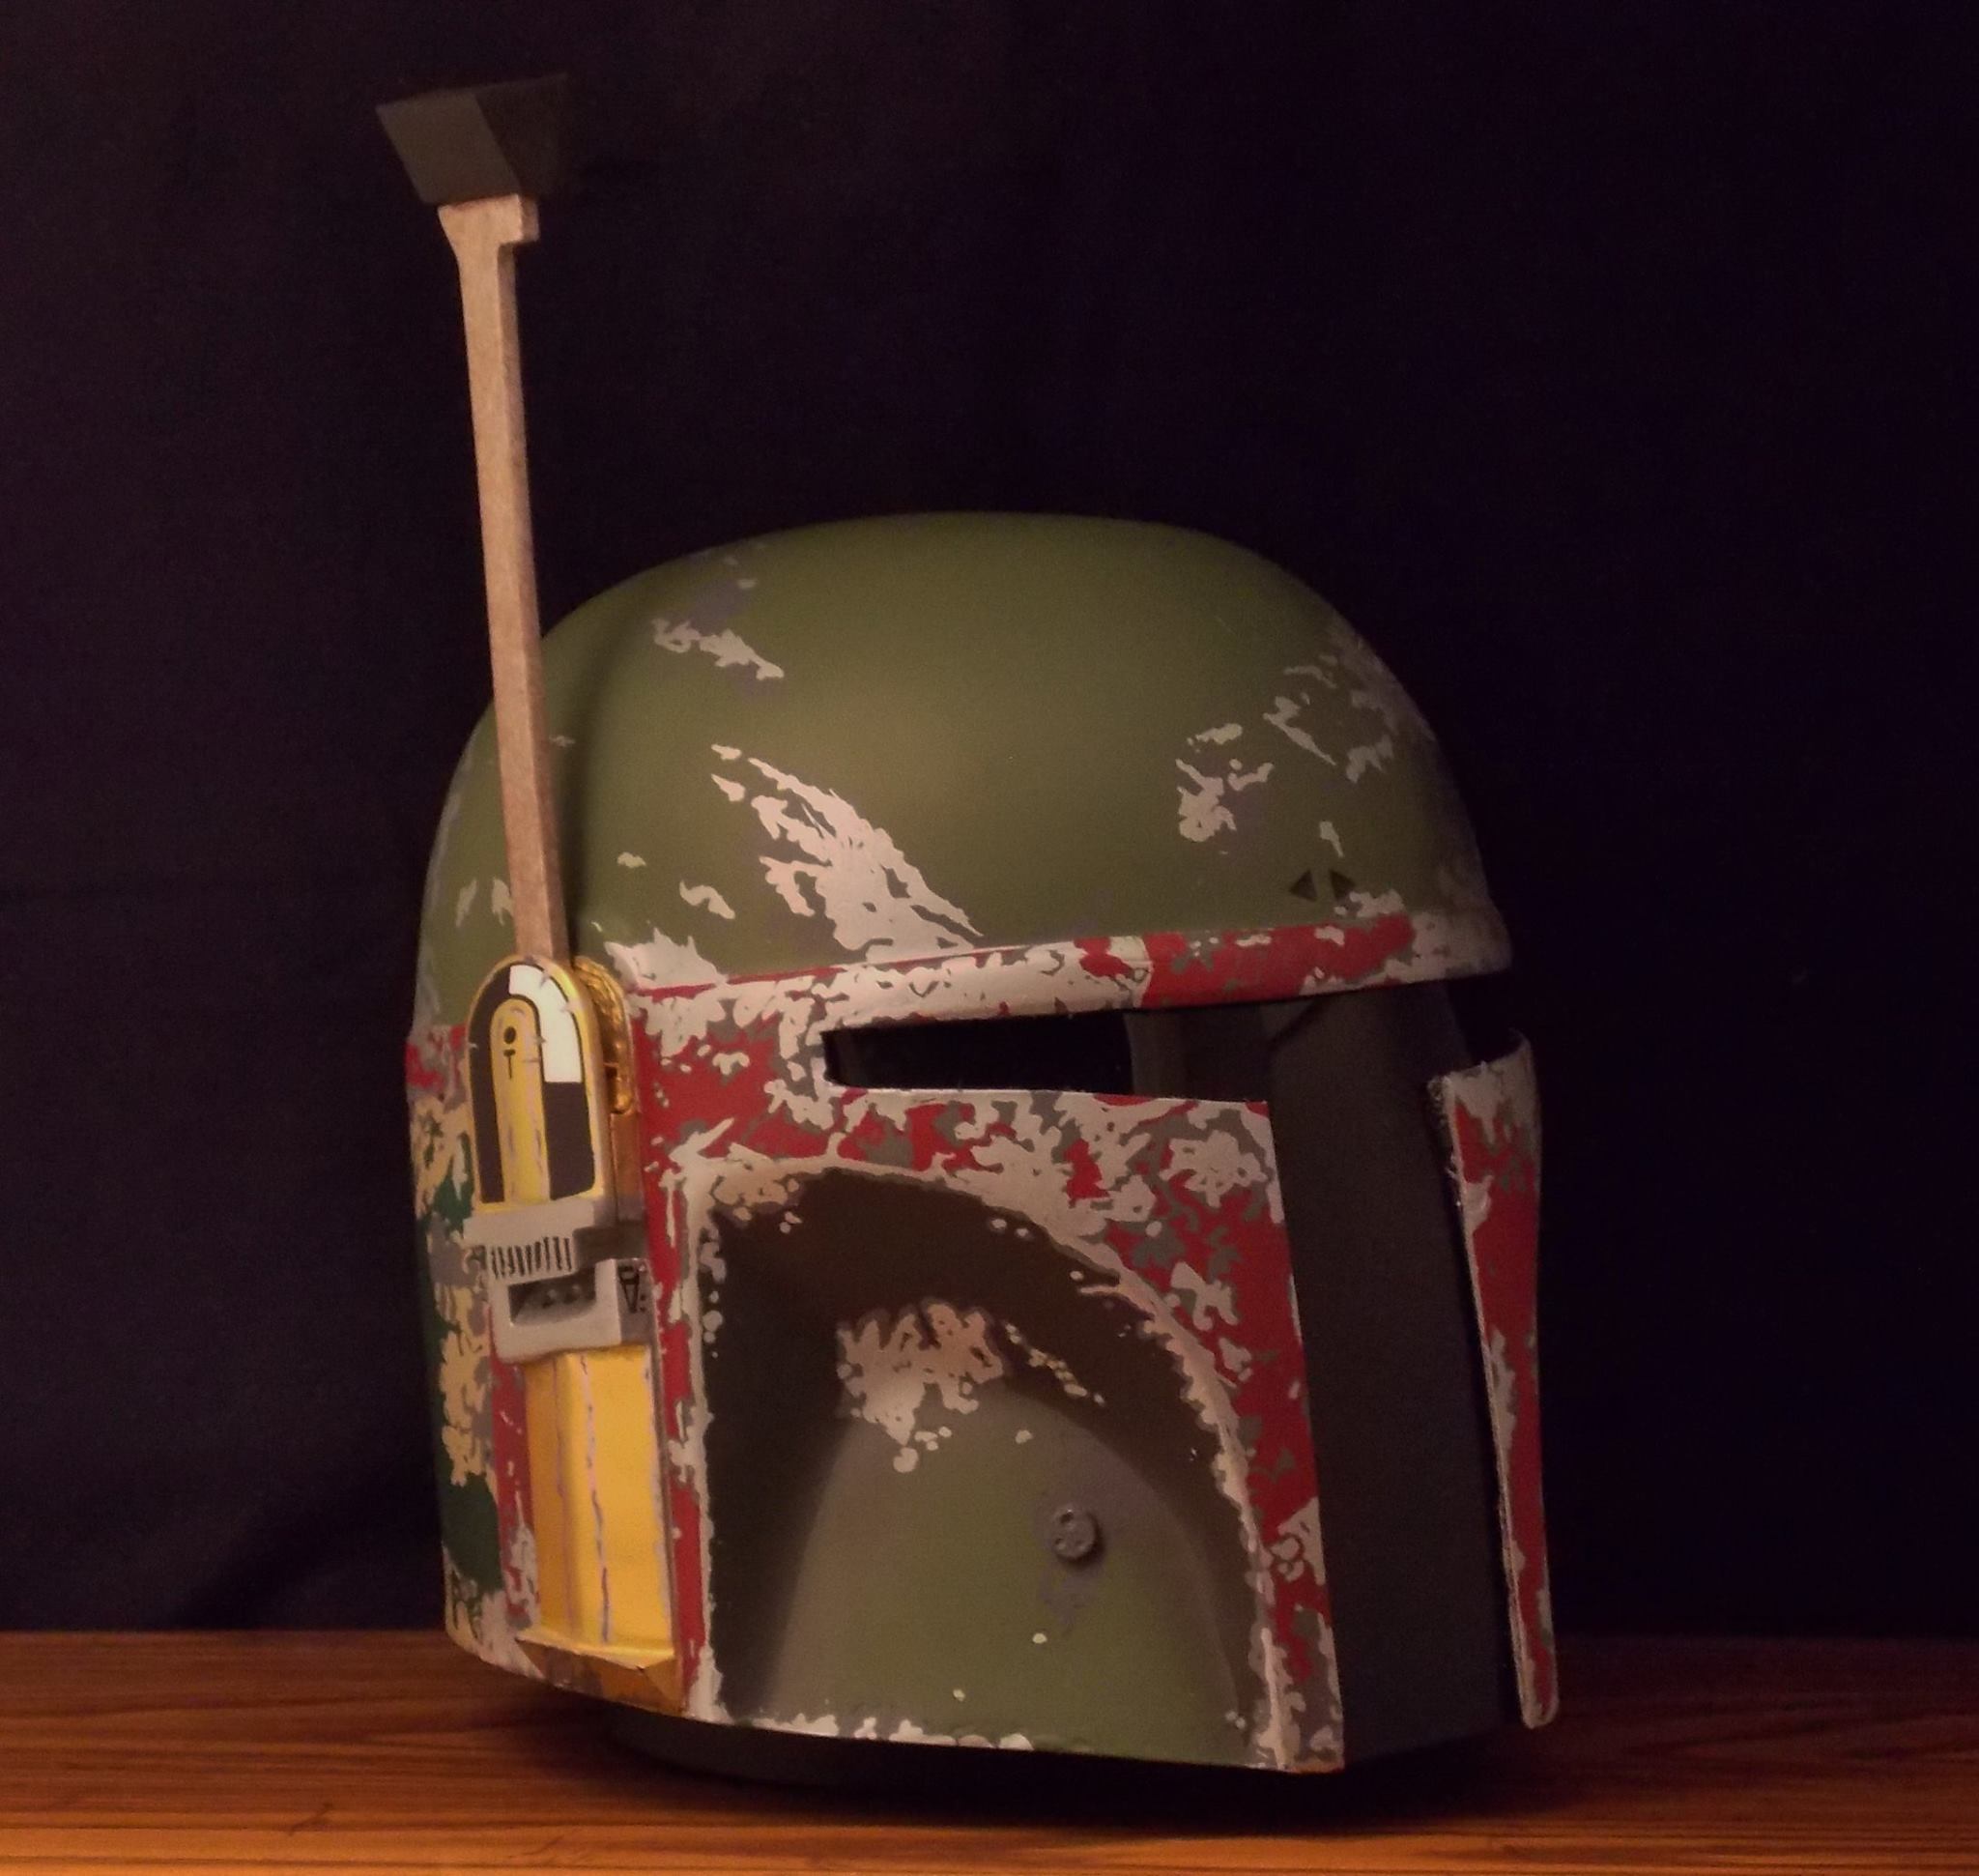
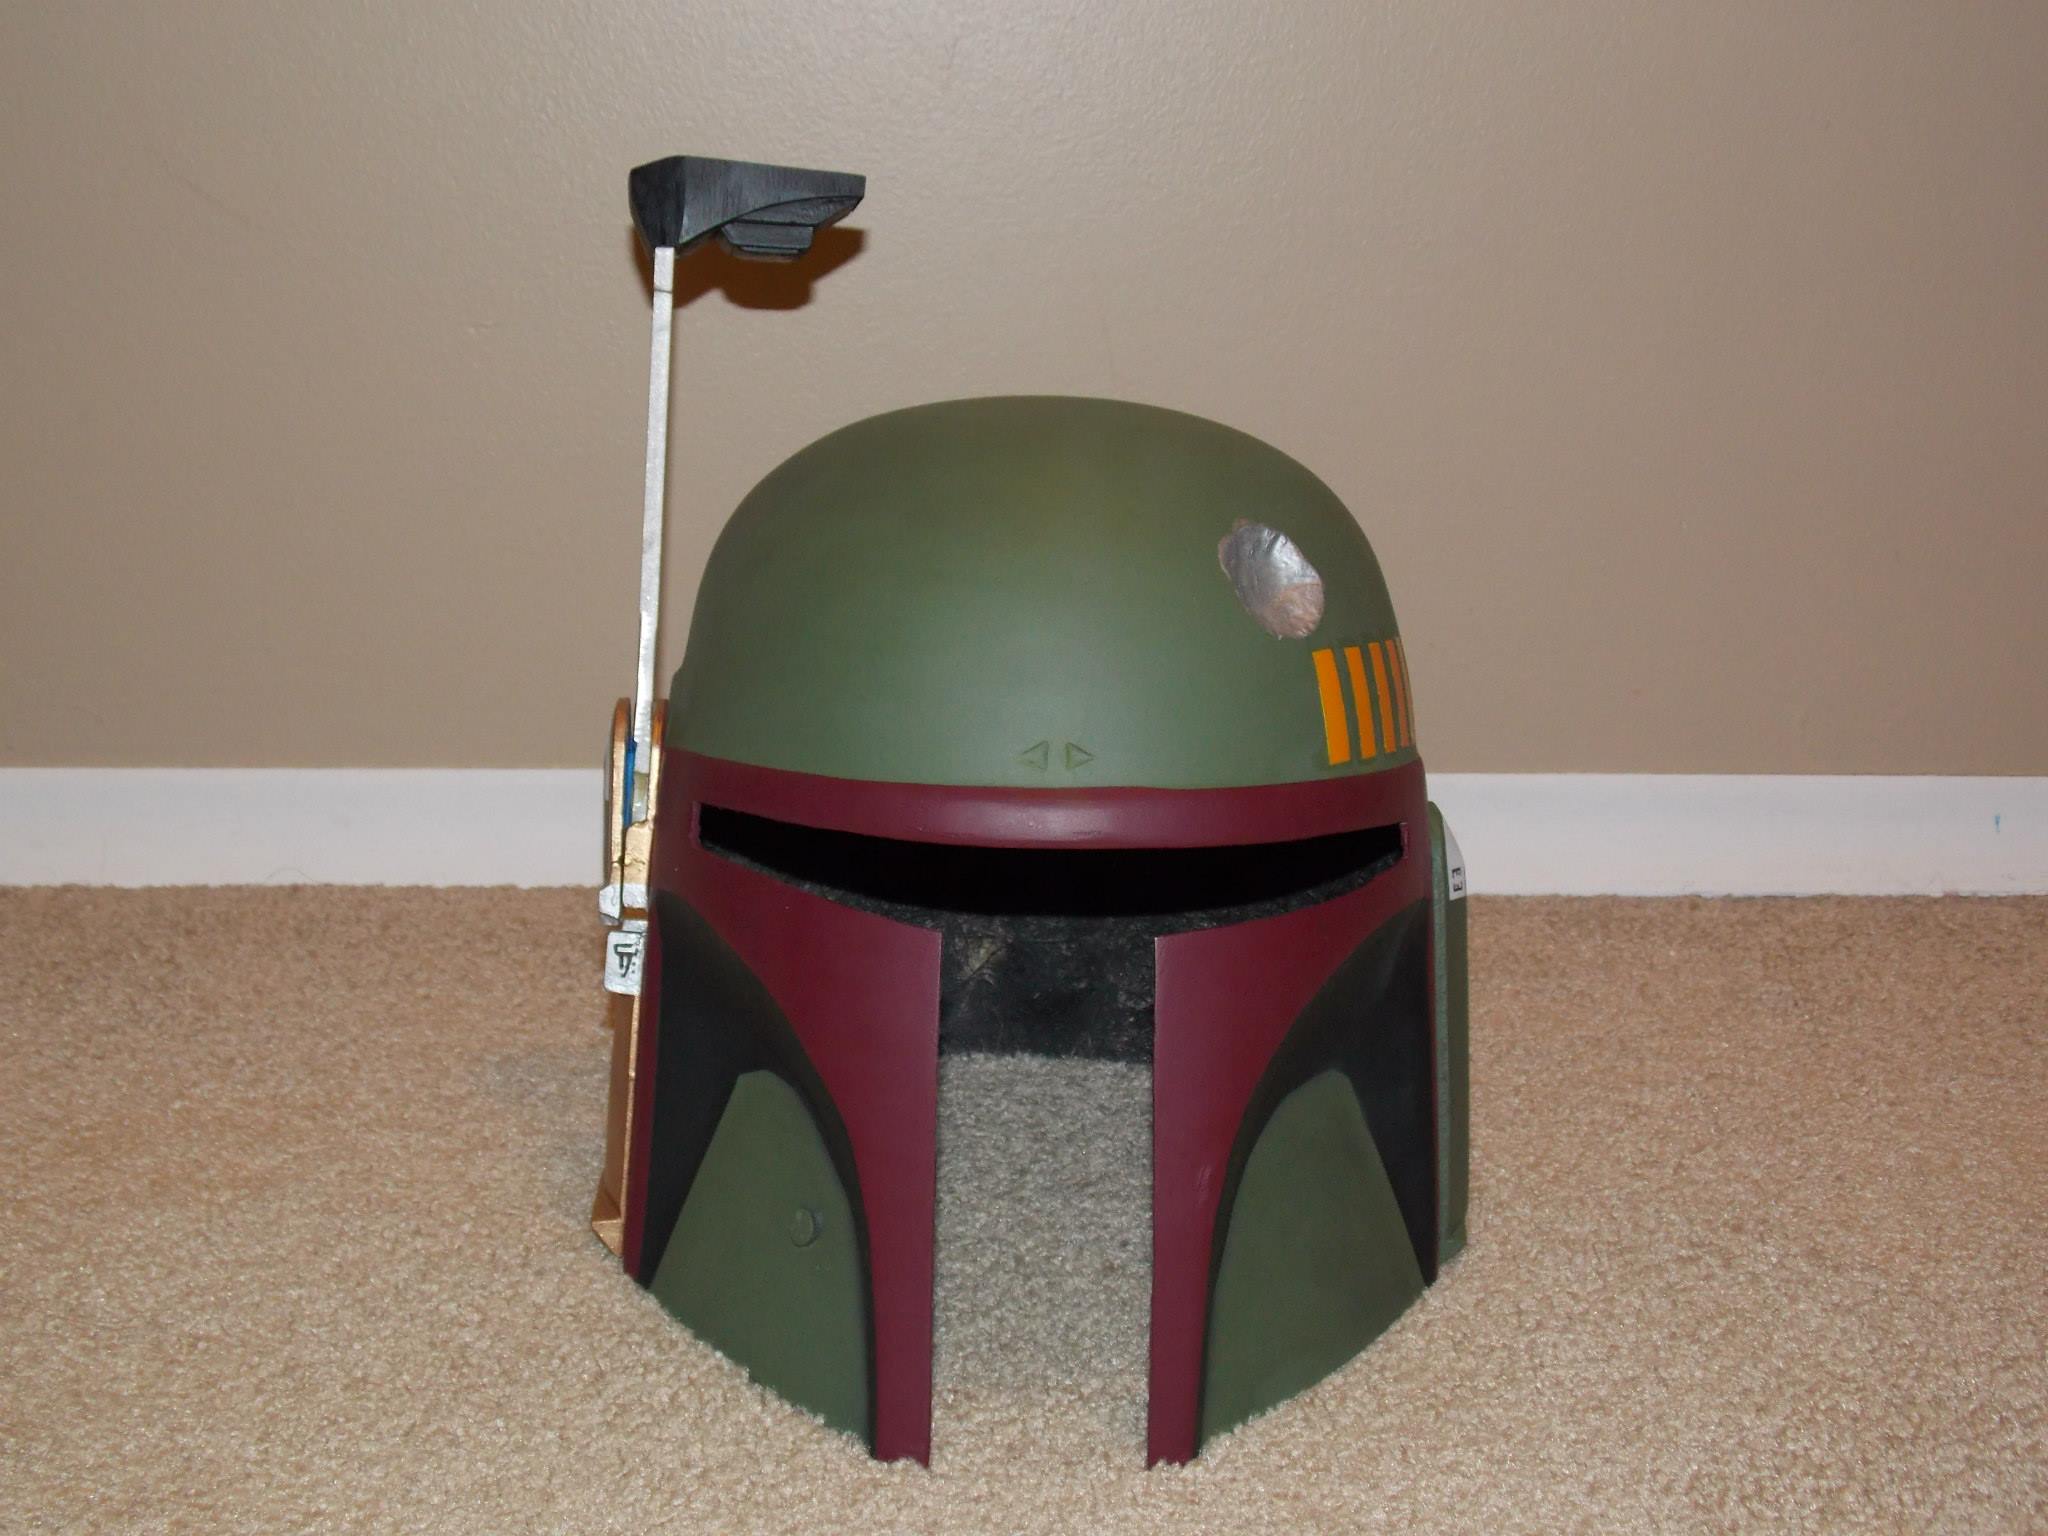
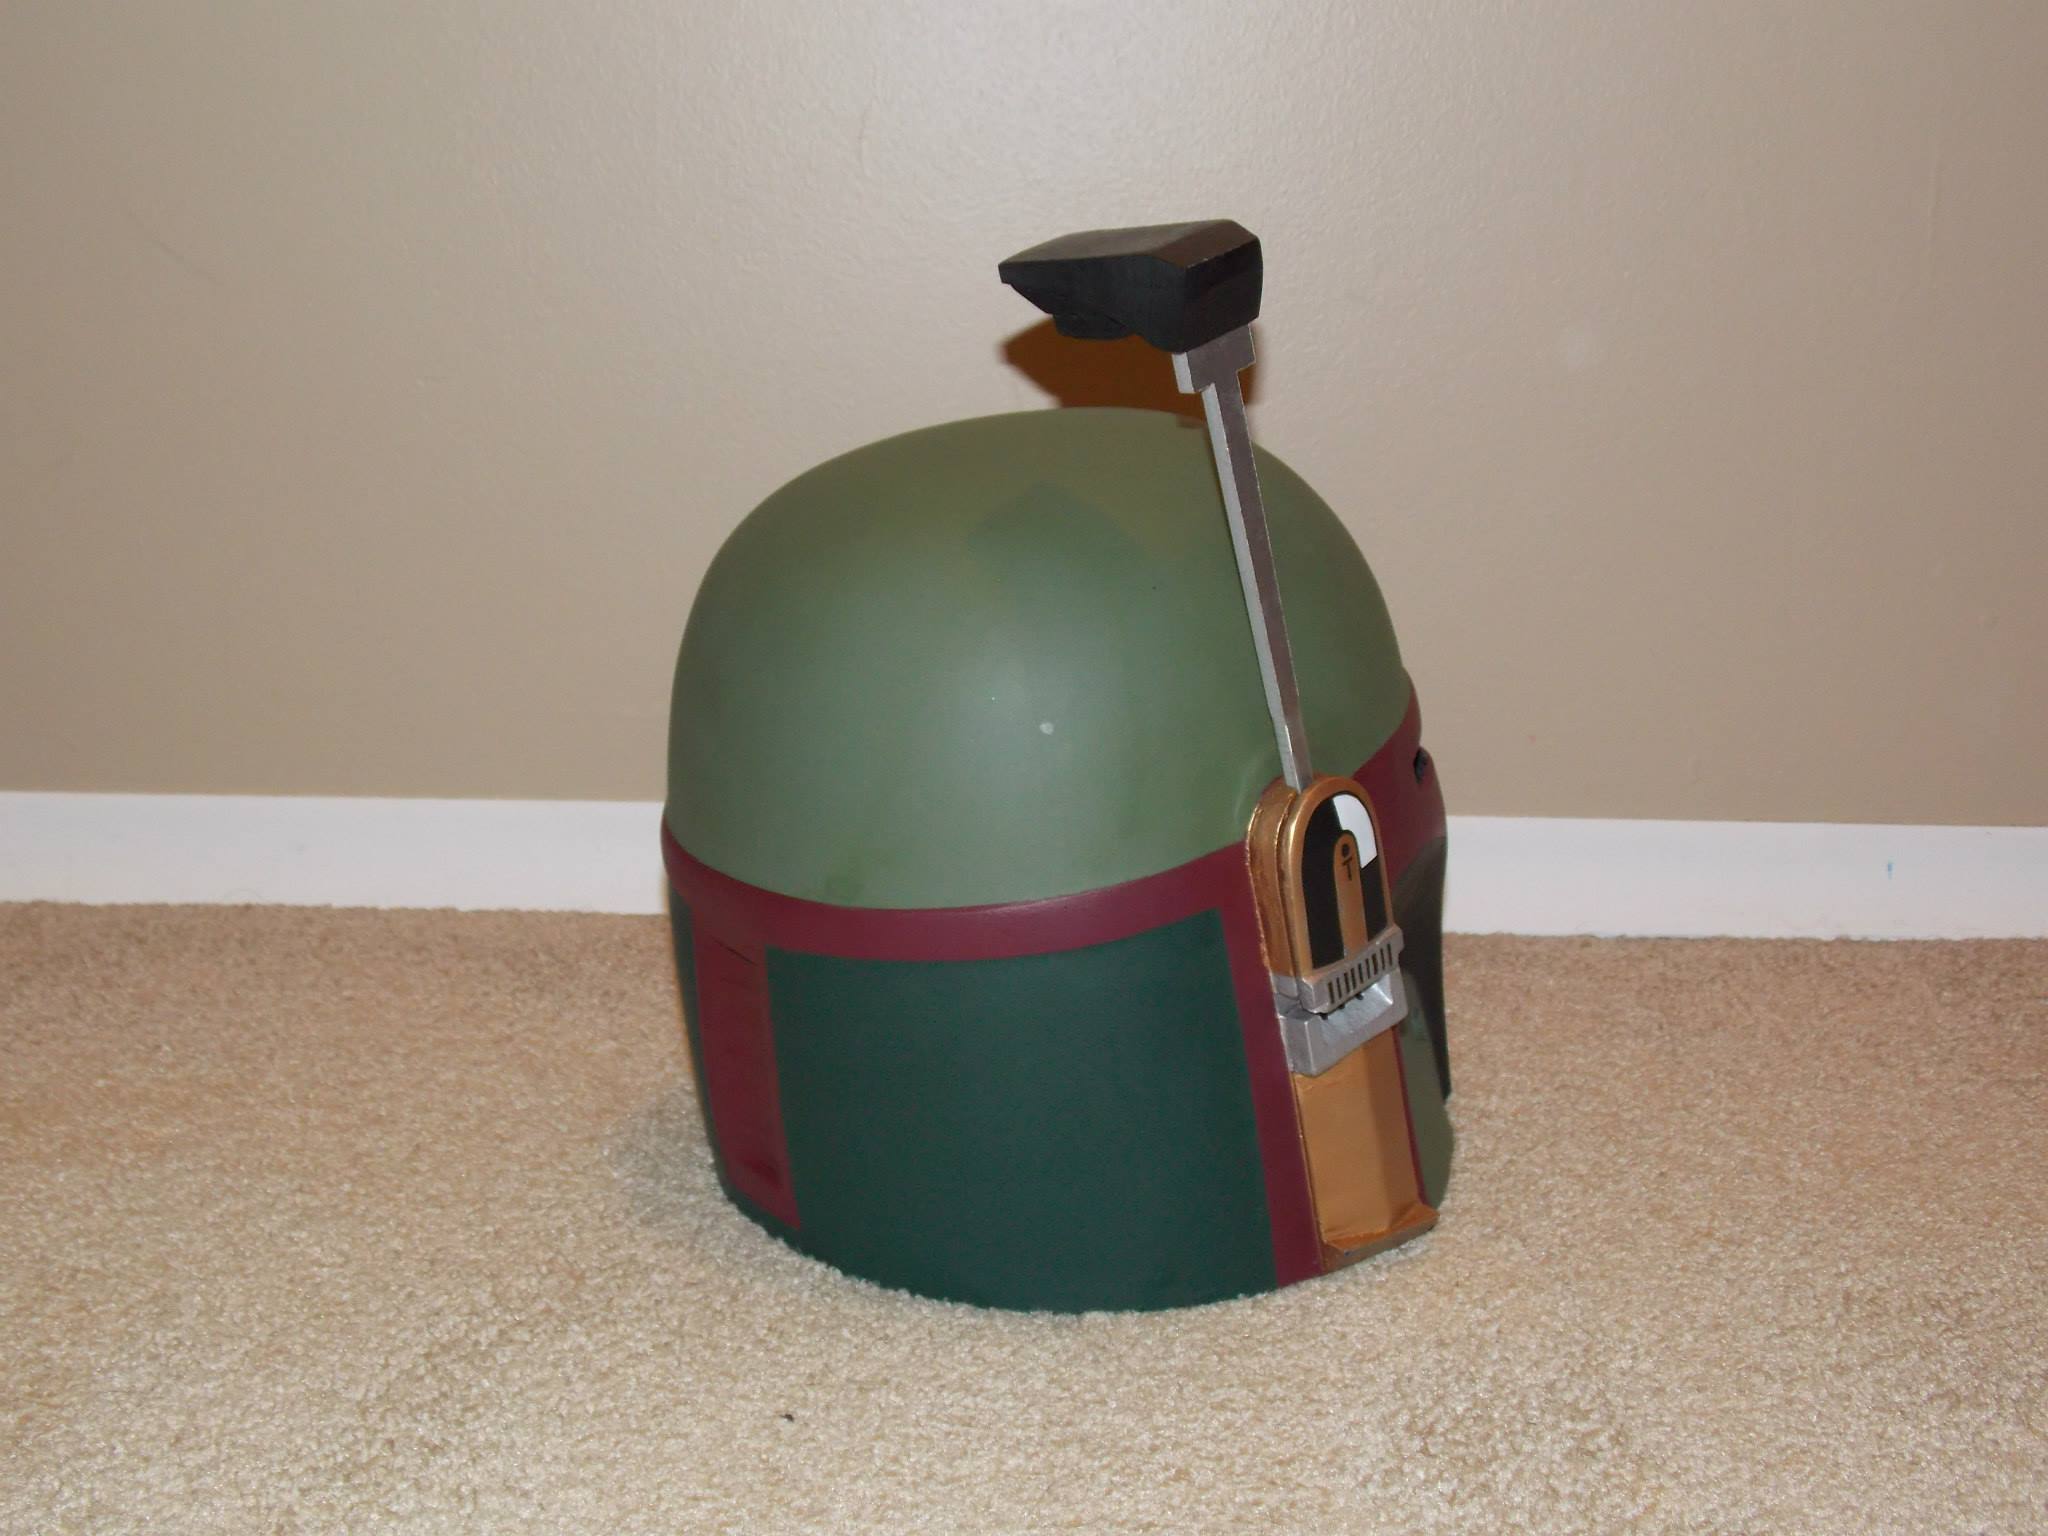
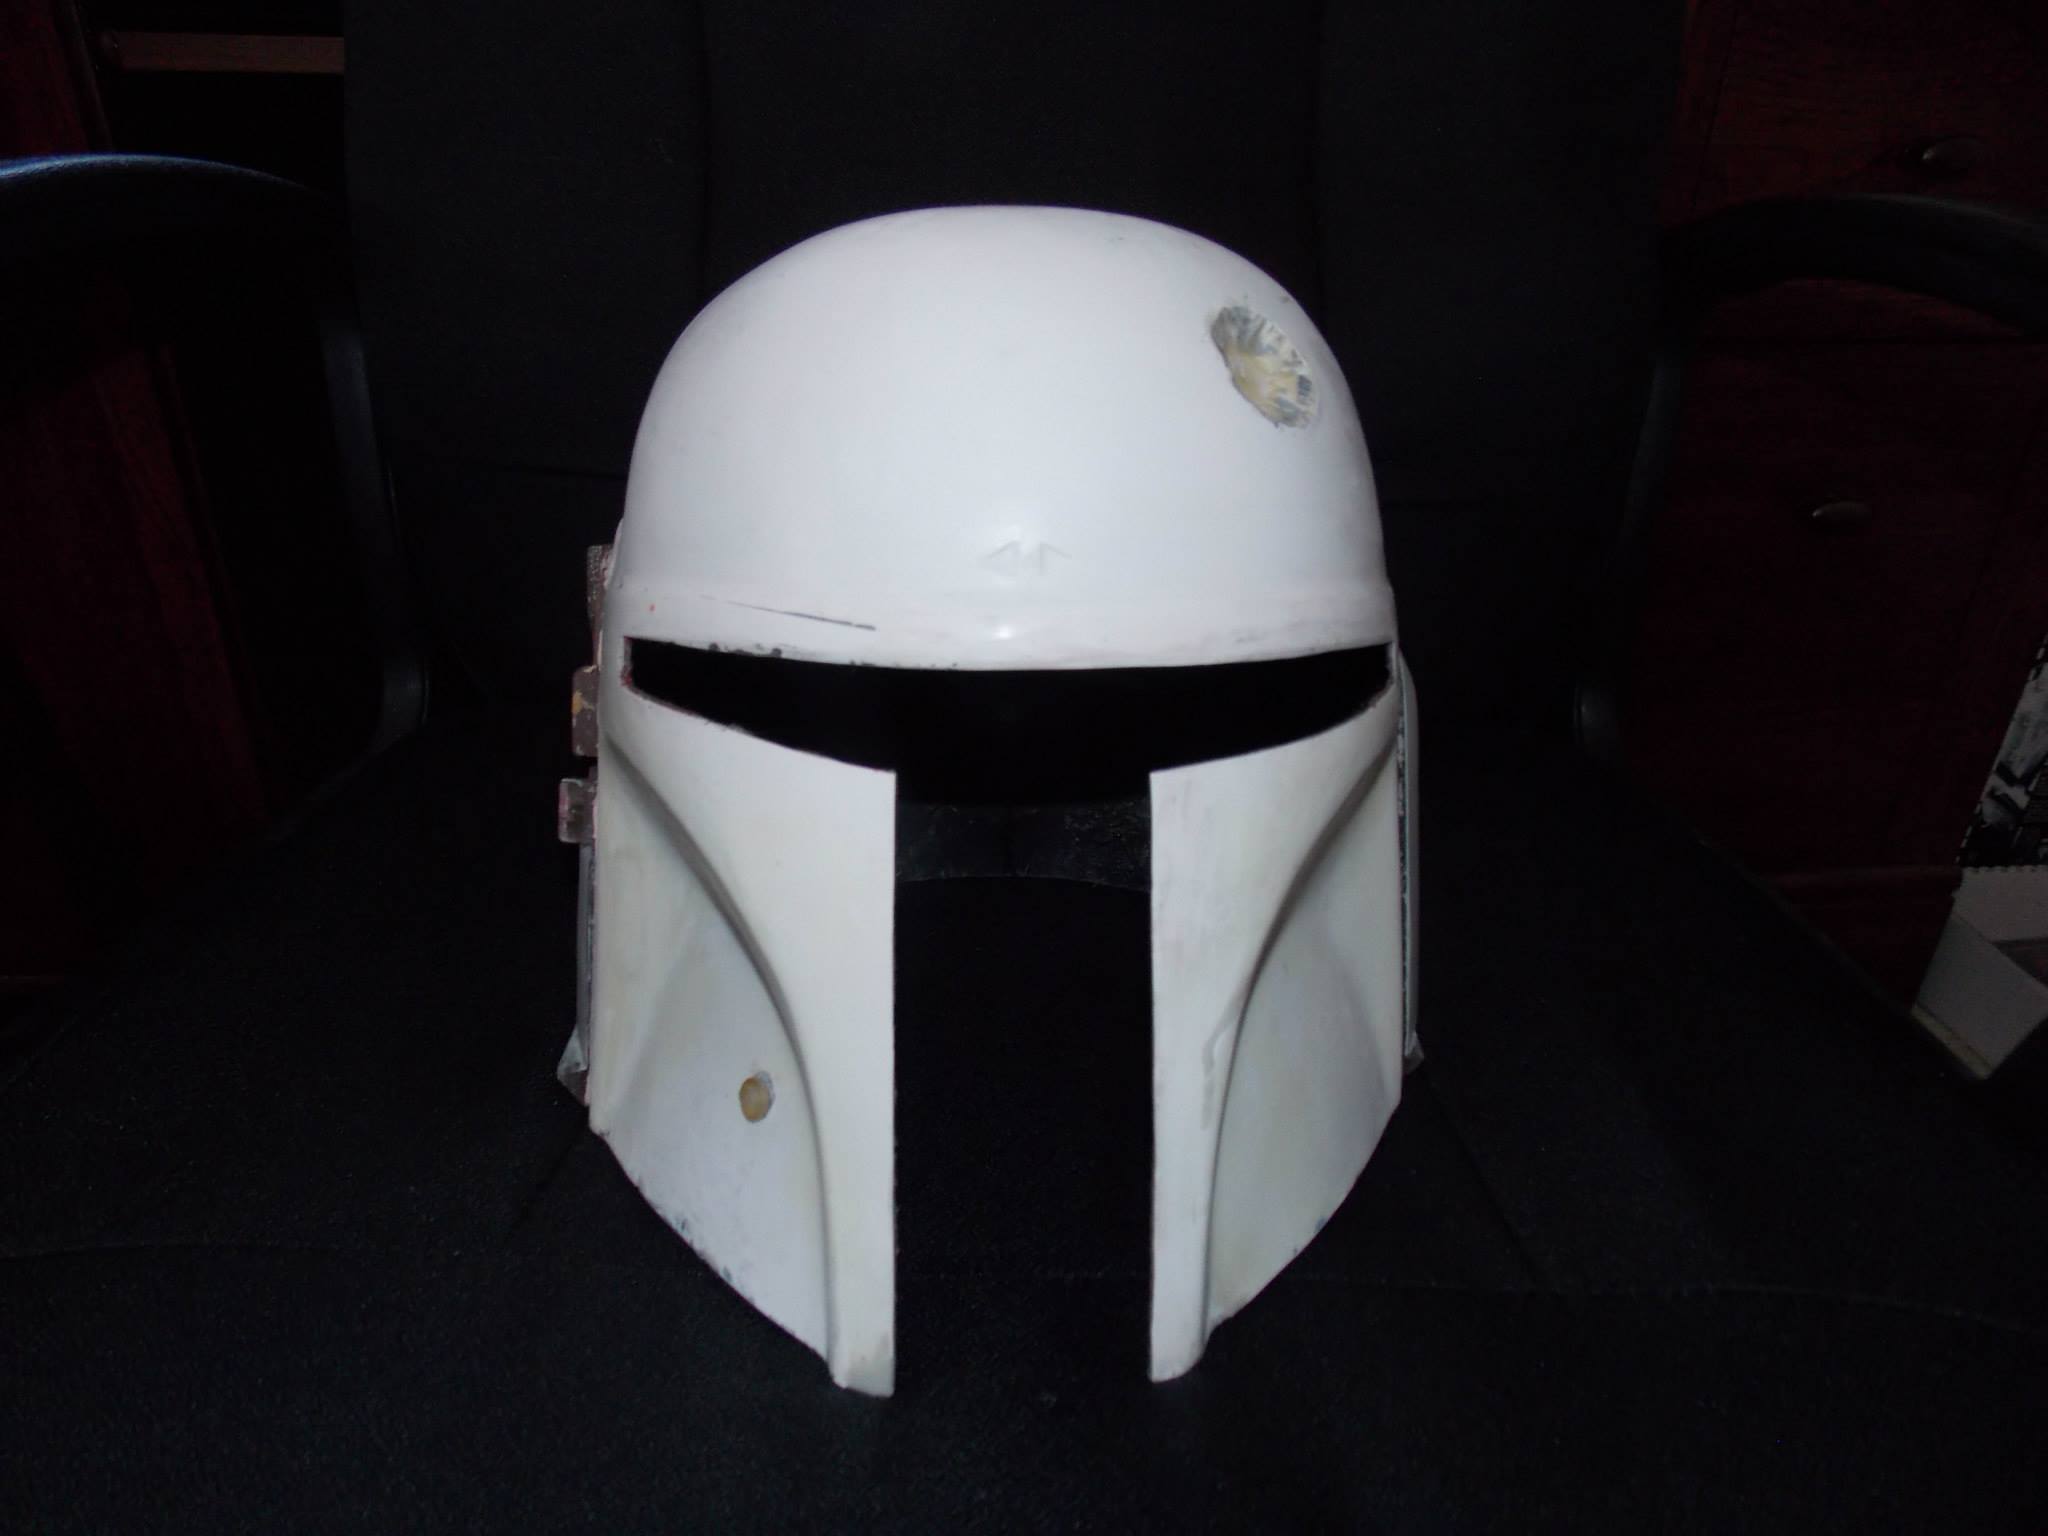
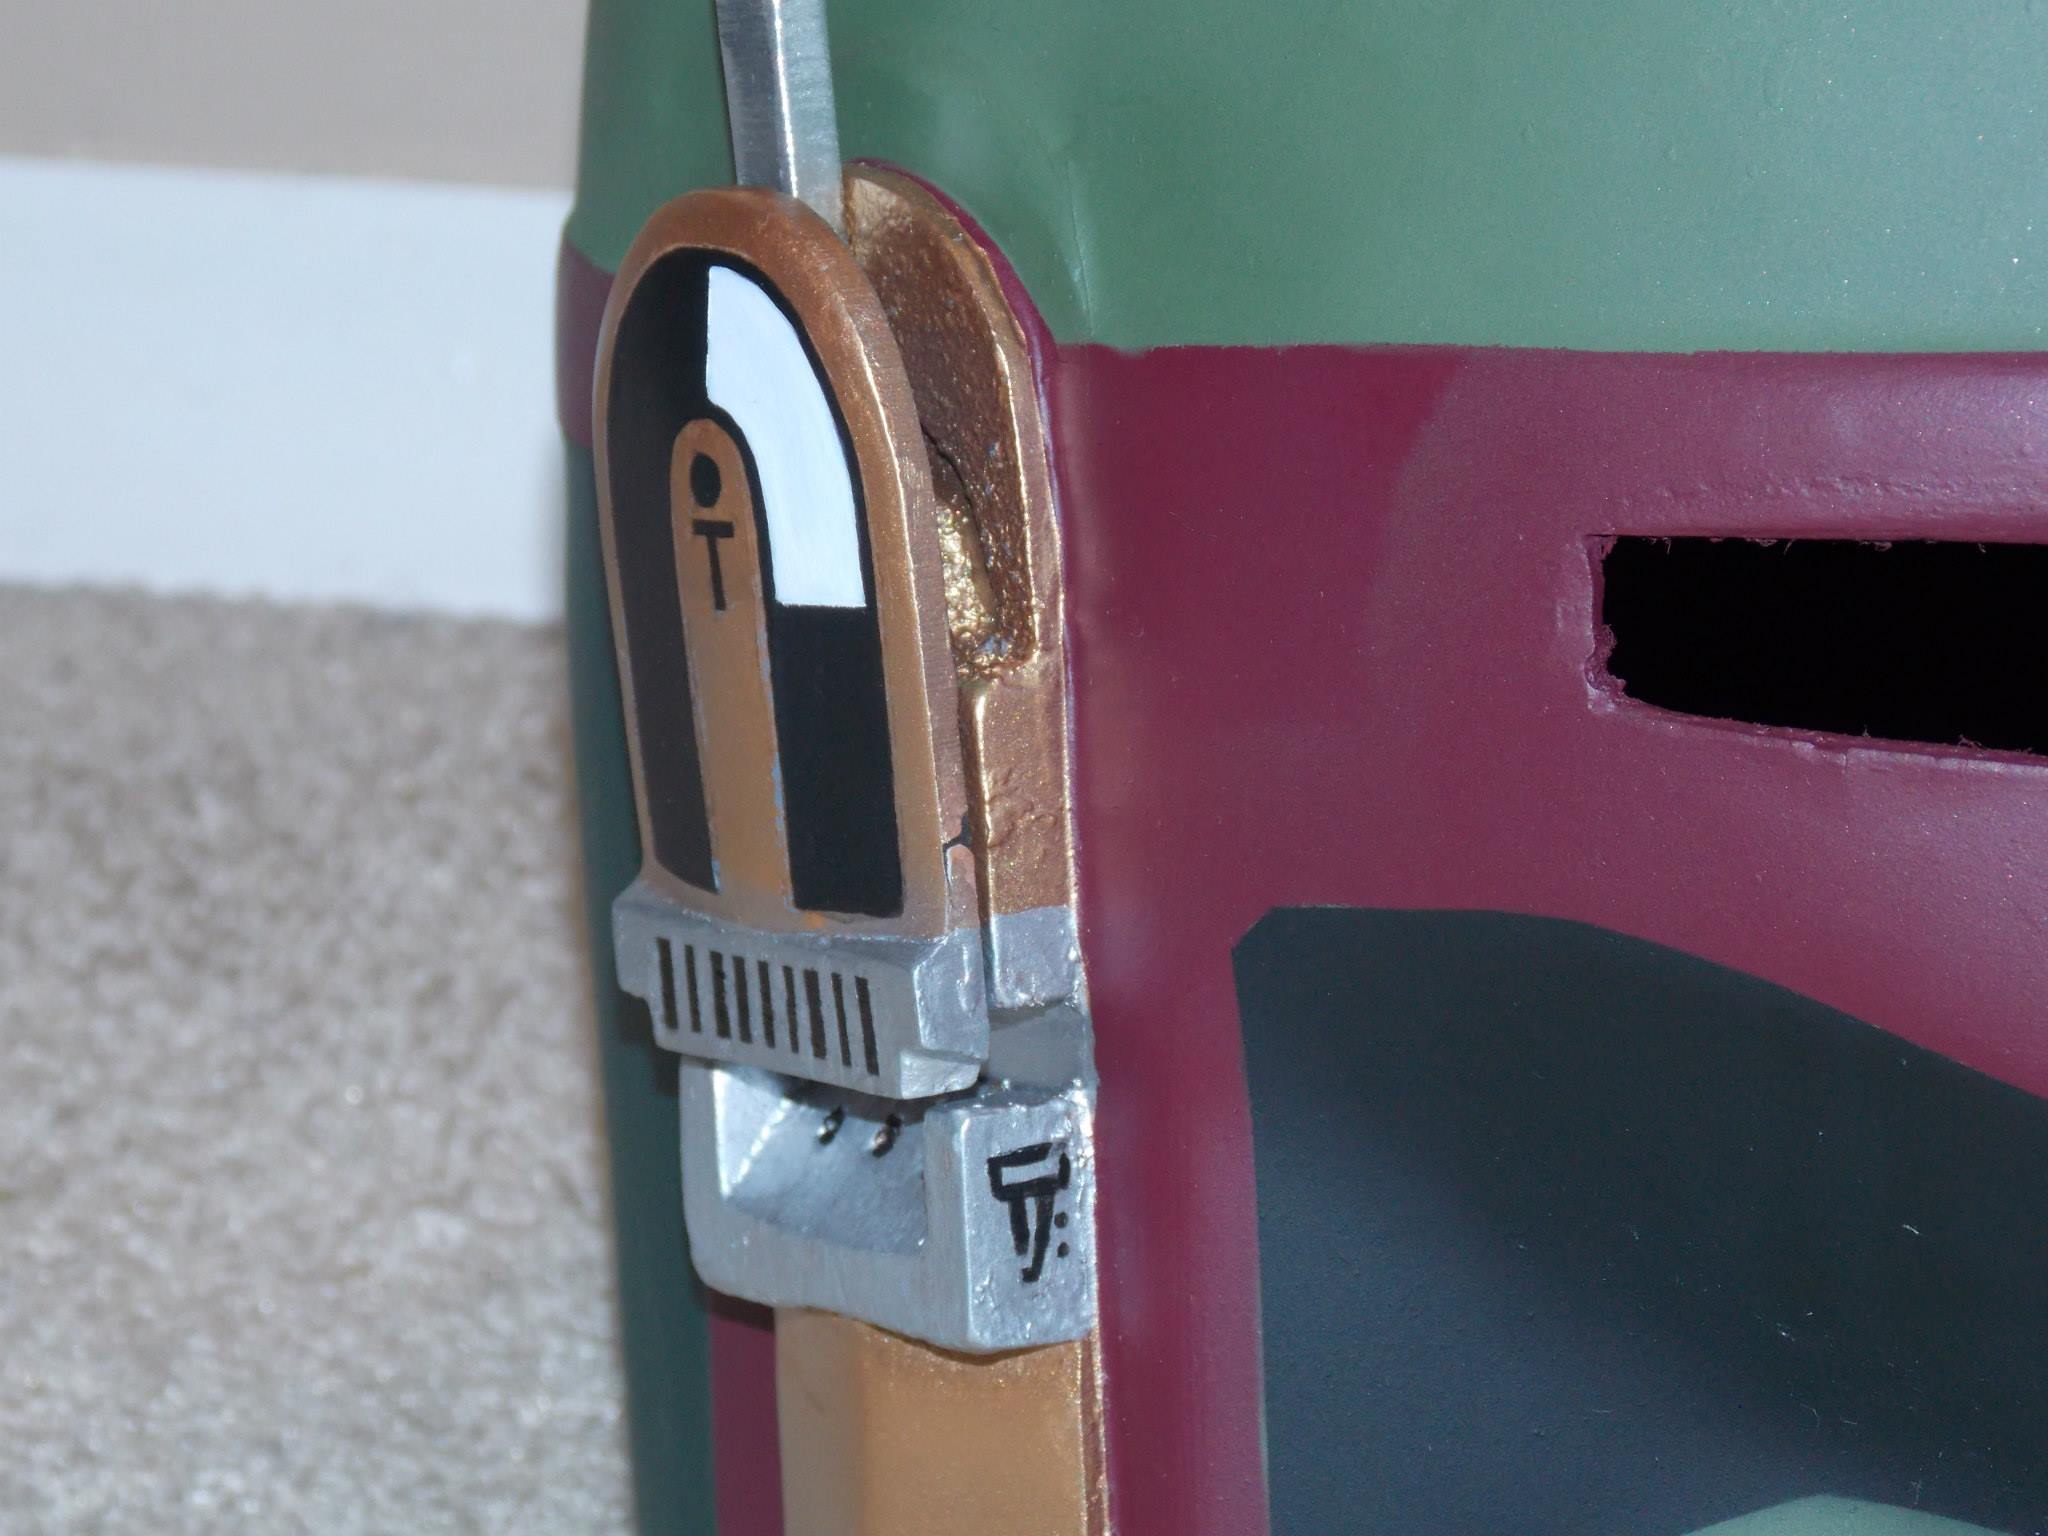
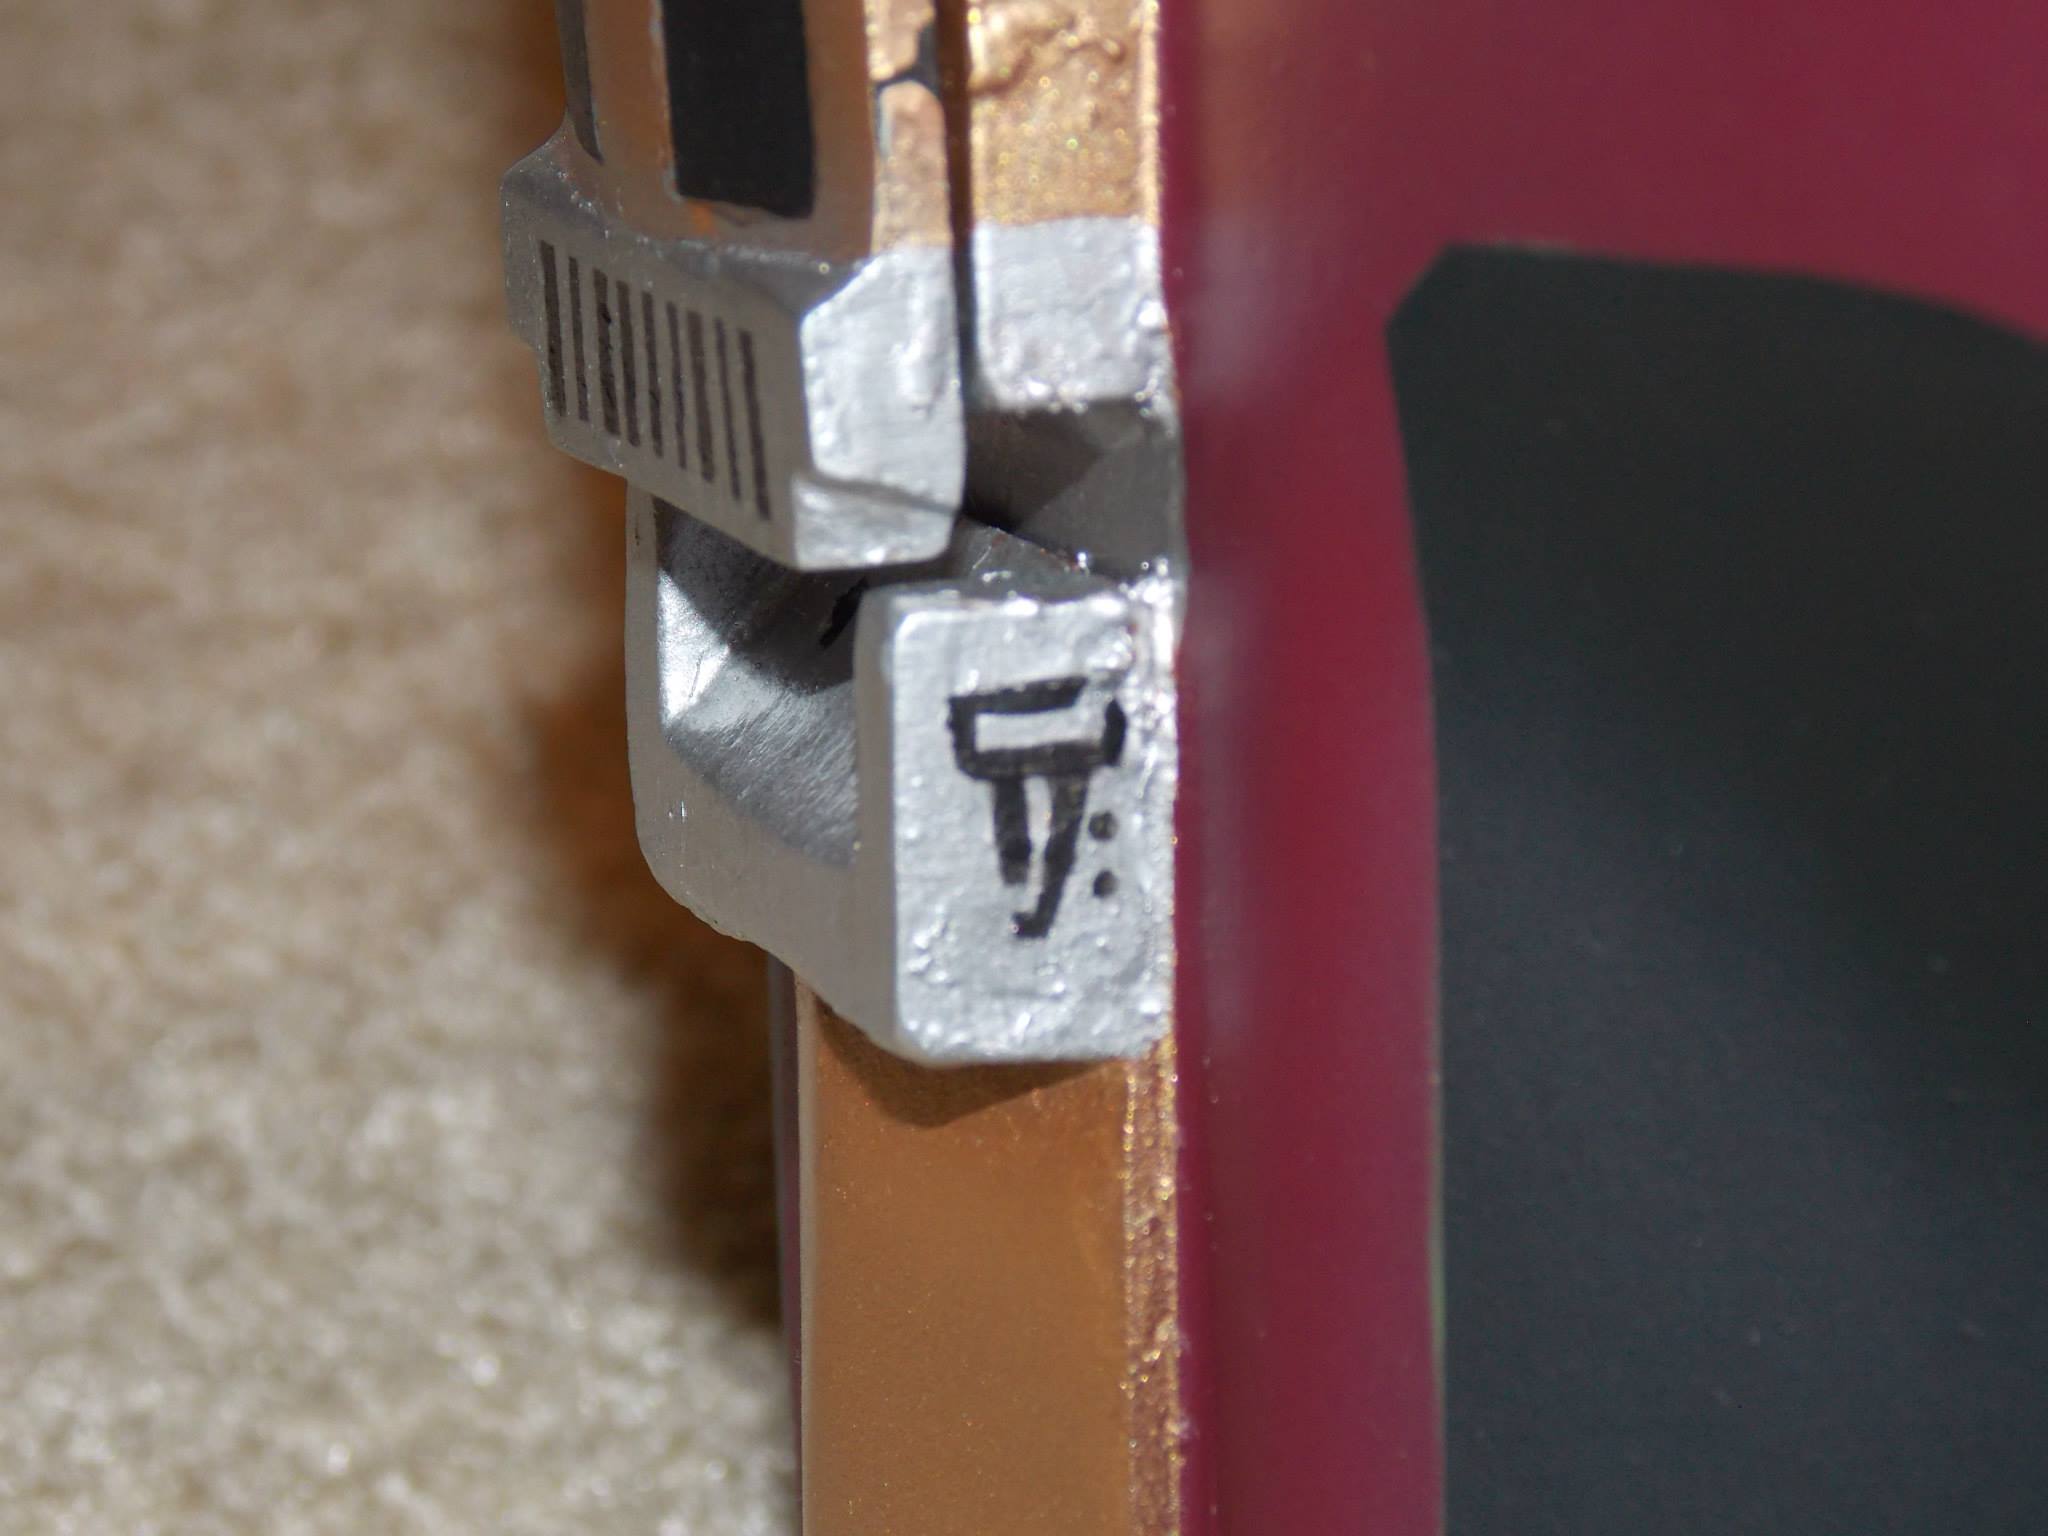
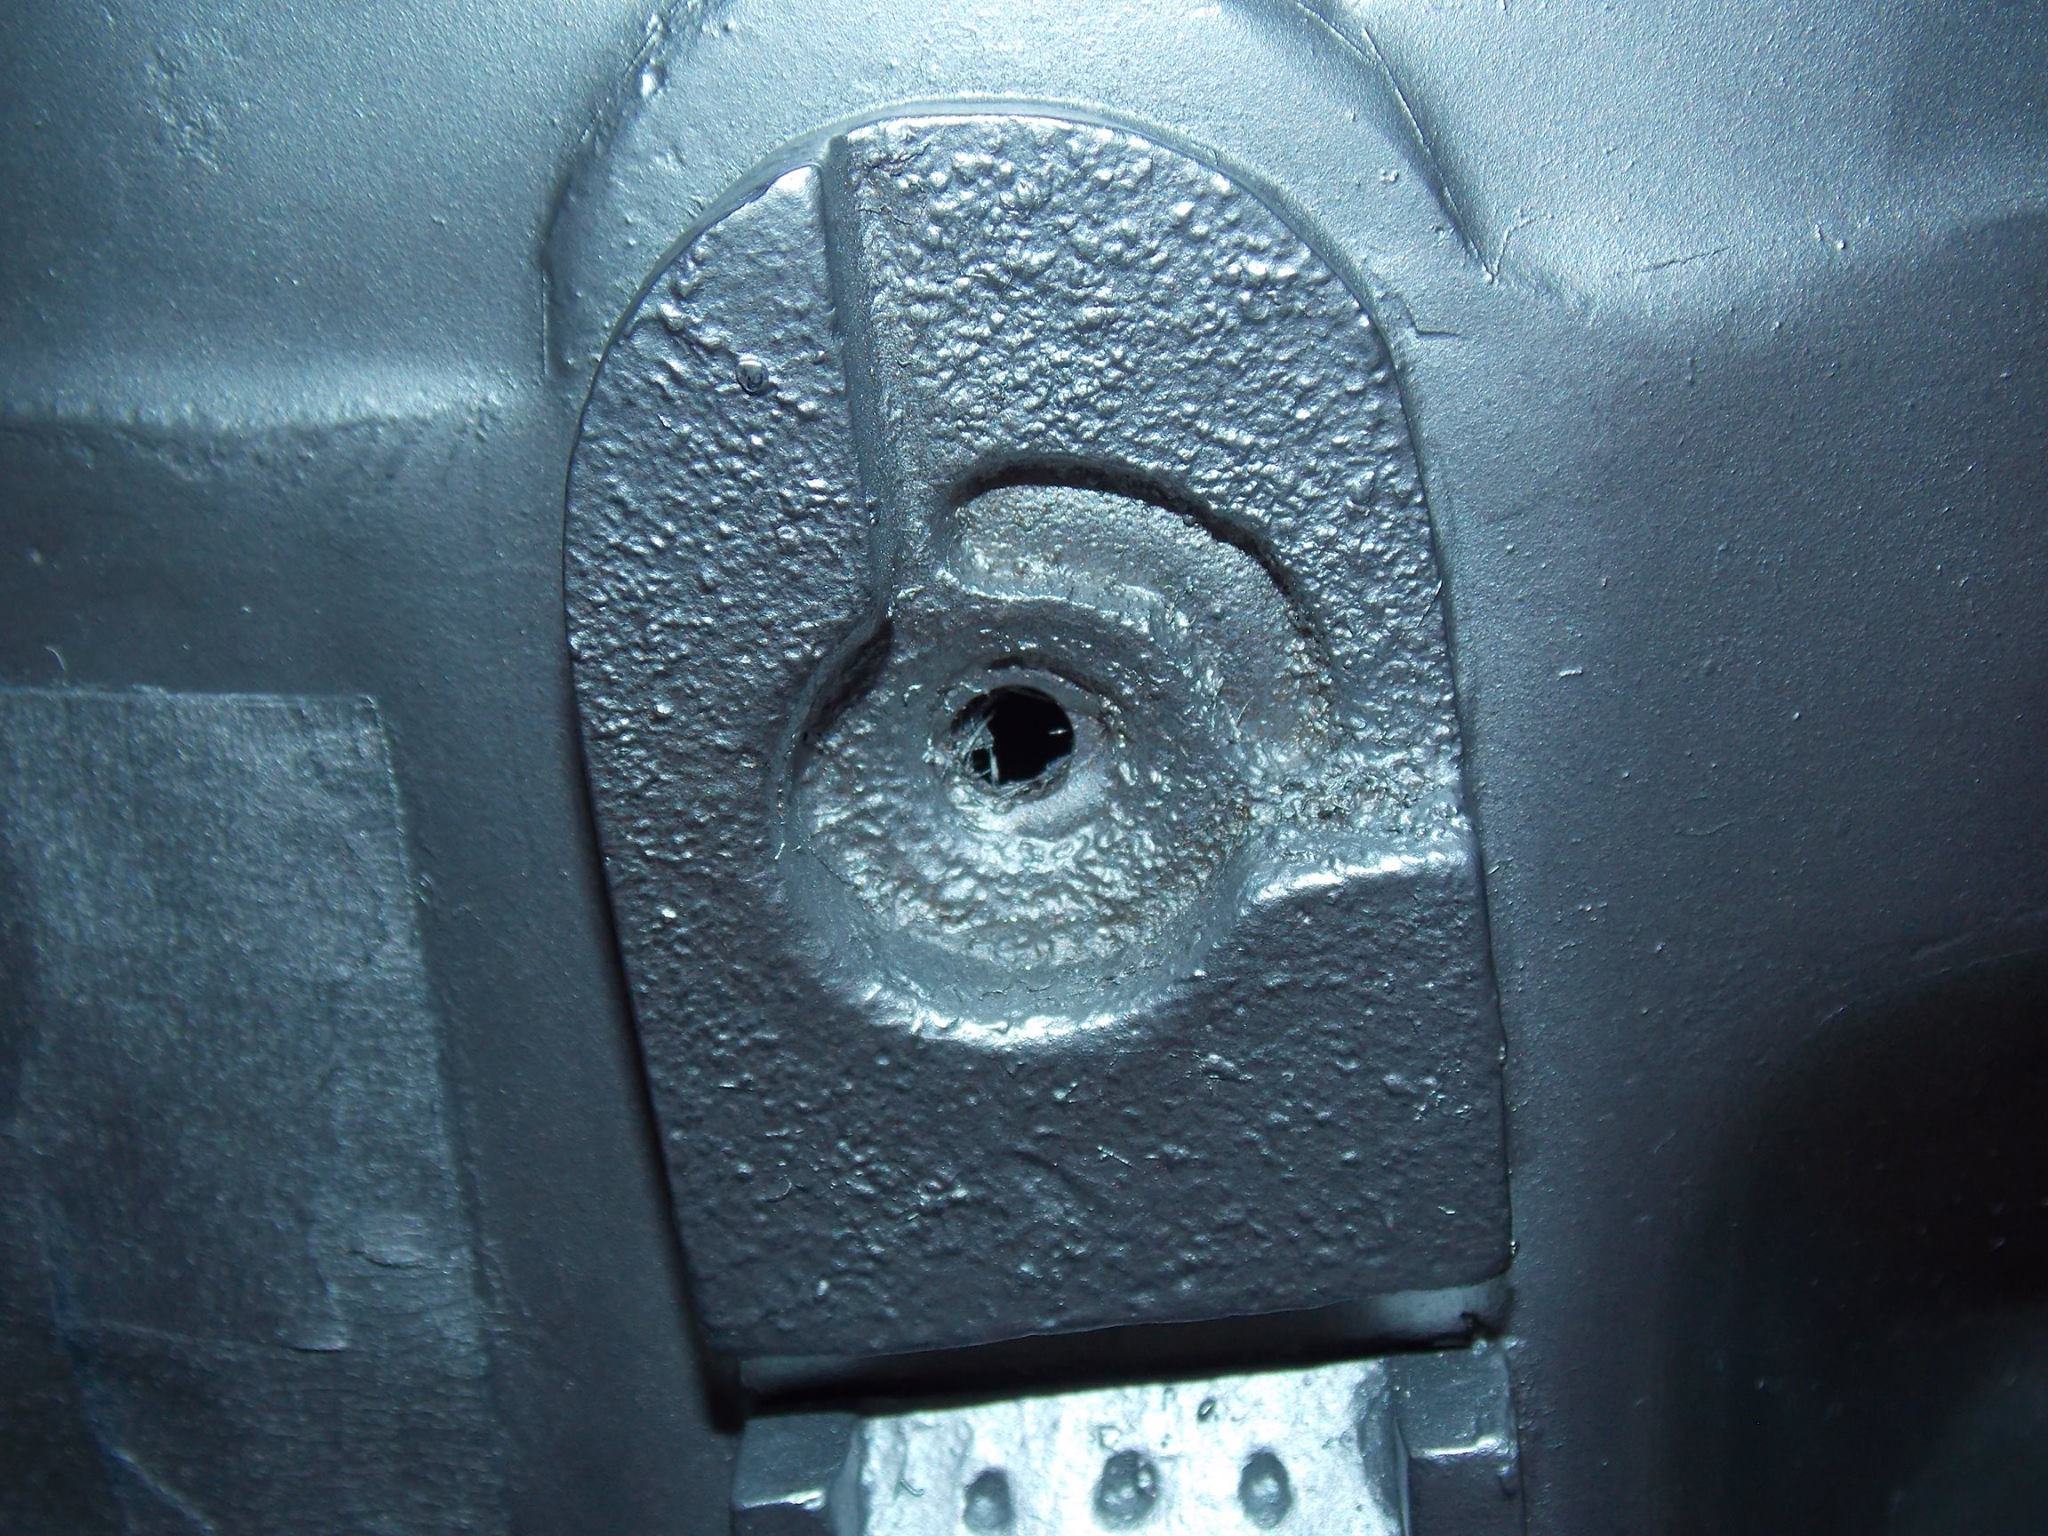
Just like the first time I had stripped all of the paint and even the primer from the helmet down to it’s bleach white foundation. Next I took my rotary tool and carved/scored nicks and scrapes into the exterior where they were needed such as on the mandibles, and cheek areas. The right ear that houses the rangefinder was sticking out way too far from where it should have been so I ground it down to a thickness that would better capture the look of the helmet in the film. The covering for that same ear was not screen accurate towards the bottom of the piece which motivated me to modify and resculpt the entire thing to match the actual design.
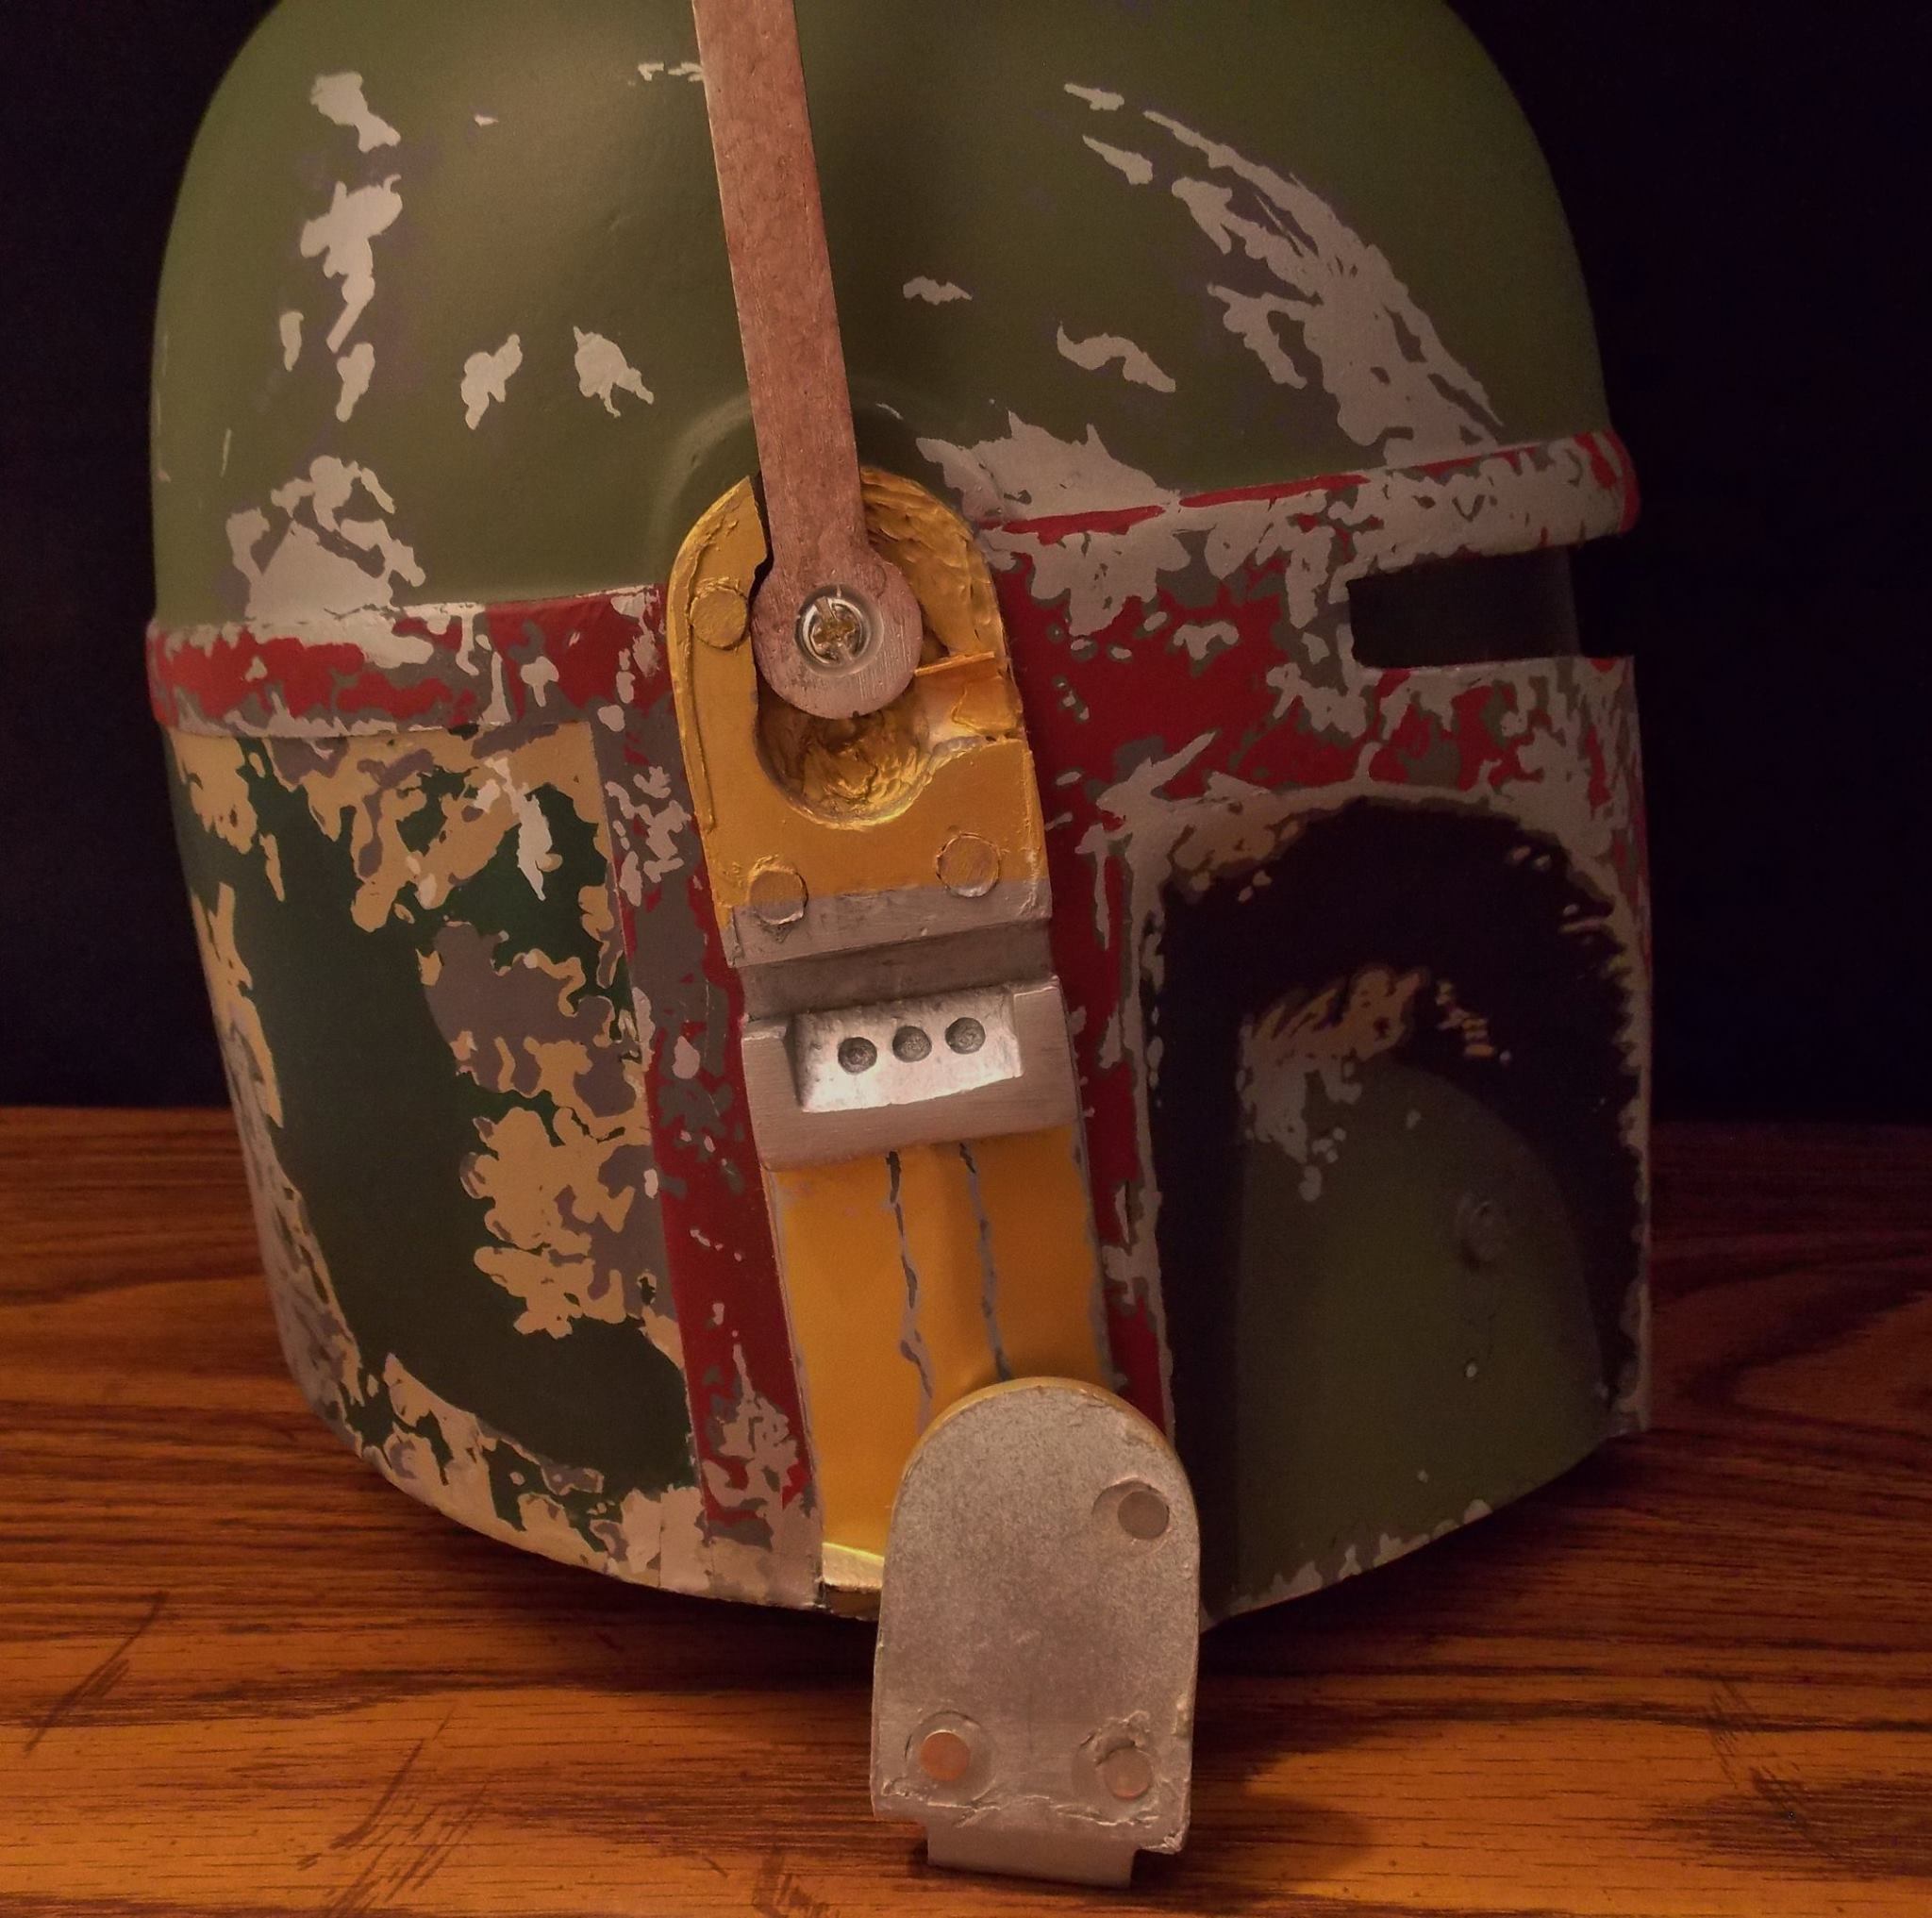
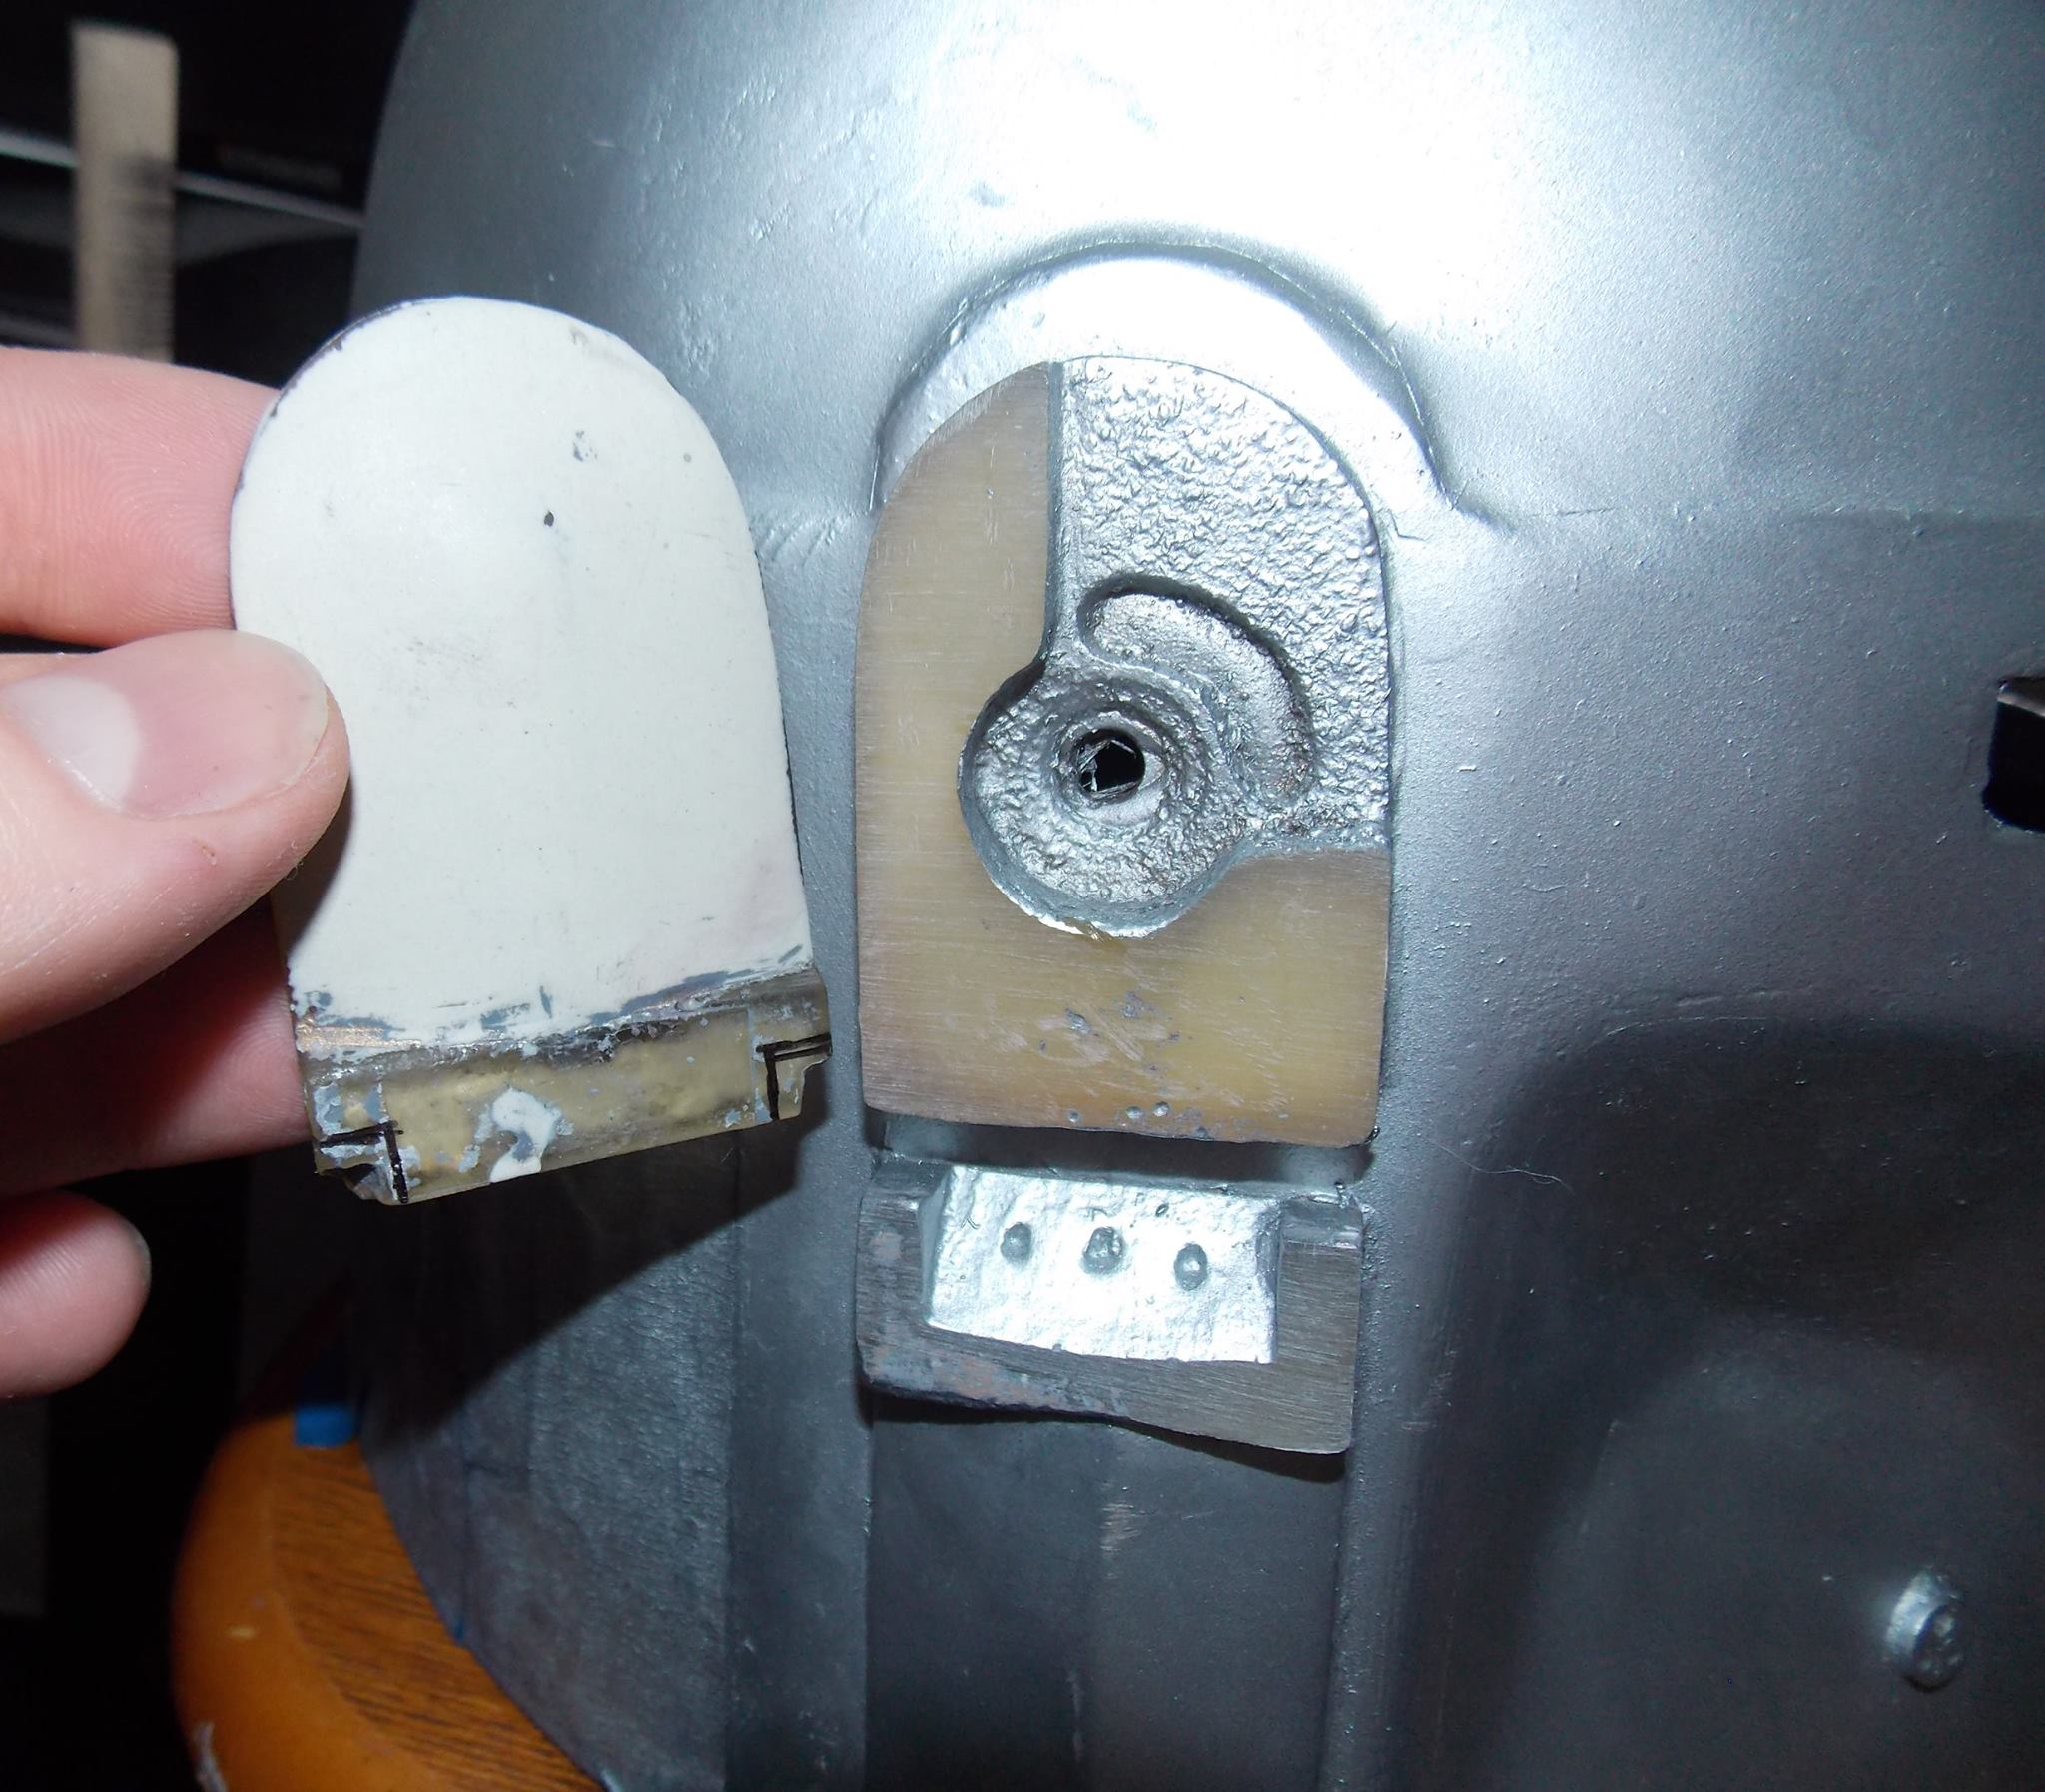
The rangefinder stalk was positioned lower than it should have been which meant that when the rangefinder was moved forward, it didn’t line up with the eyes of the person behind the visor. I ended up filling the old pivot point and drilling out a knew one slightly higher up so that the stalk would line up with the red band running across the brow line and therefore, allow the rangefinder to sit in front of the wearer’s right eye.
This also allowed the rangefinder to rest higher above the head for a more accurate look. The way it was before had created the illusion that the stalk was shorter than it was supposed to be.
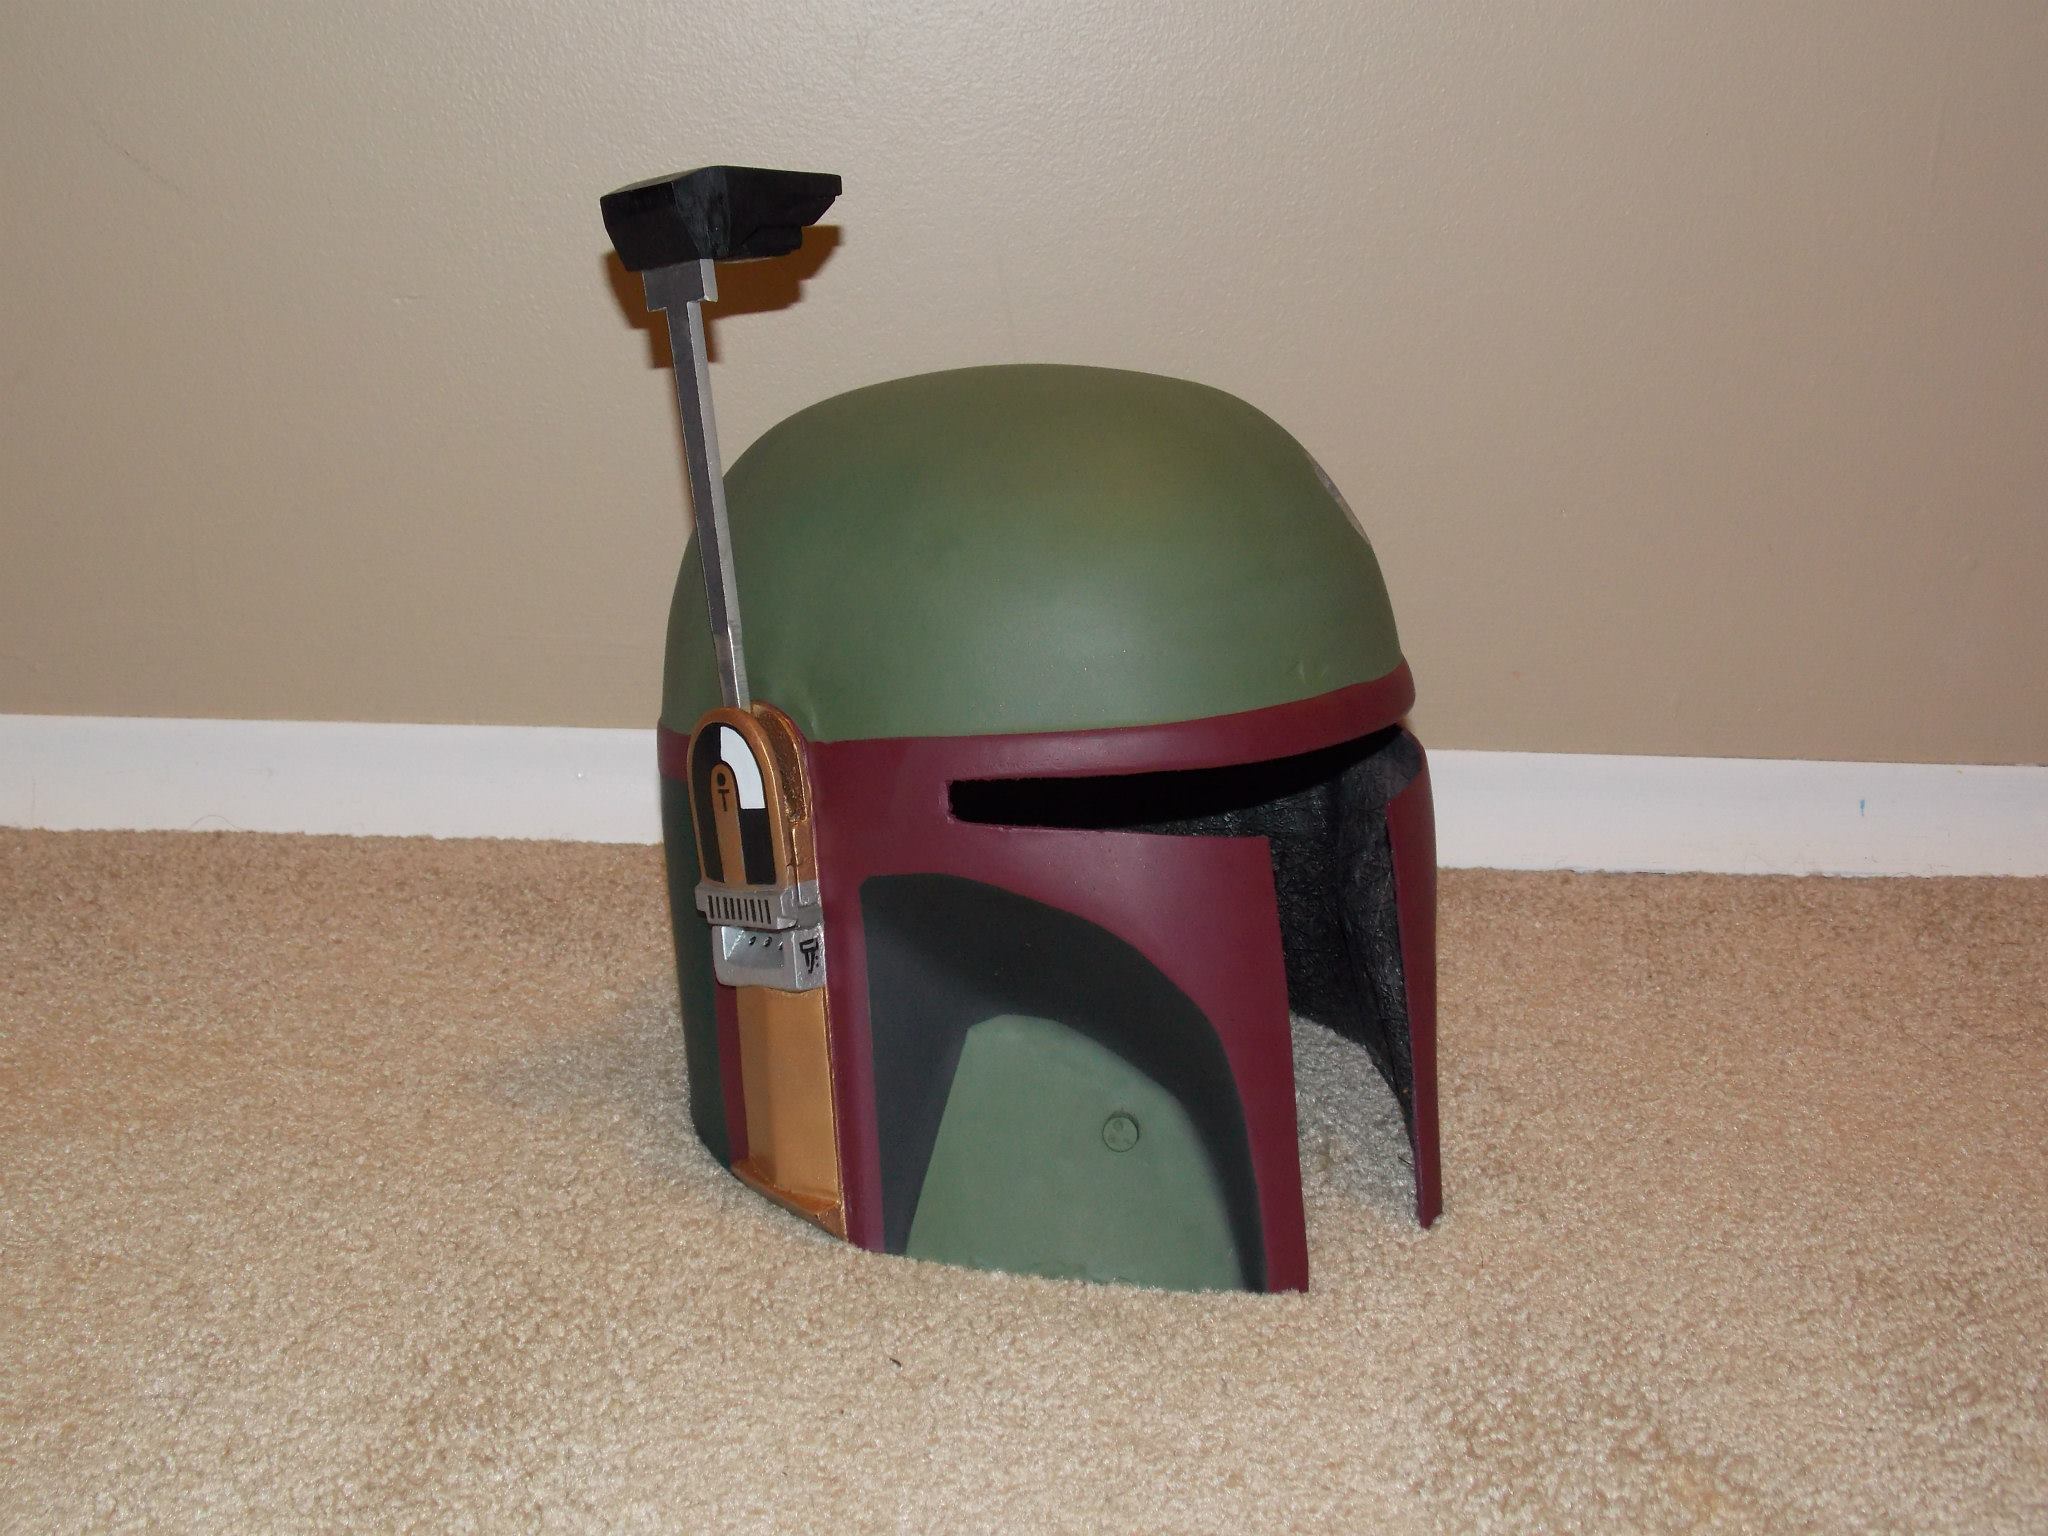
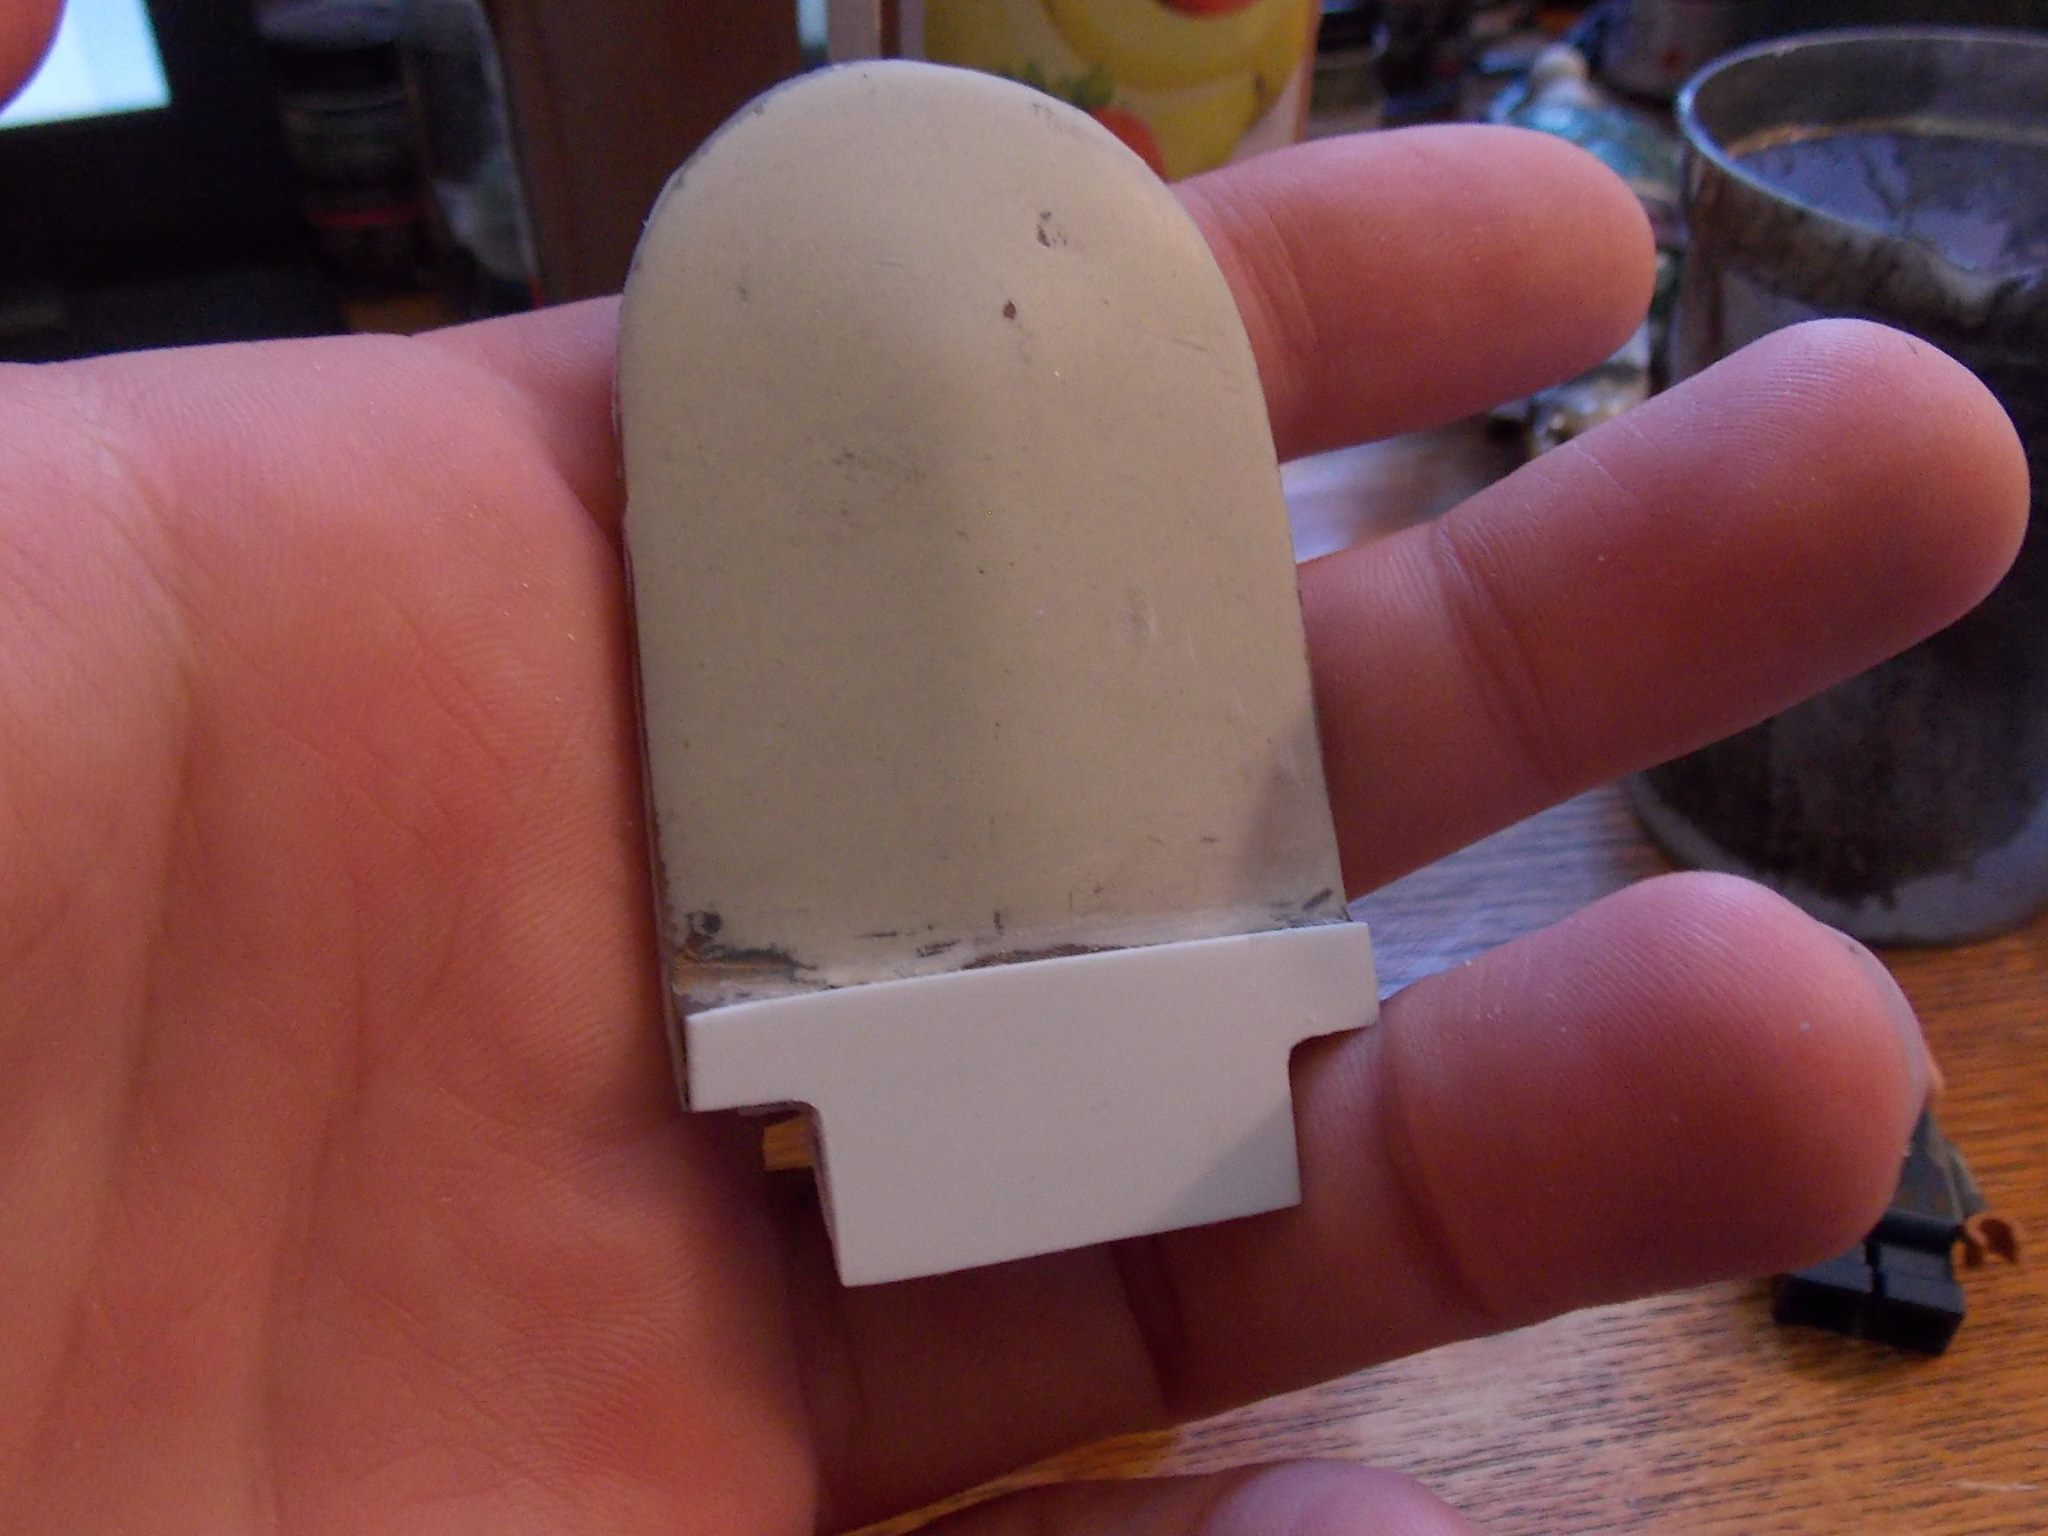
One big mistake I had made during my second attempt at painting this helmet was that I had used a hacksaw to remove the parts of metal jutting out from under the rangefinder since I thought it was an oversight made by my predecessor. Once I realized that the rangefinder actually does have metal jutting out in that area, although slightly different from how it was before I began working on it, I realized that I had made that section less accurate as a result.
So I went to ebay and found a seller who was peddling resin casts of the rangefinder and stalk. After winning the auction I had to sand, fill, refine, paint, weather, and reassemble the stalk and rangefinder to the right ear. Now it’s not only more accurate but should Law want to integrate electronics and LED lights, he can do so.
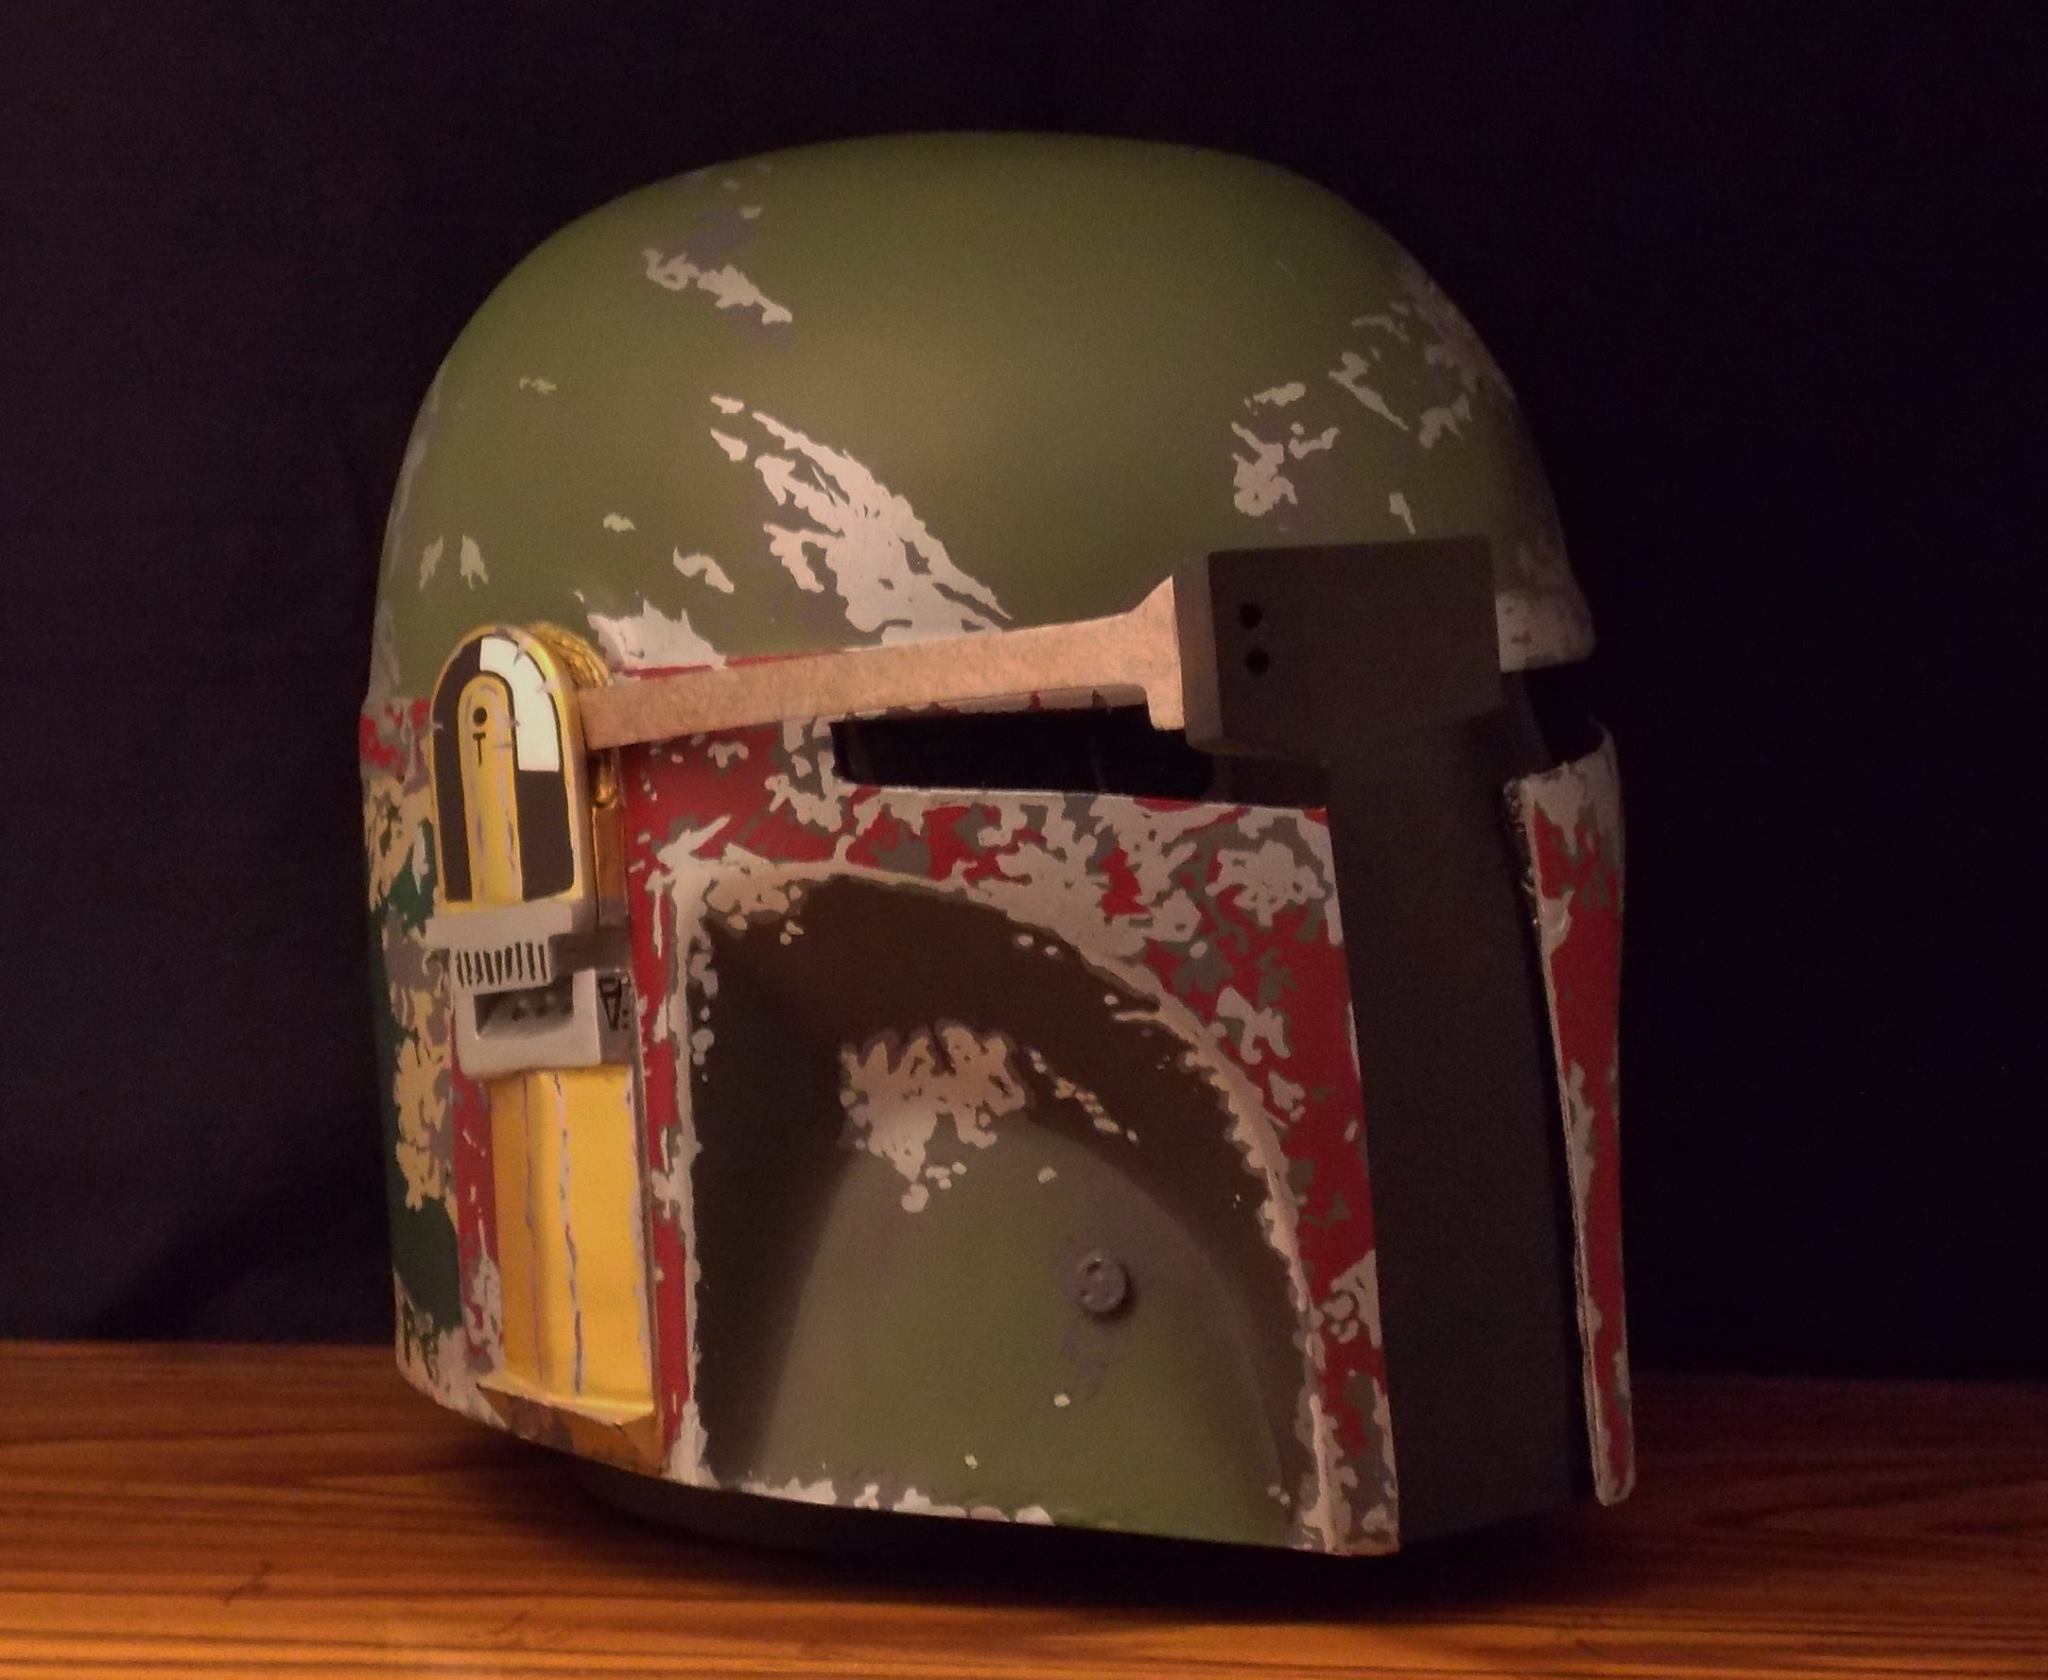
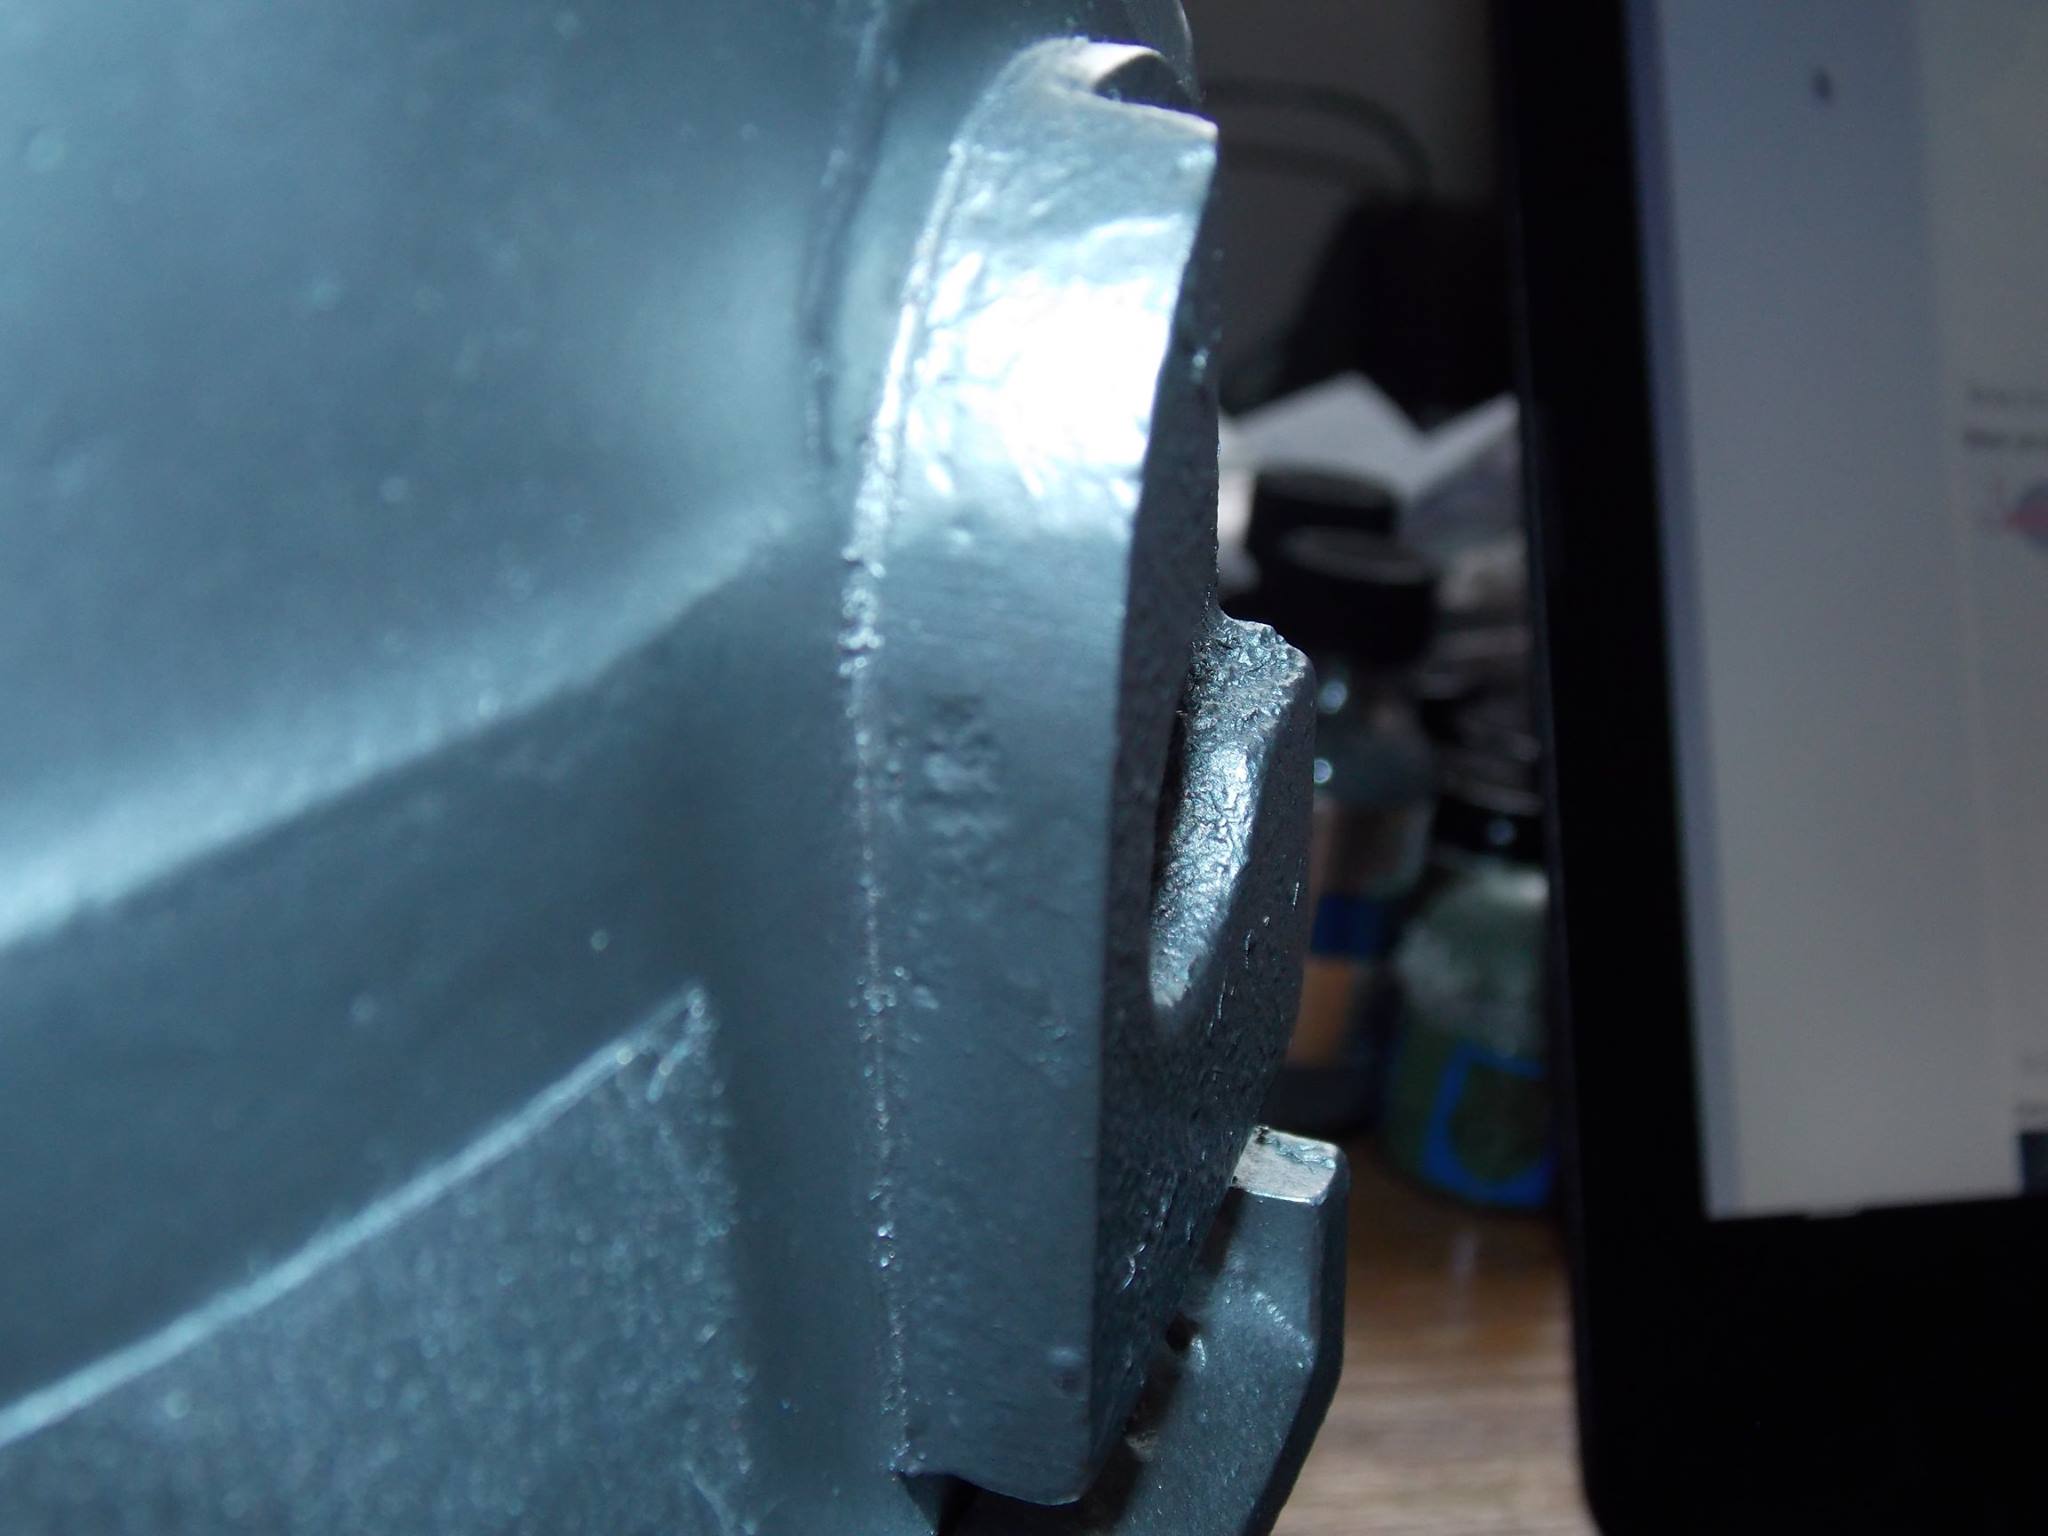
When it was first given to me, the right ear was held in place with rolled up masking tape. While it did the trick and also allowed future modifications like the electronics mentioned, I drilled holes and inserted powerful, rare-earth magnets to allow easy detachment as well as a strong bond that keeps the ear in place.
Once I had finally made all necessary modifications to the helmet sculpt and mechanics of the right ear; I made my decision on how I was going to do the painting that would result in the best application as well as finished look.
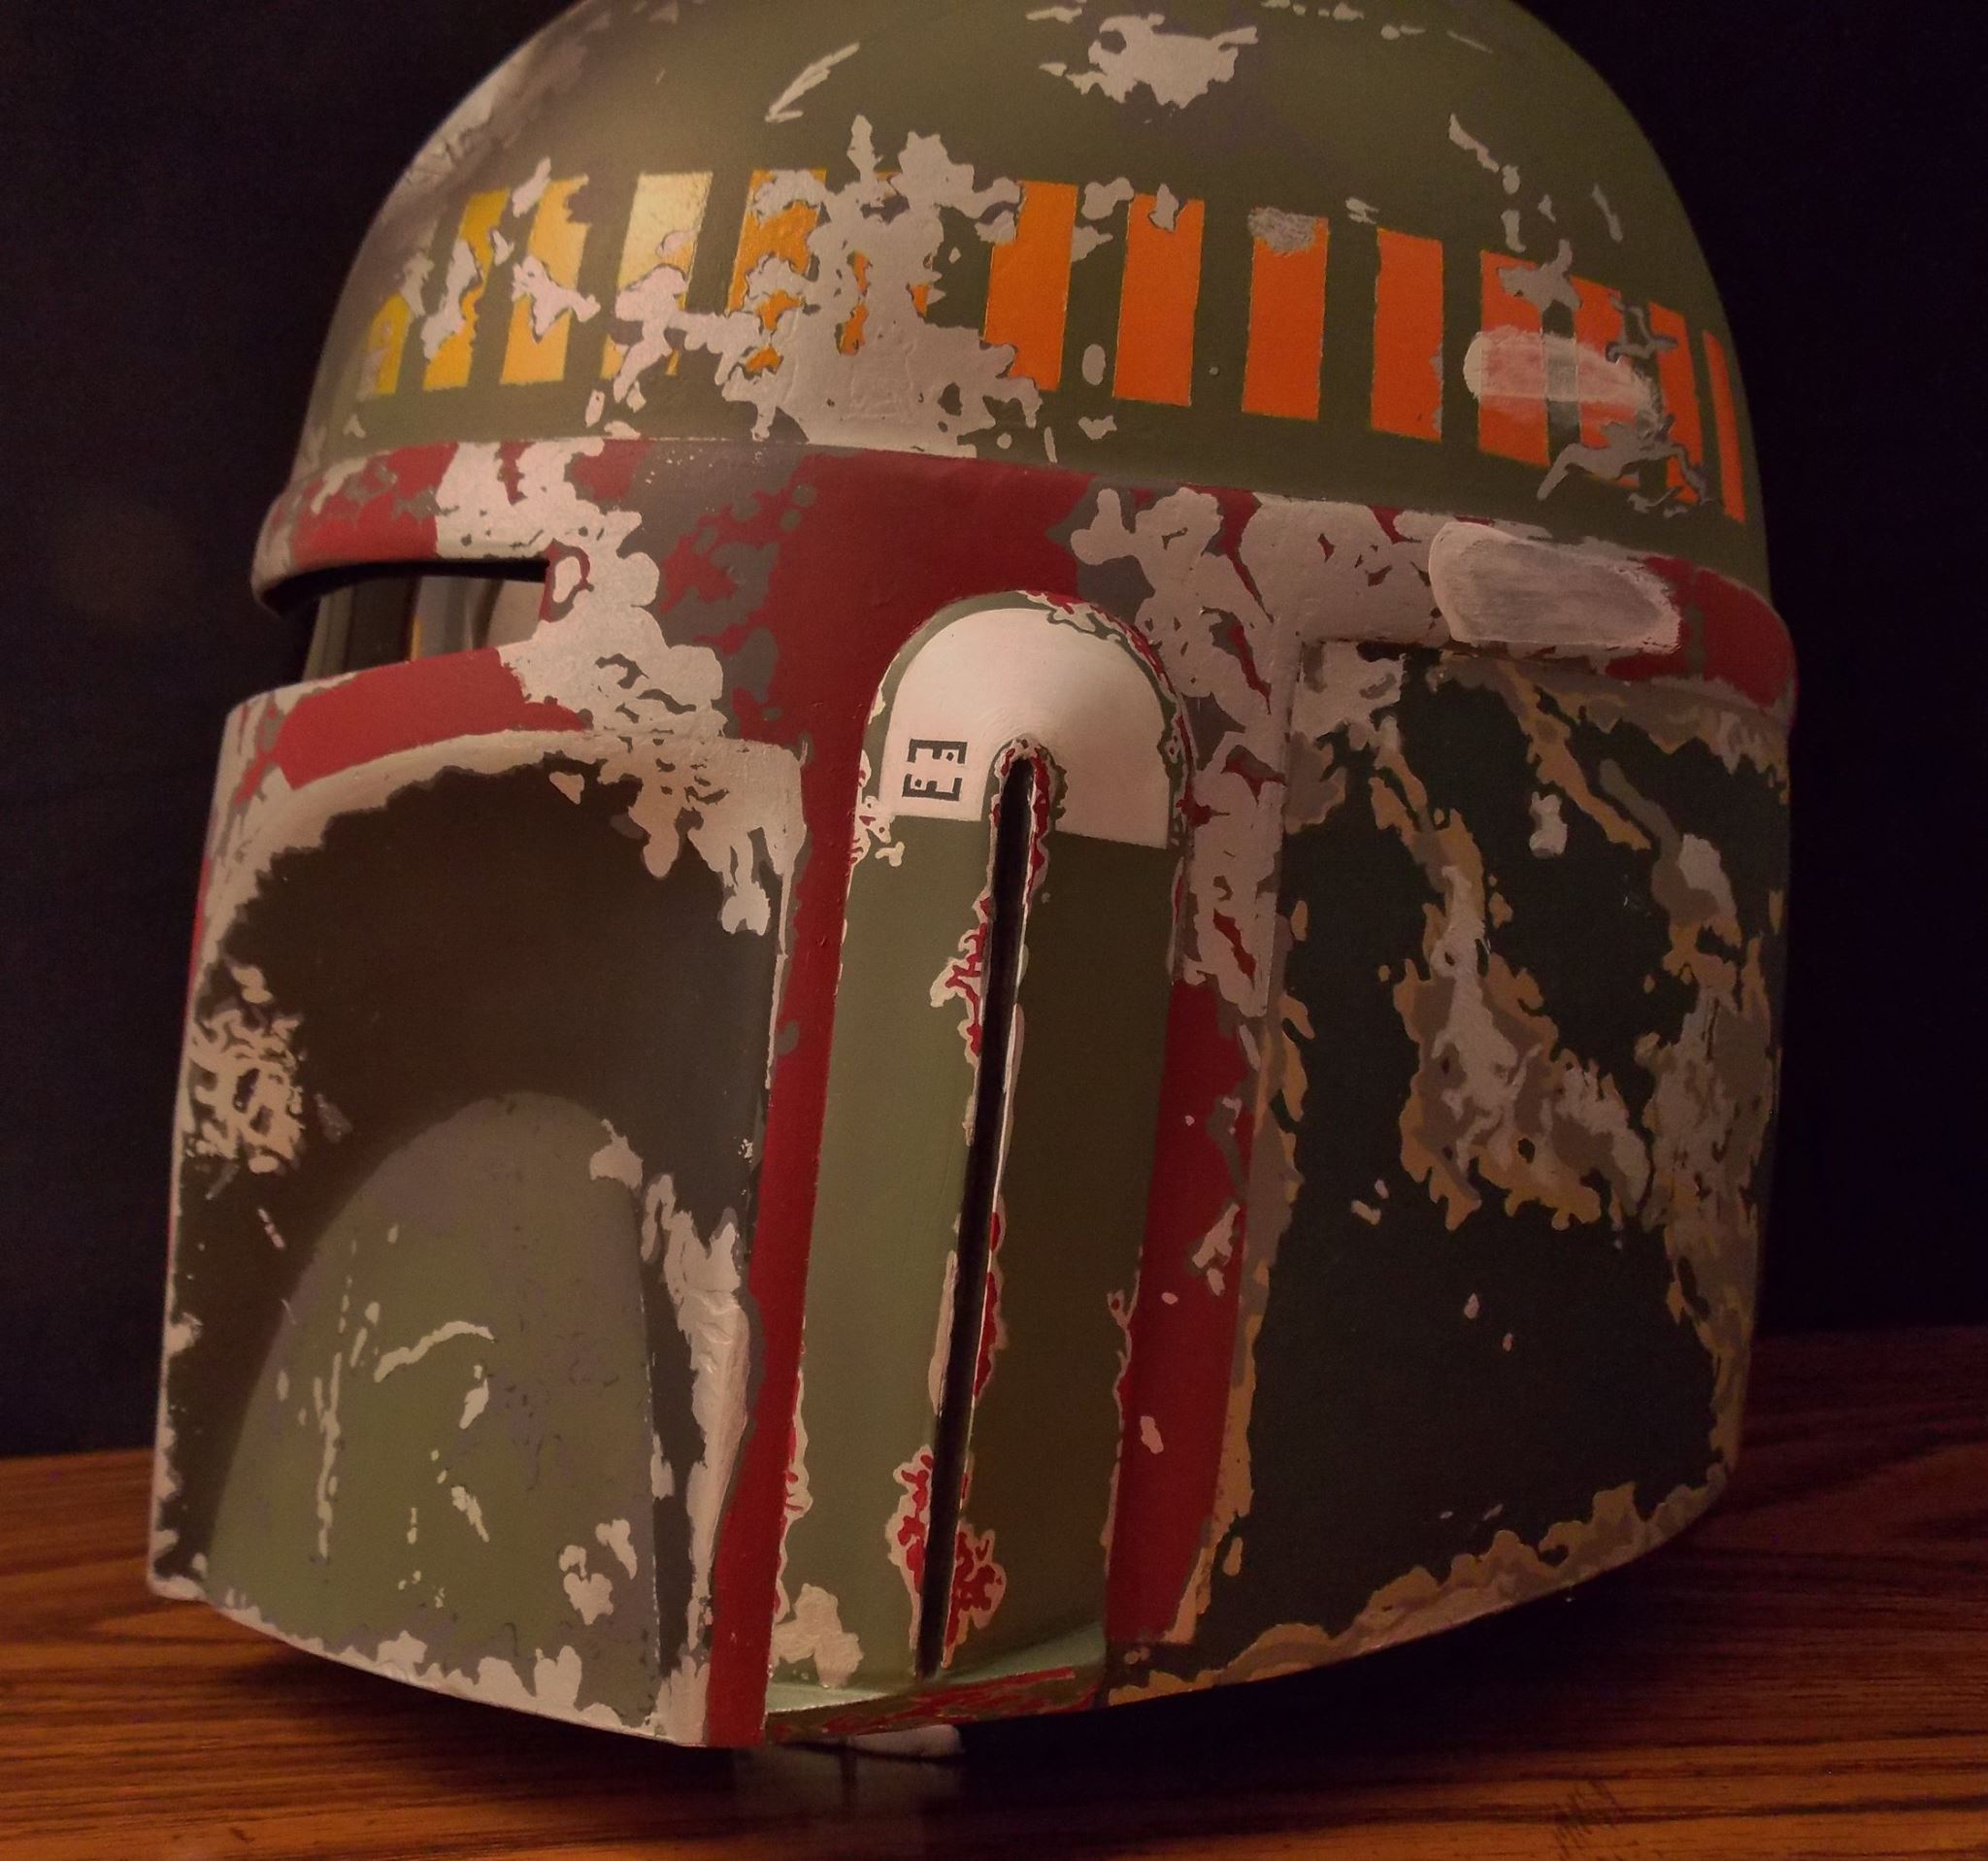
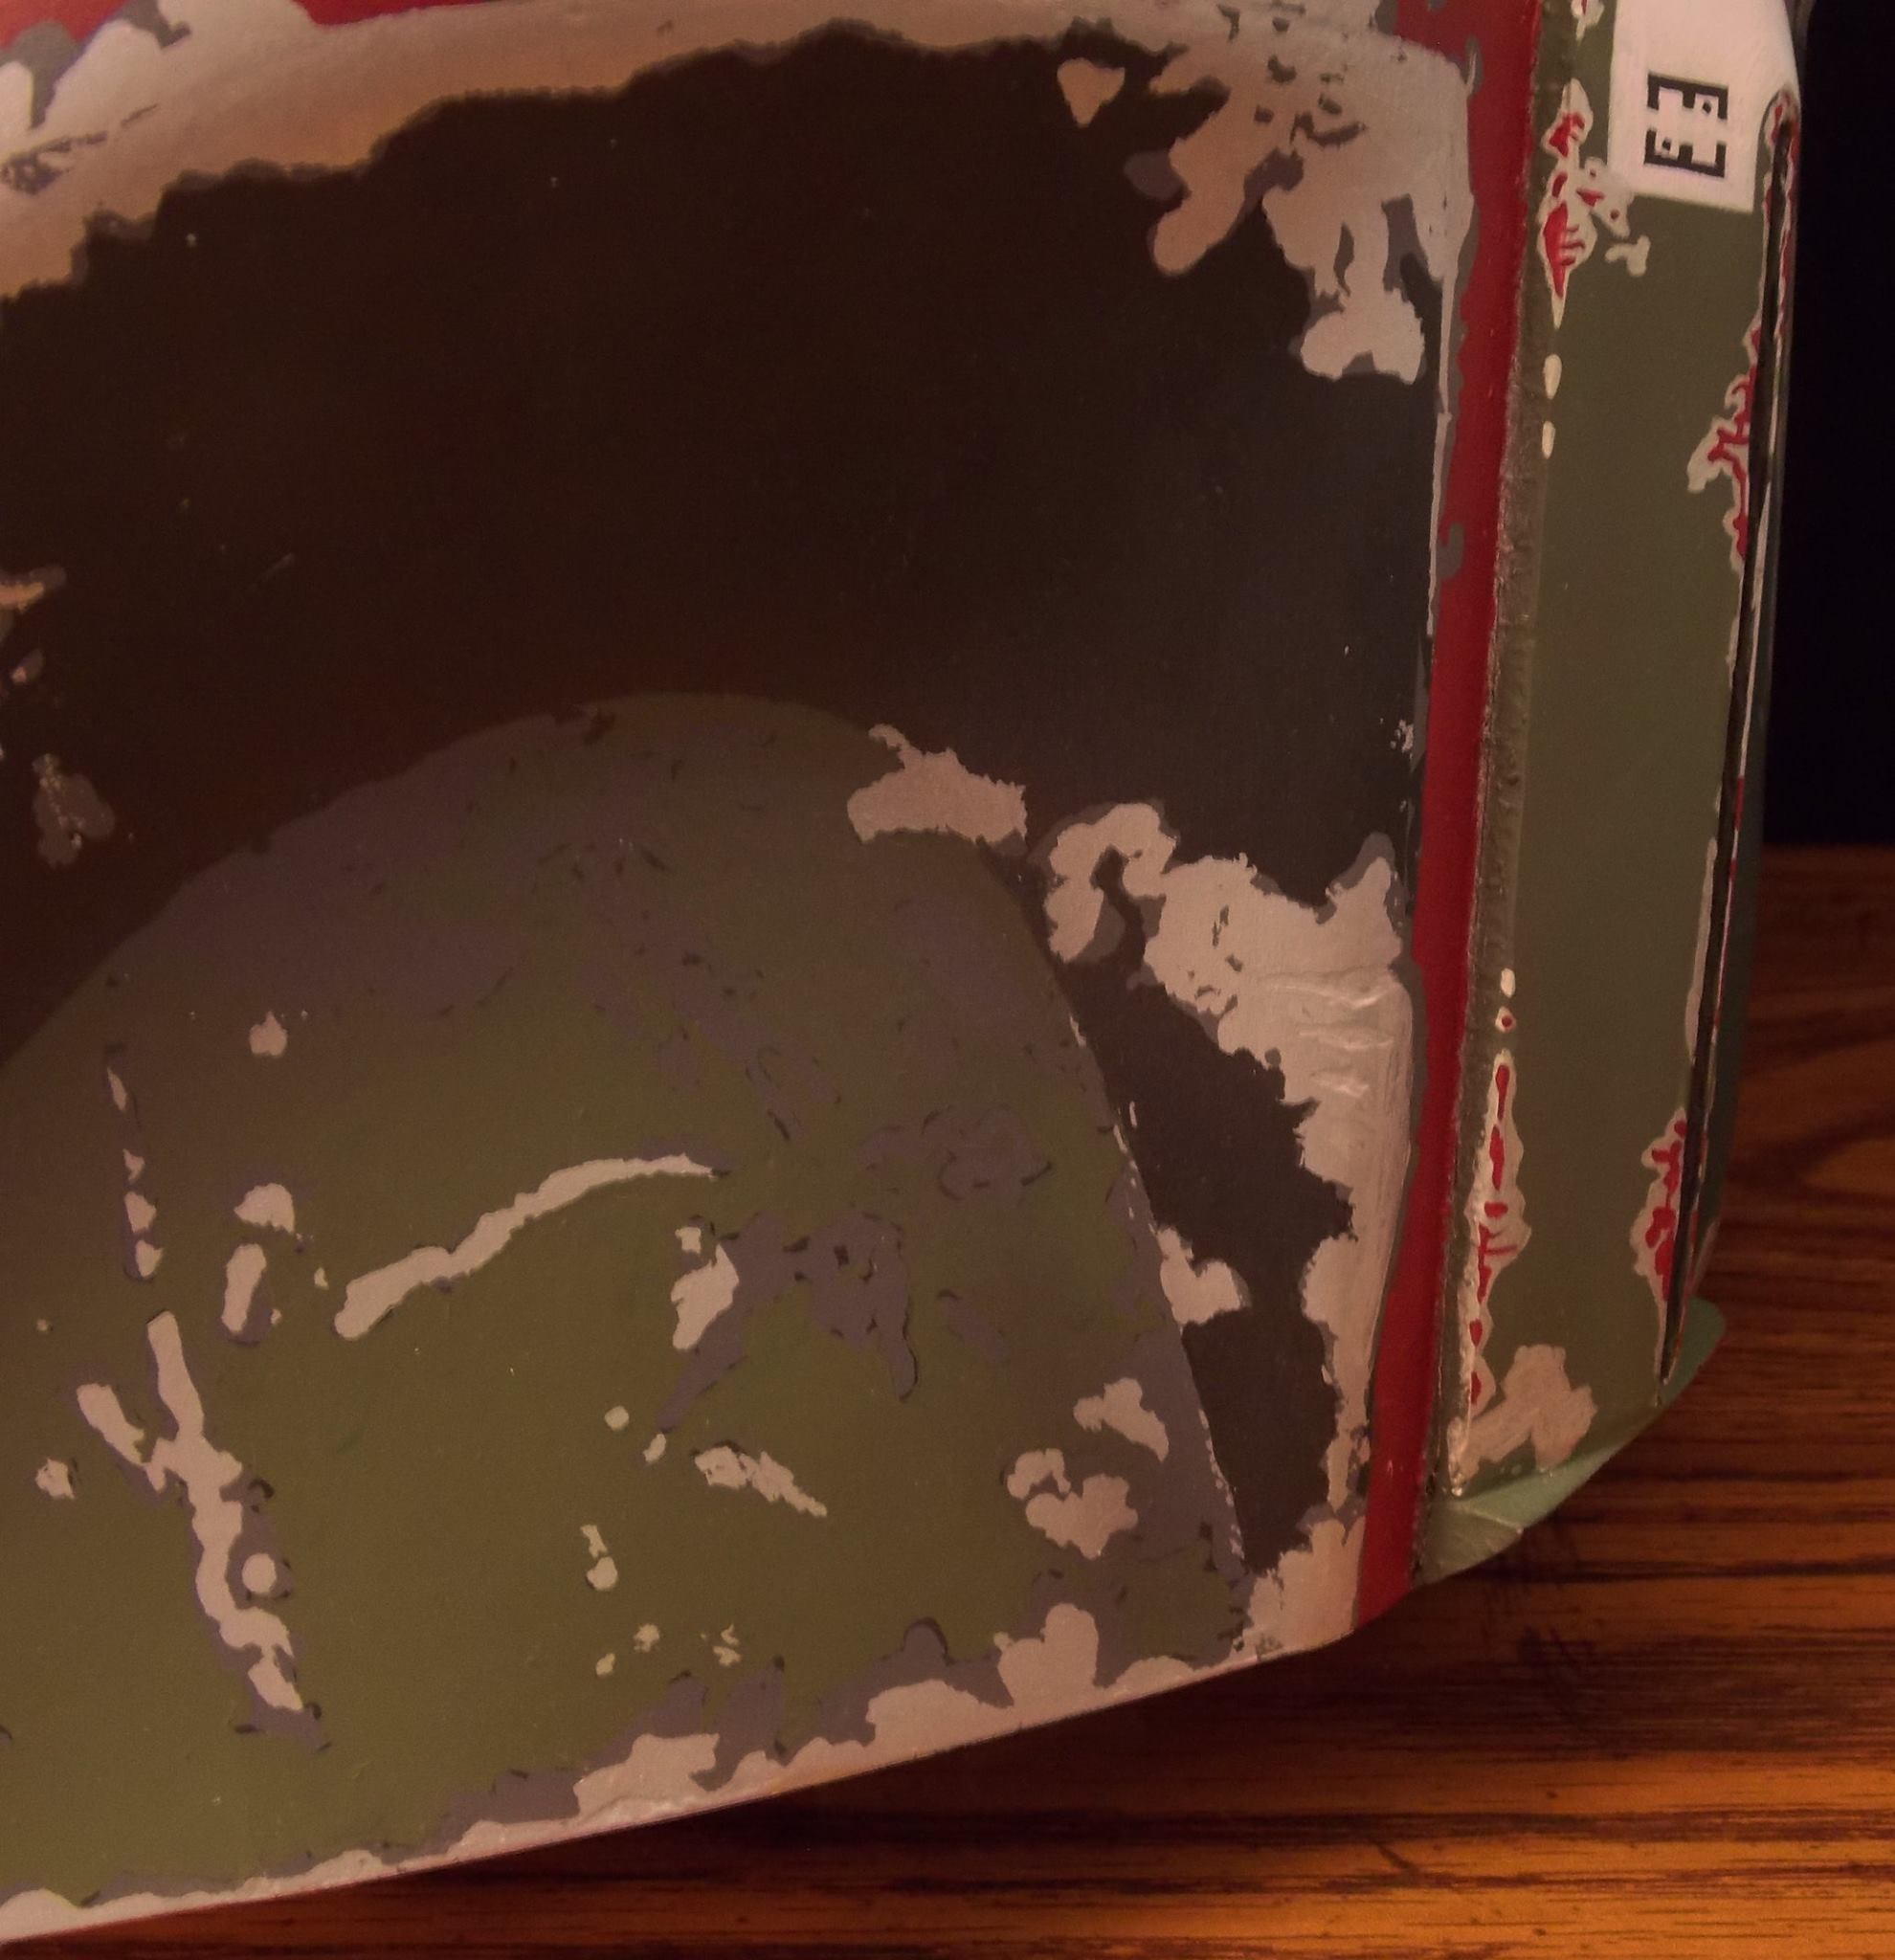
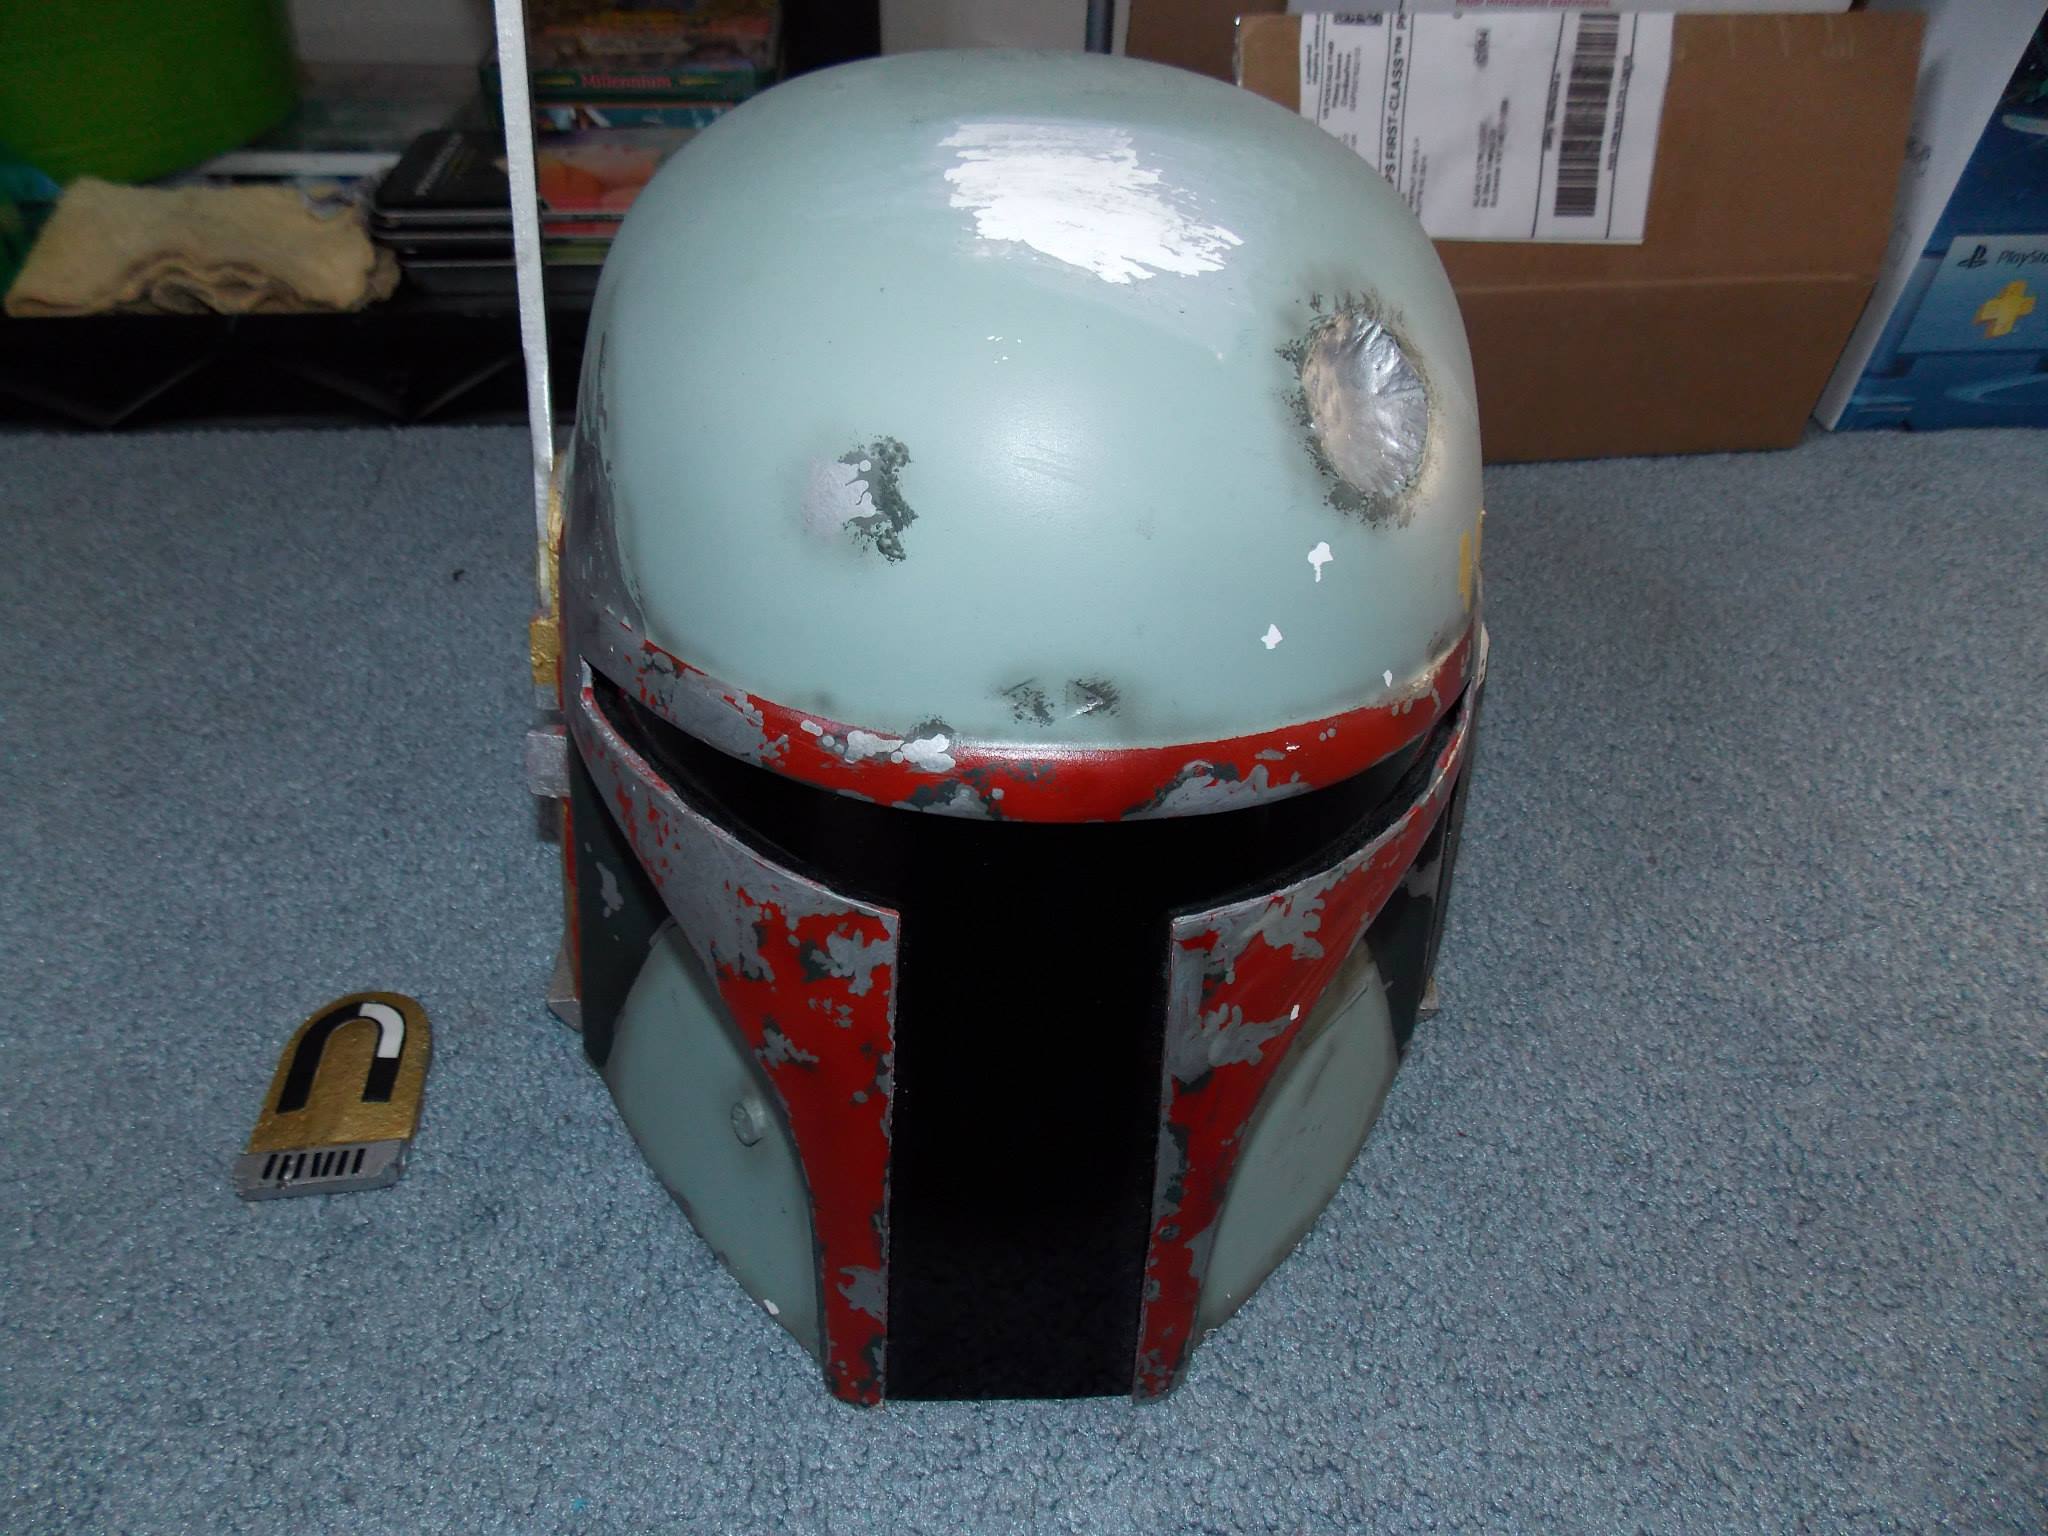
The entire helmet was sprayed stainless steel silver, and after following references from the dented helmet online group as well as YouTube footage of the movie itself; I began to slowly but surely repaint the helmet using a method I found a YouTuber incorporate to great effect.
The sections that needed to remain silver were masked off with liquid latex masking fluid and the surrounding color was airbrushed on top. After peeling away the masking fluid the silver underneath not only remained but left a tiny dip in level between both colors. More importantly, the silver was deeper than the colors placed on top which help create the illusion as well as make the appearance more faithful in the process. Then it was on to night after night of masking with the latex and airbrushing color after color, layer by layer, section by section.
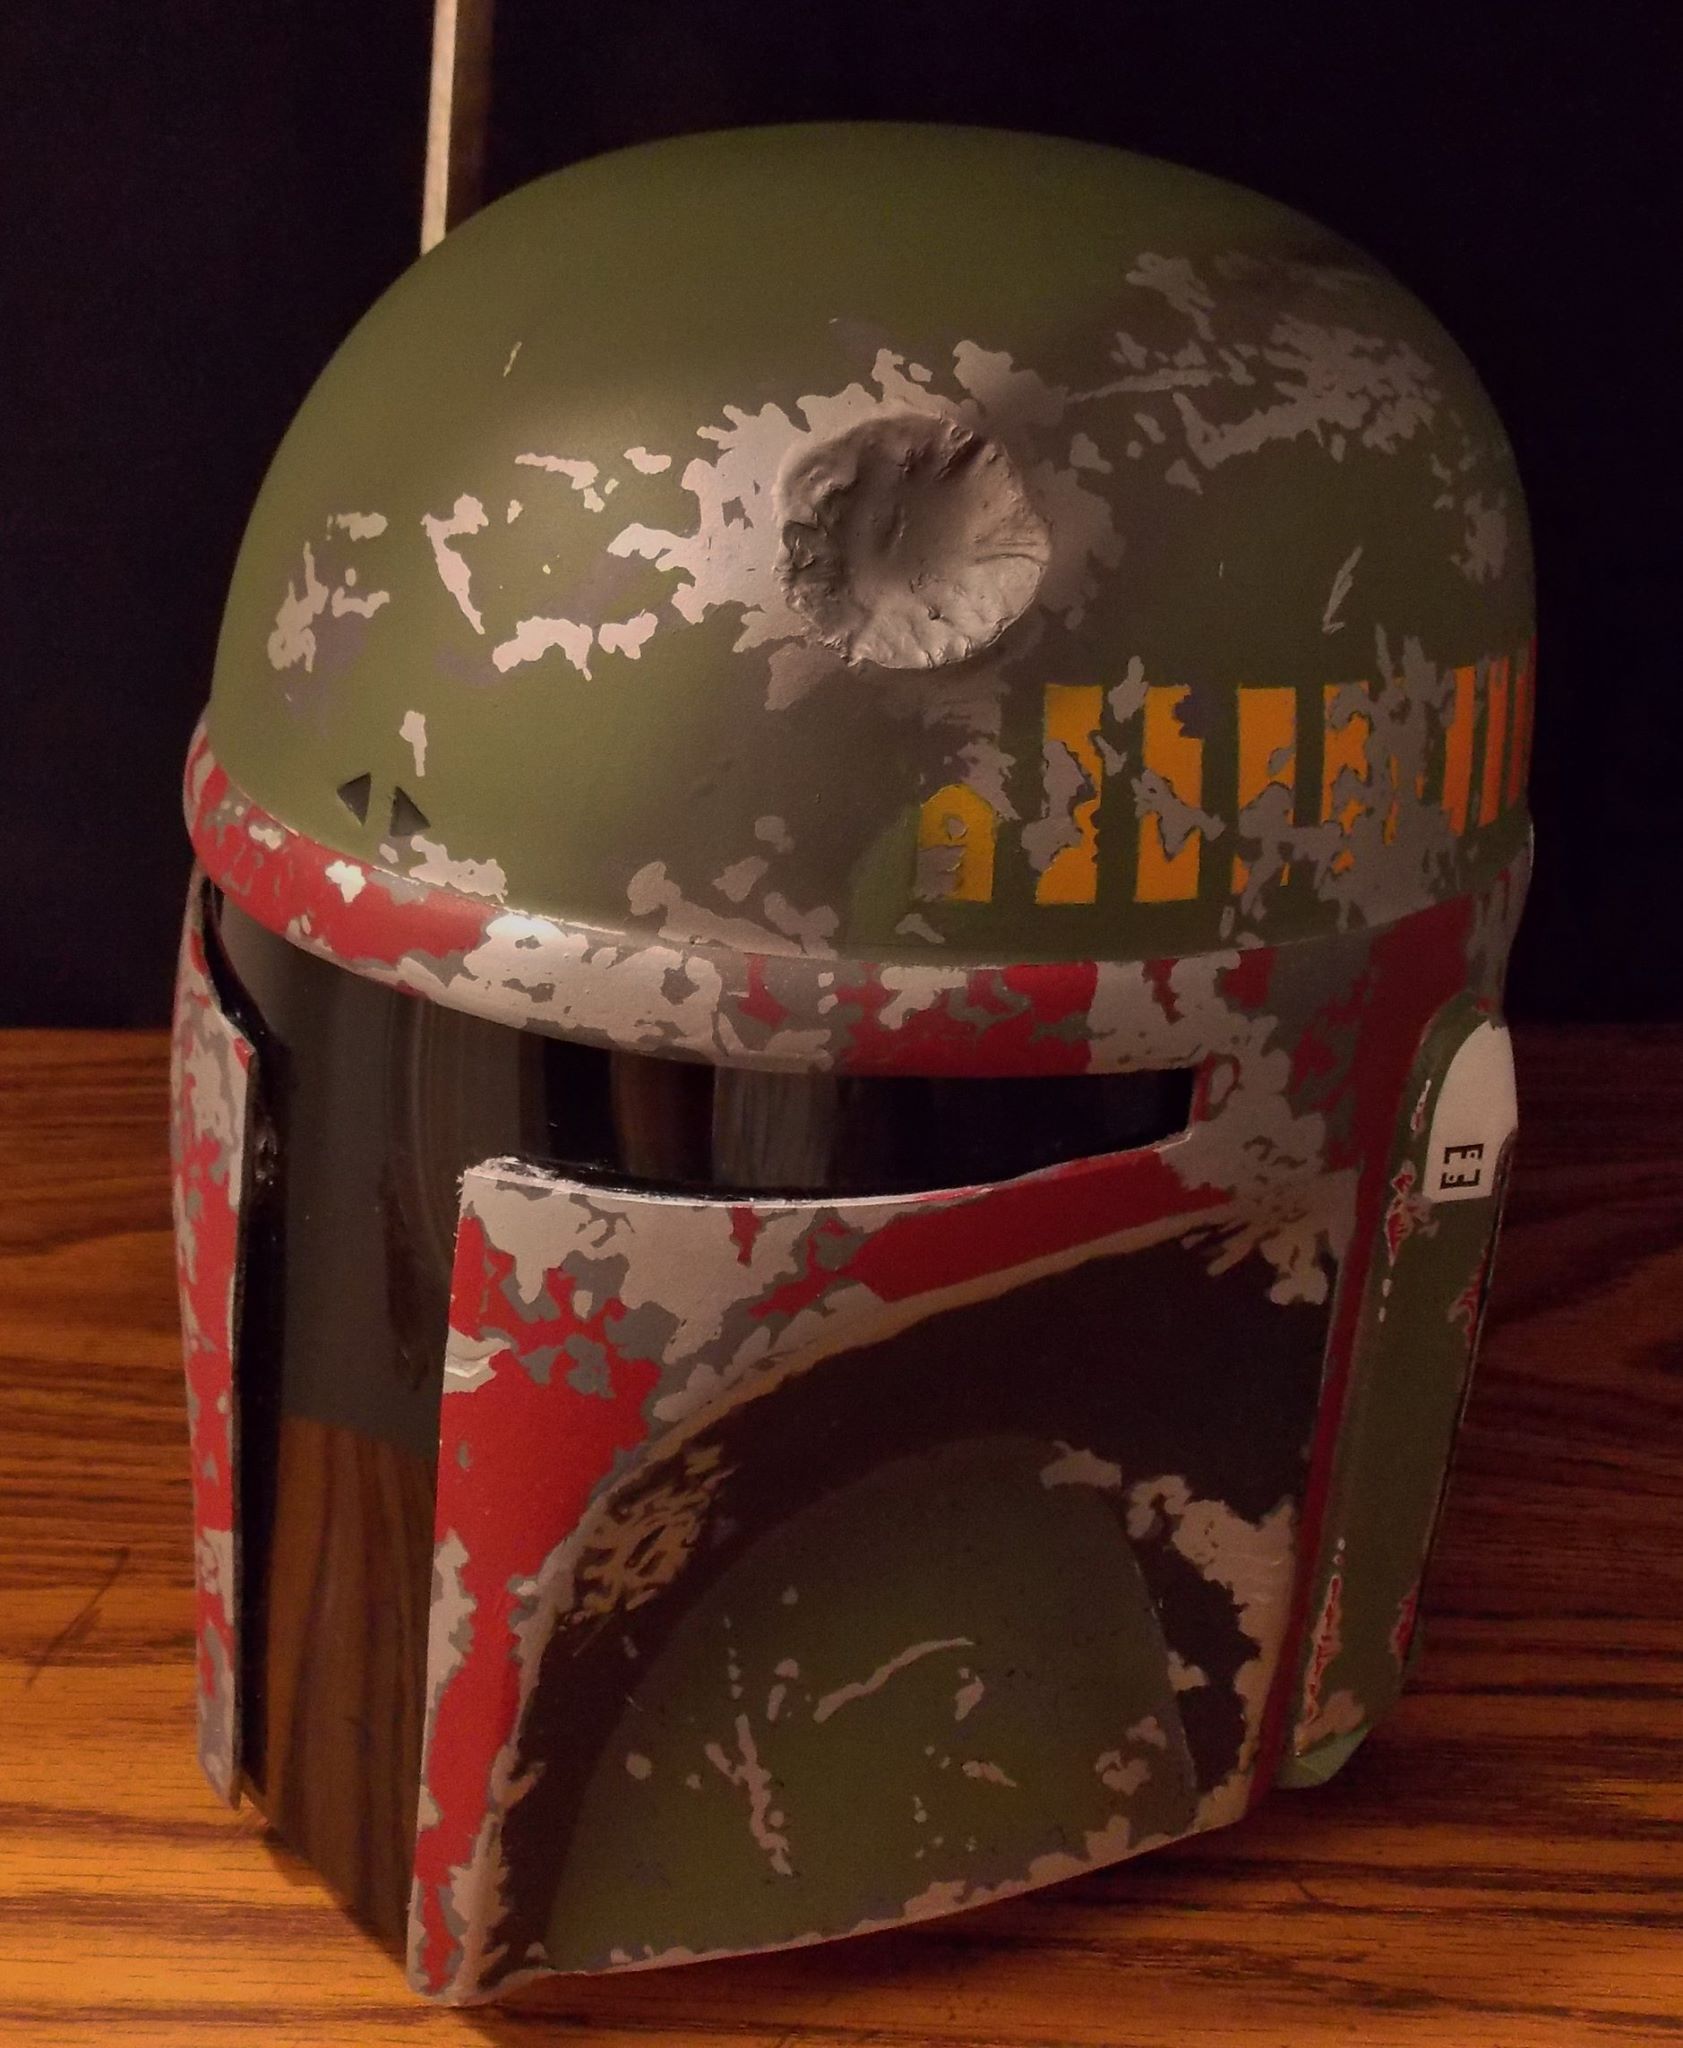
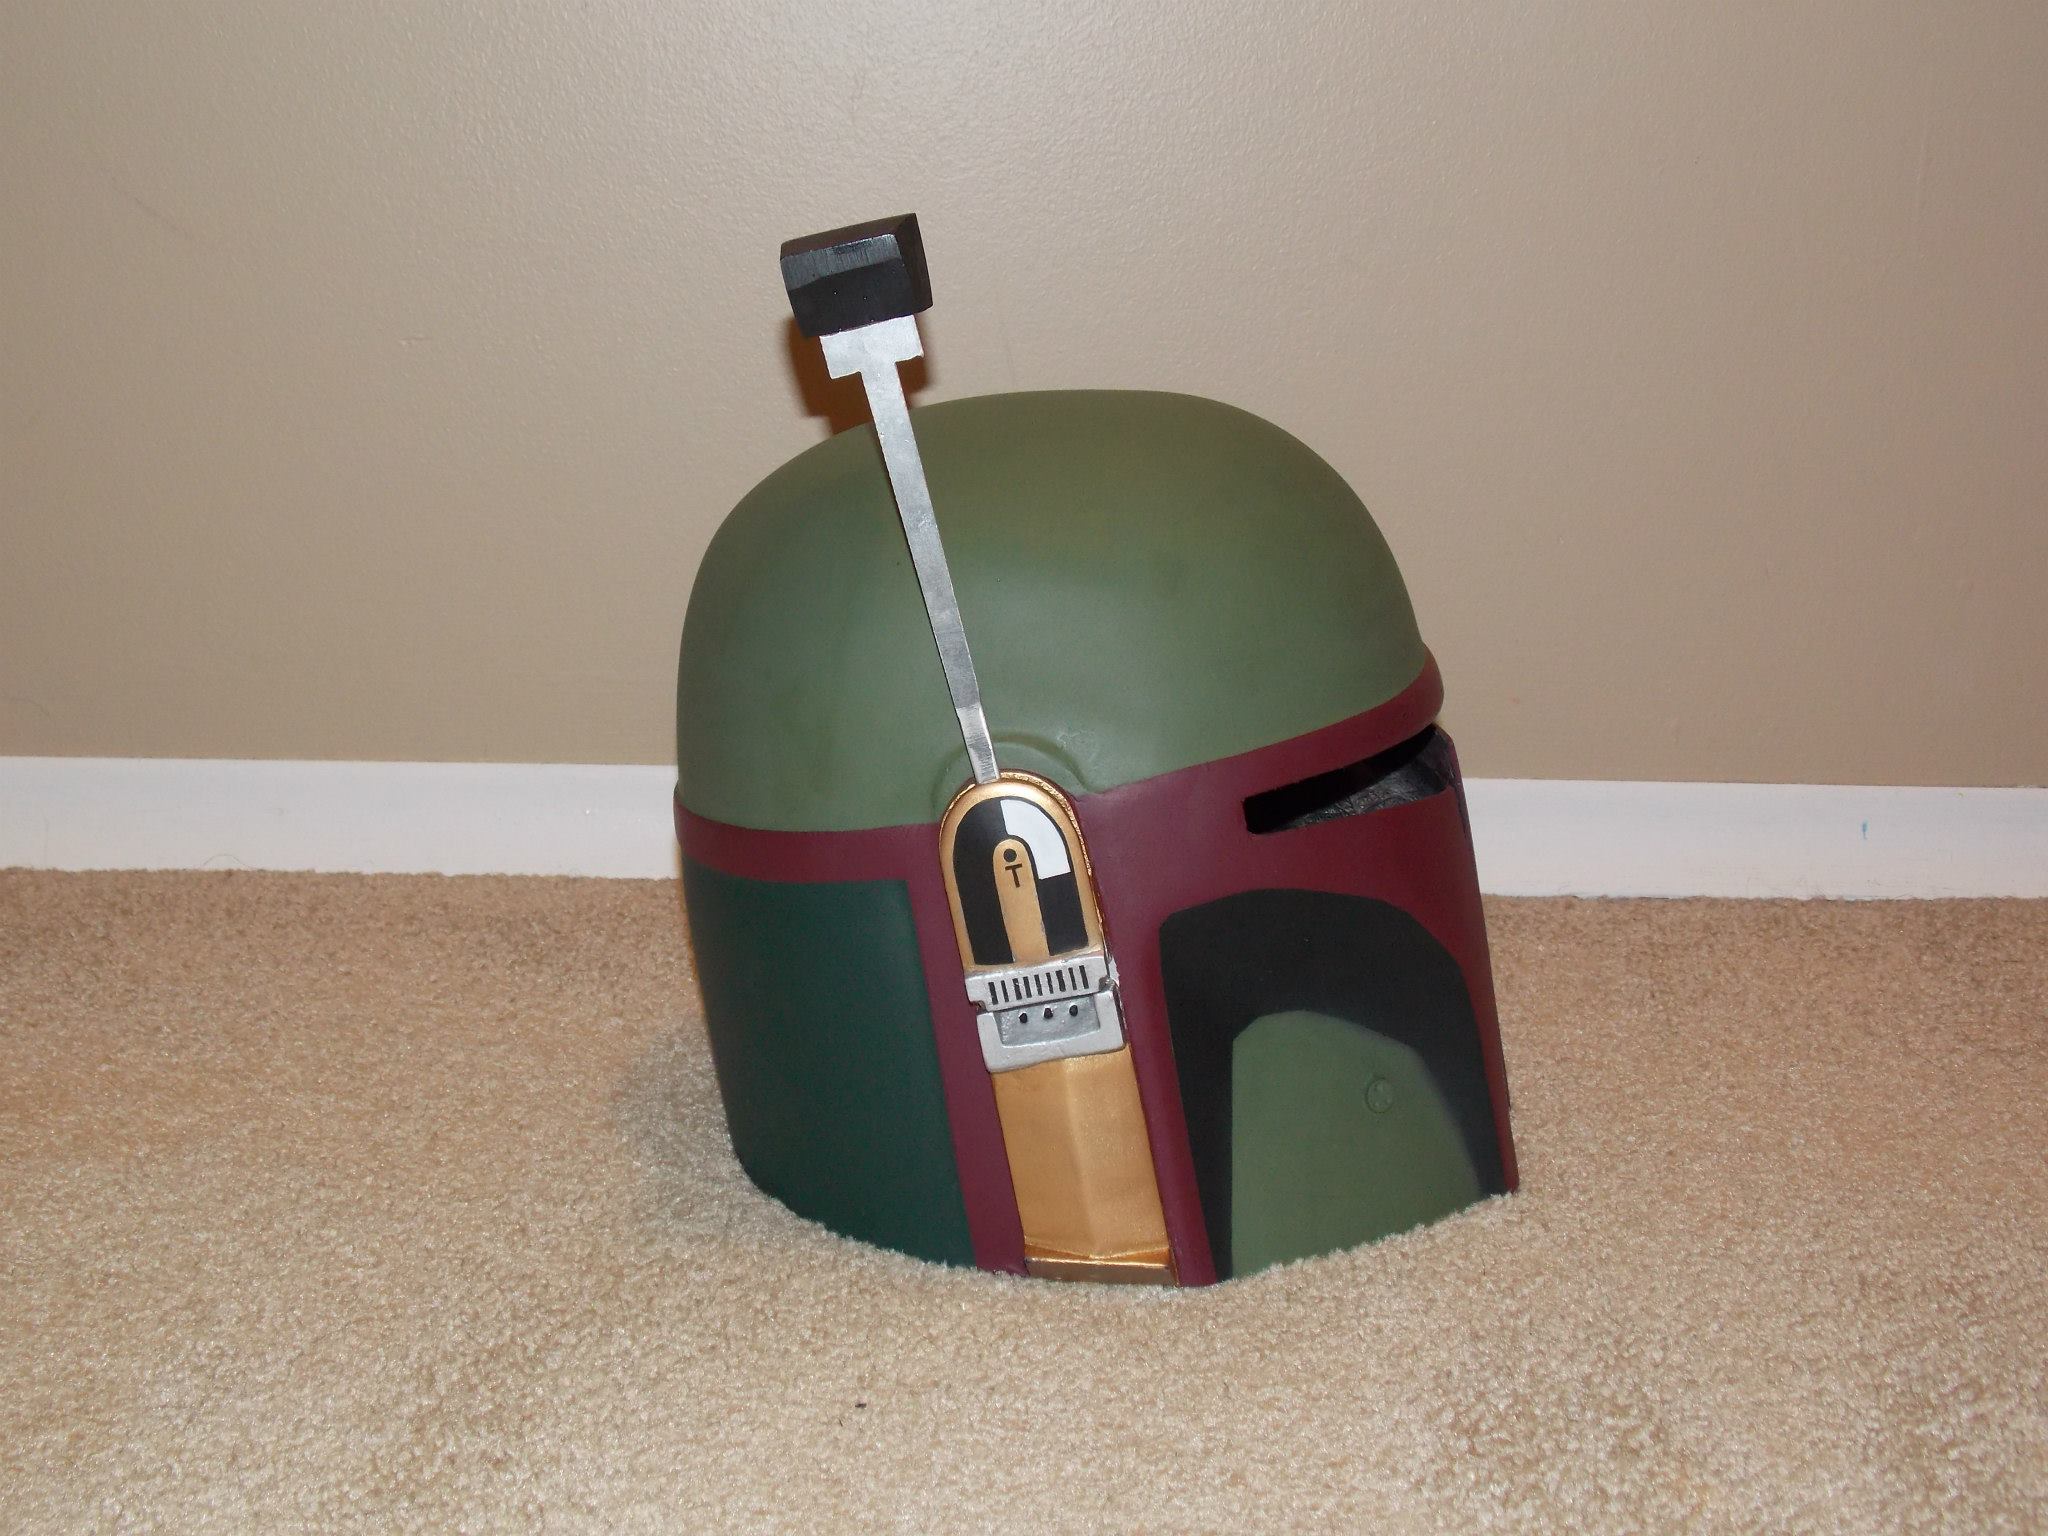
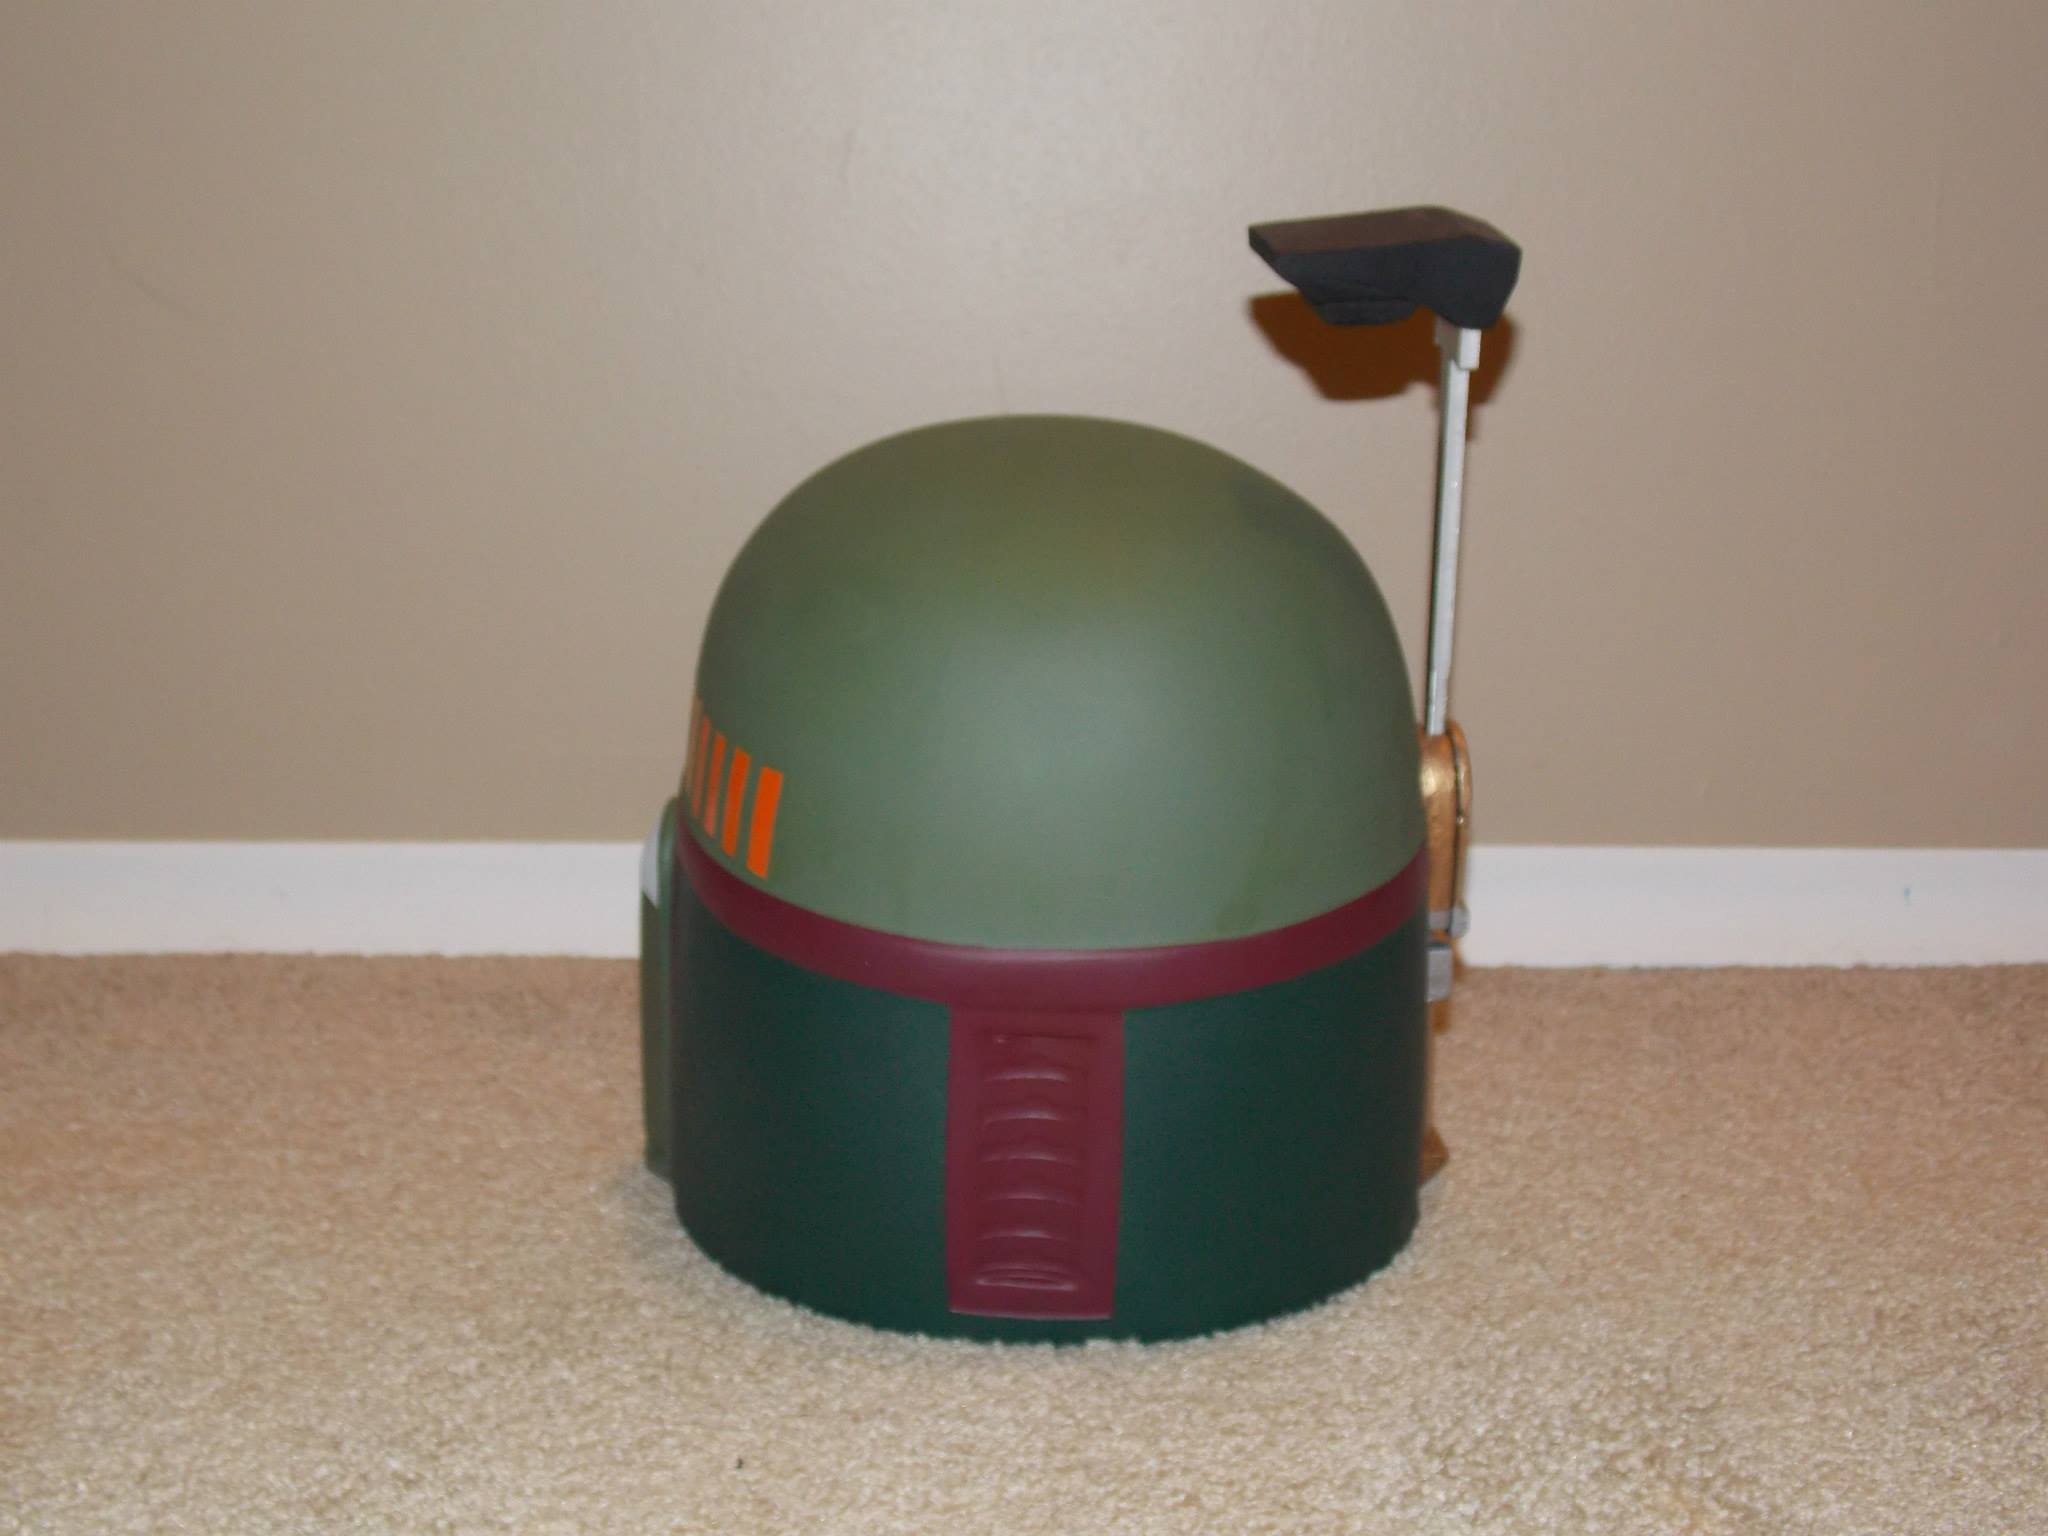
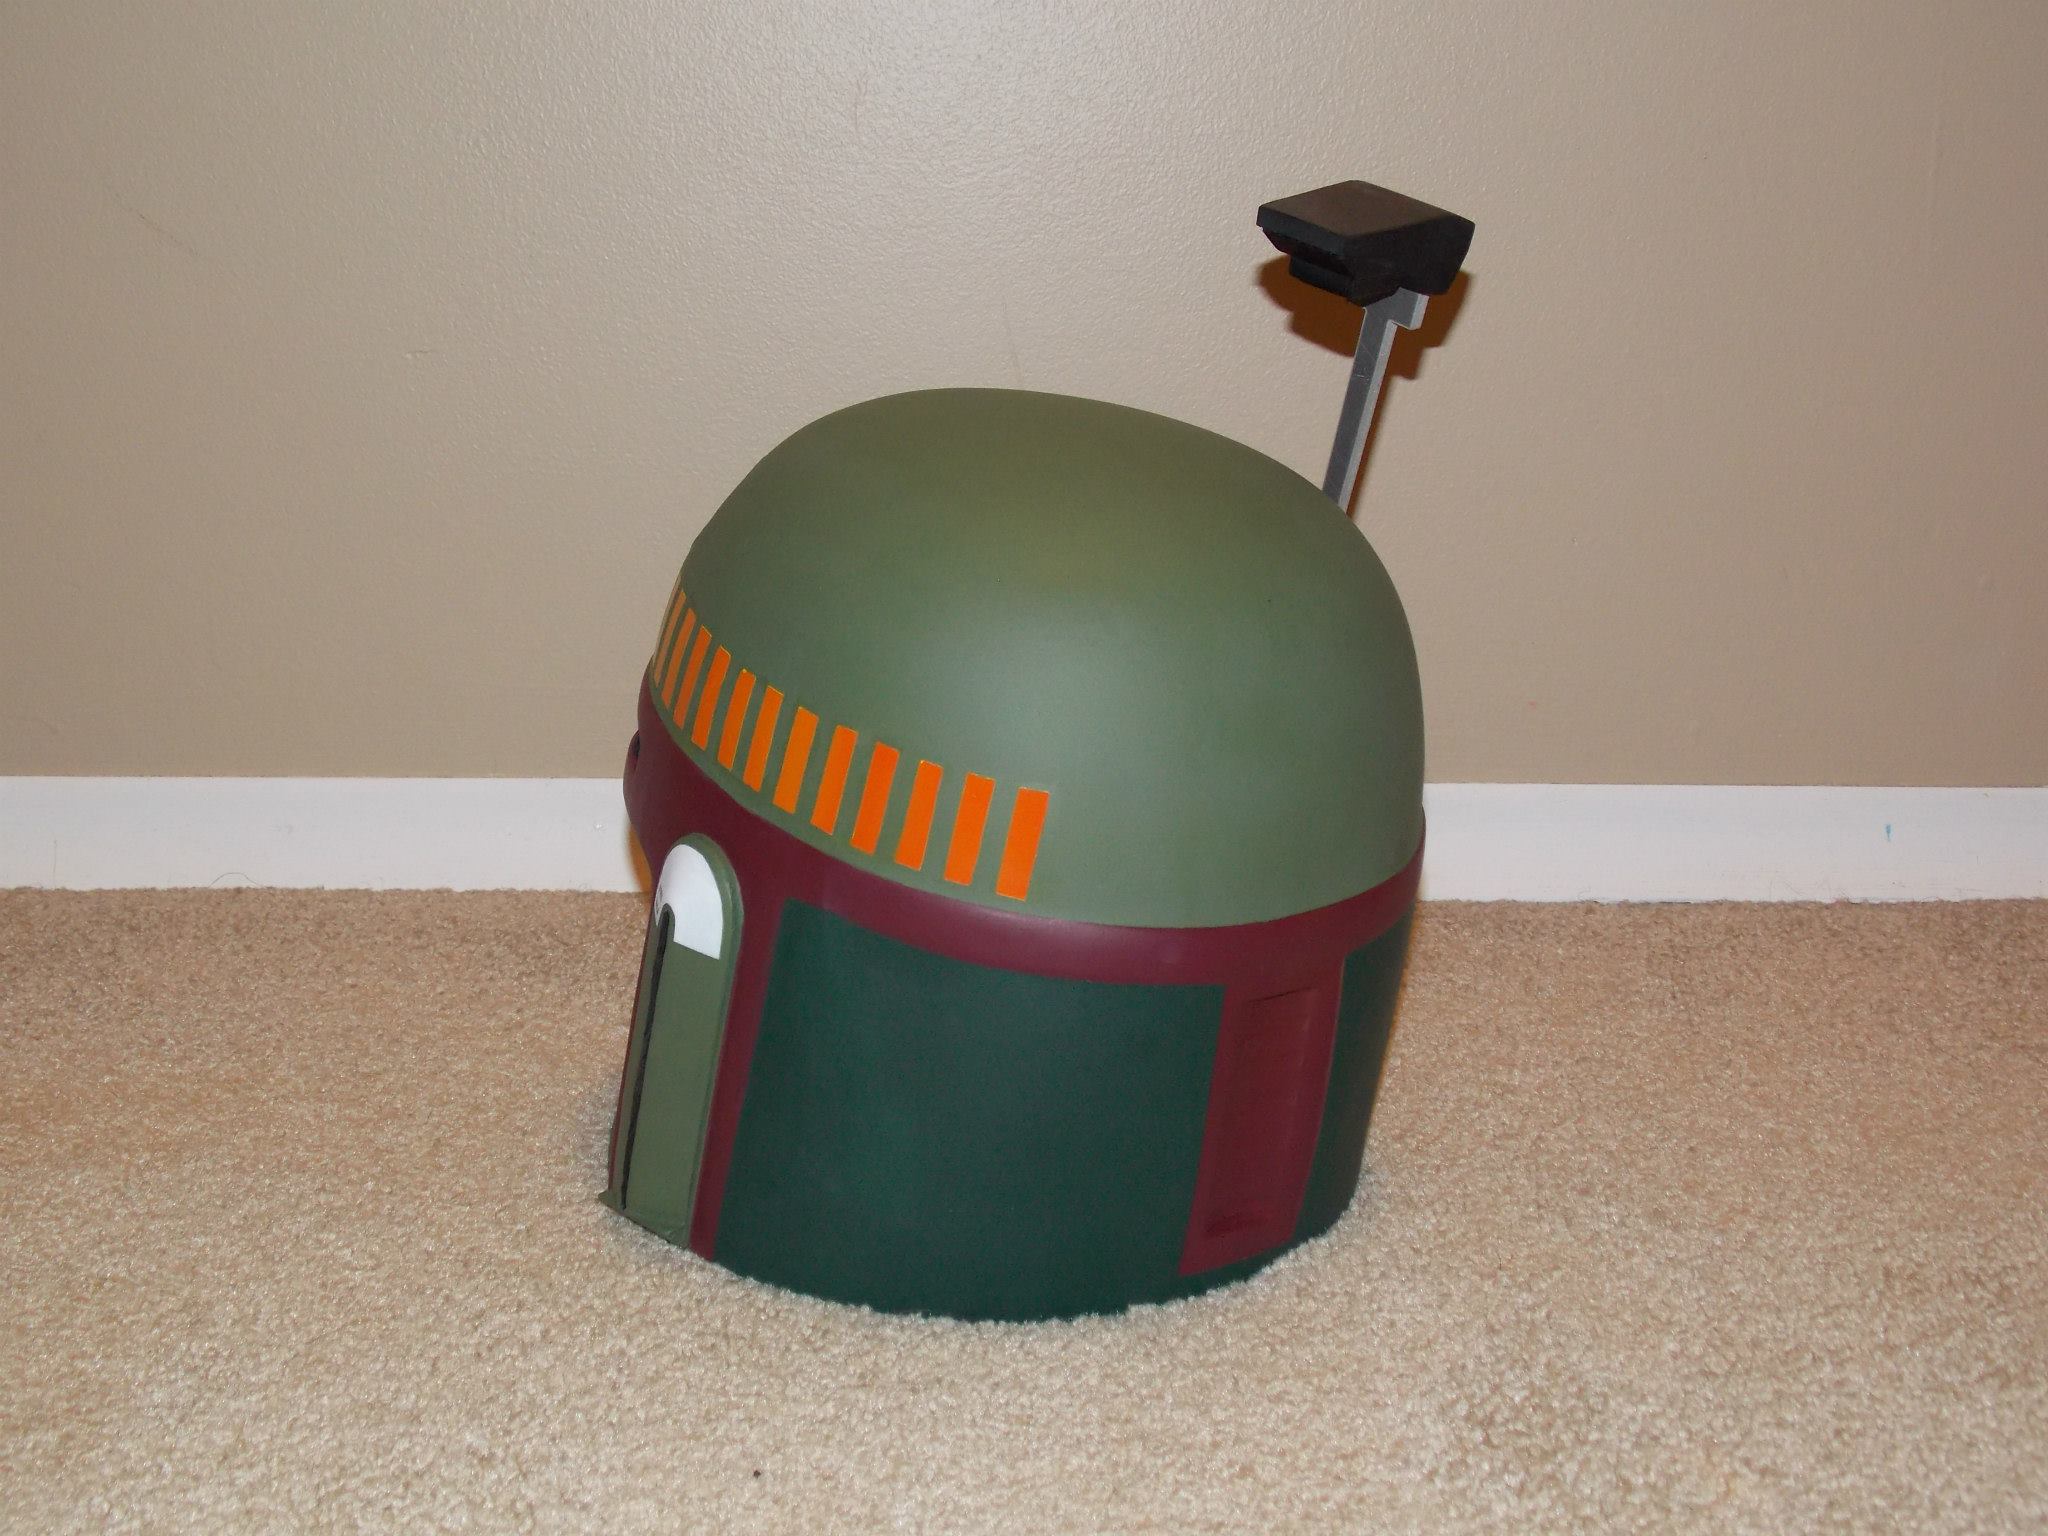
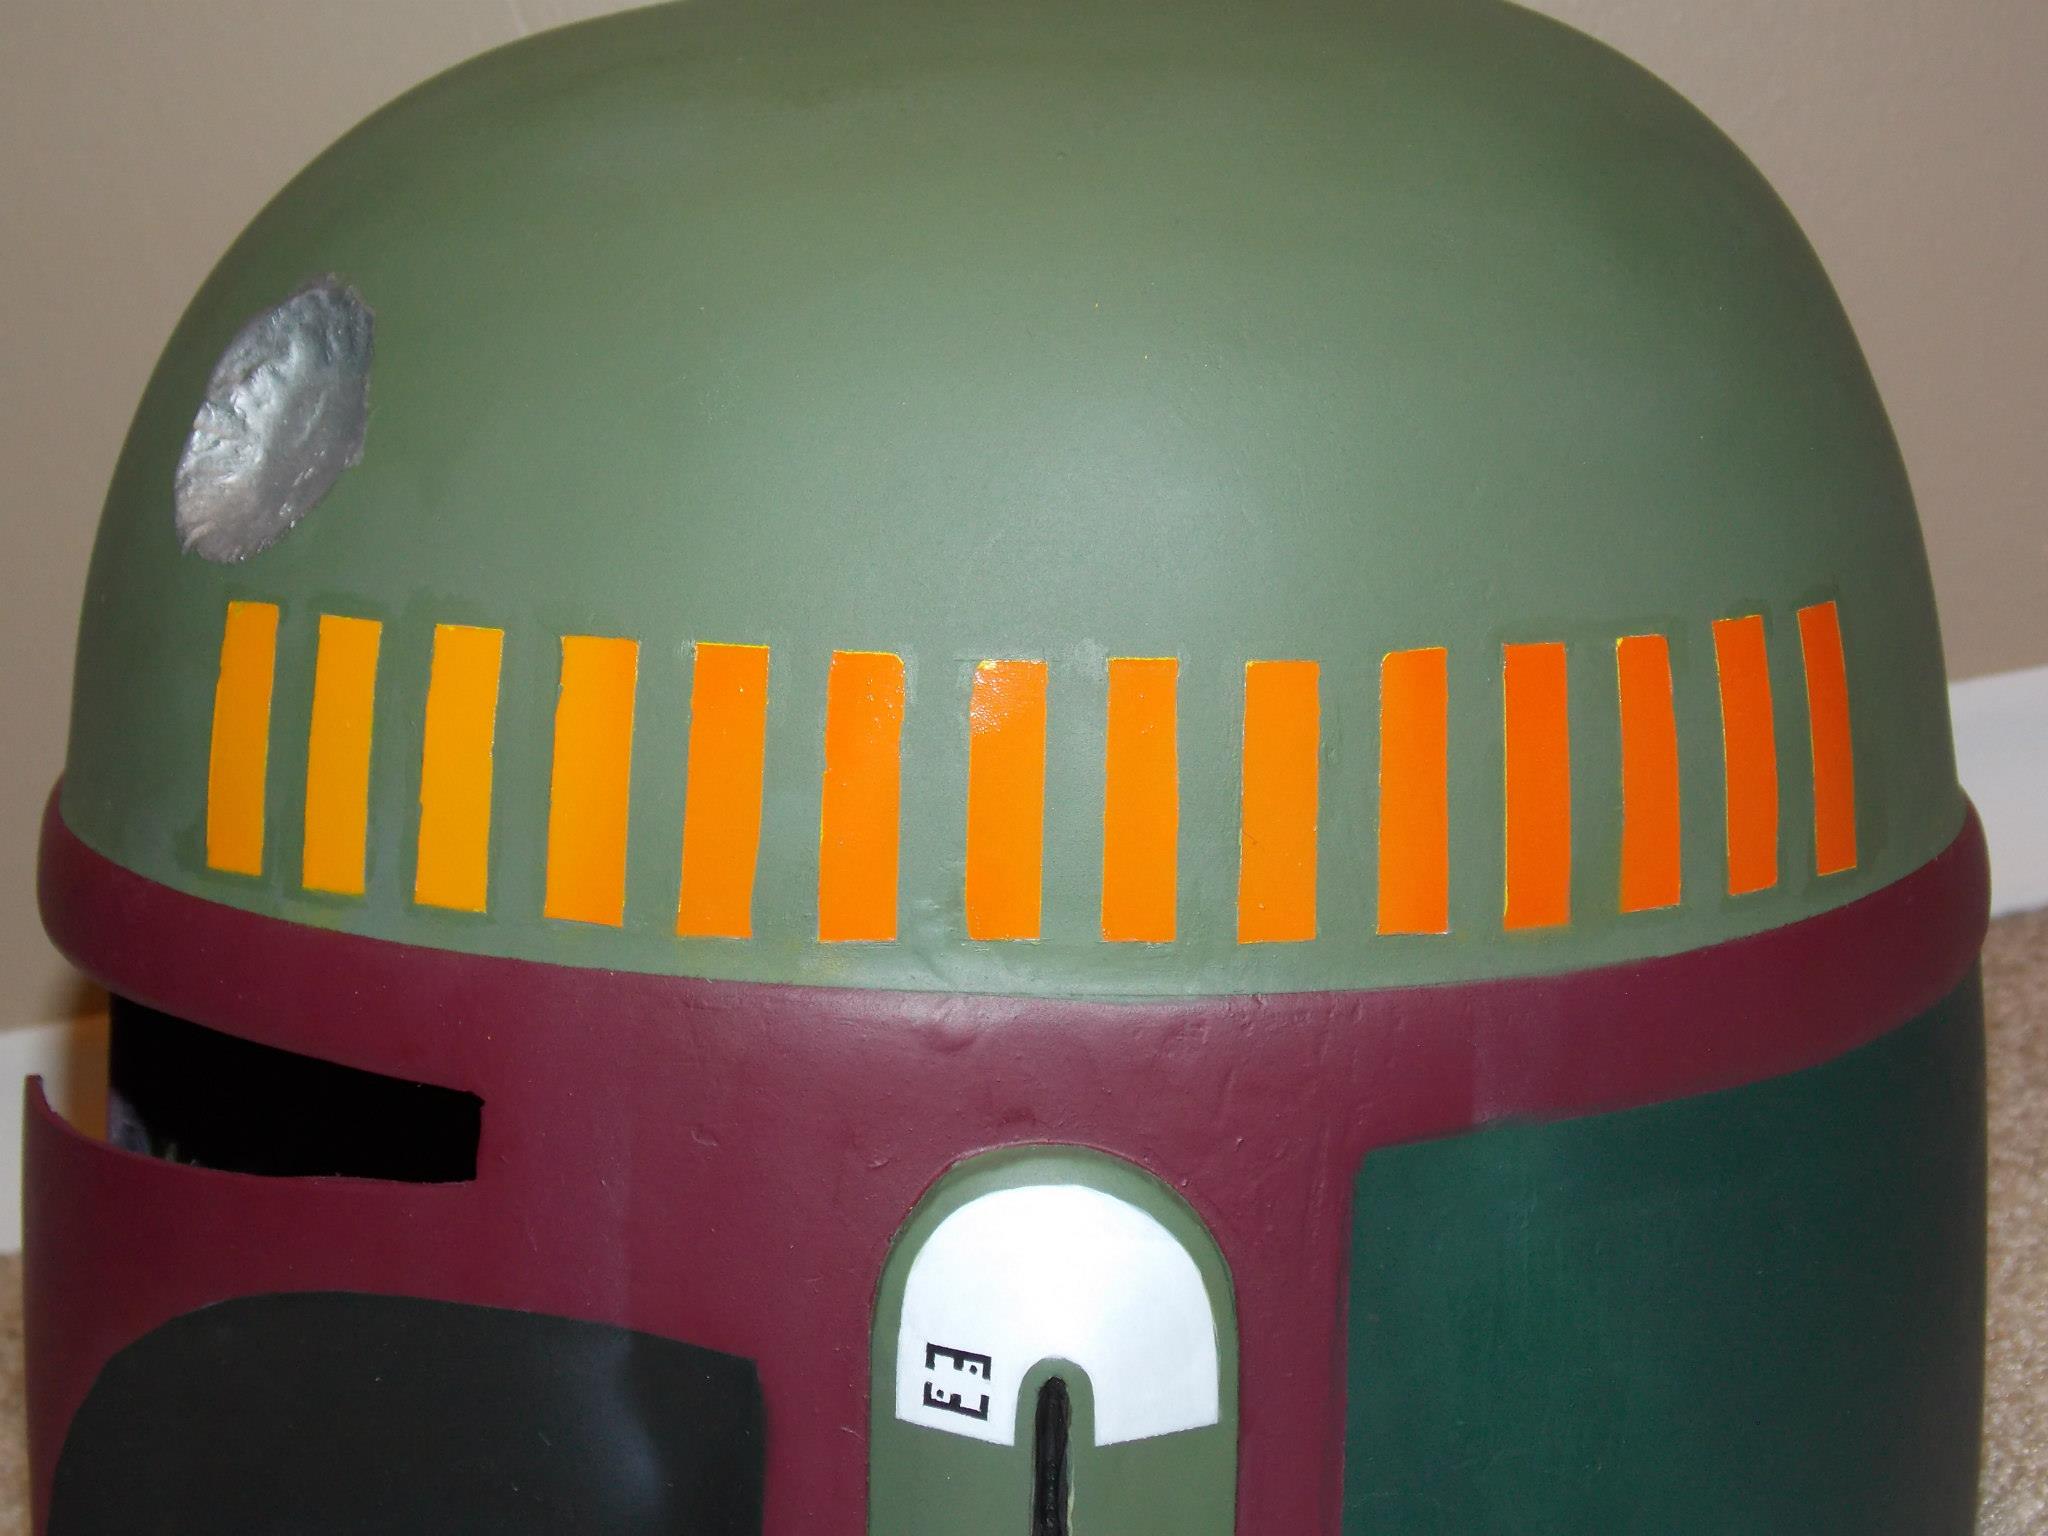
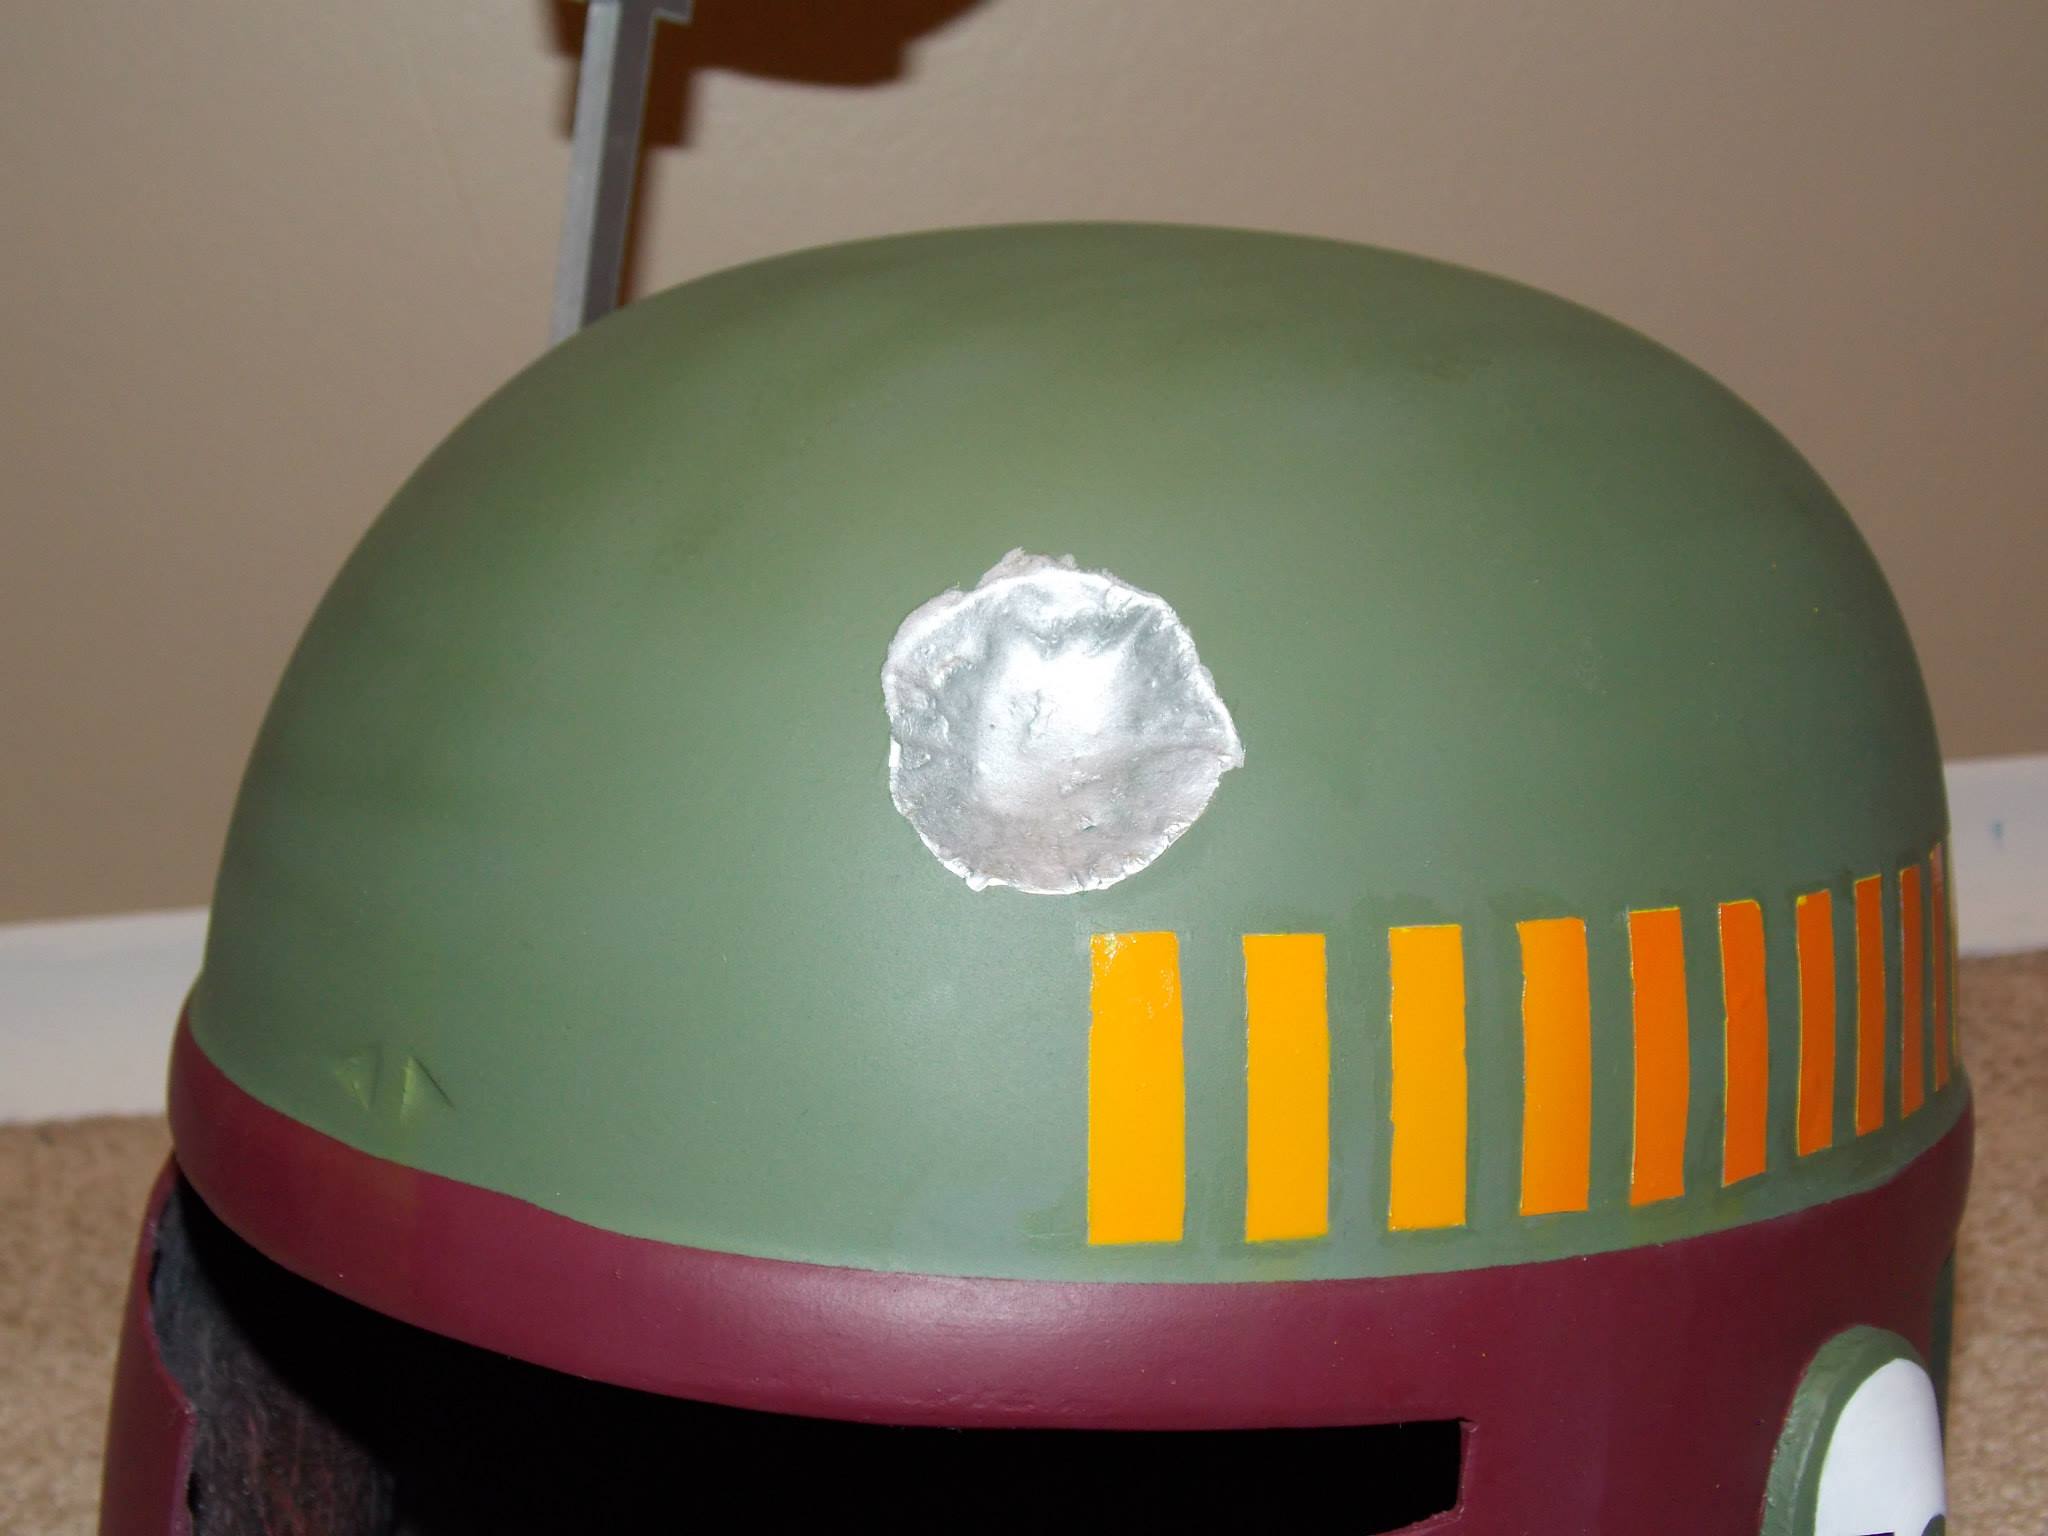
The original paint job was more of a winter green tone overall. I had picked out an olive drab green that matched the actual costume.
The recessed areas of the cheeks were painted with a dark green mixed with just enough black to blur the line between the two colors.
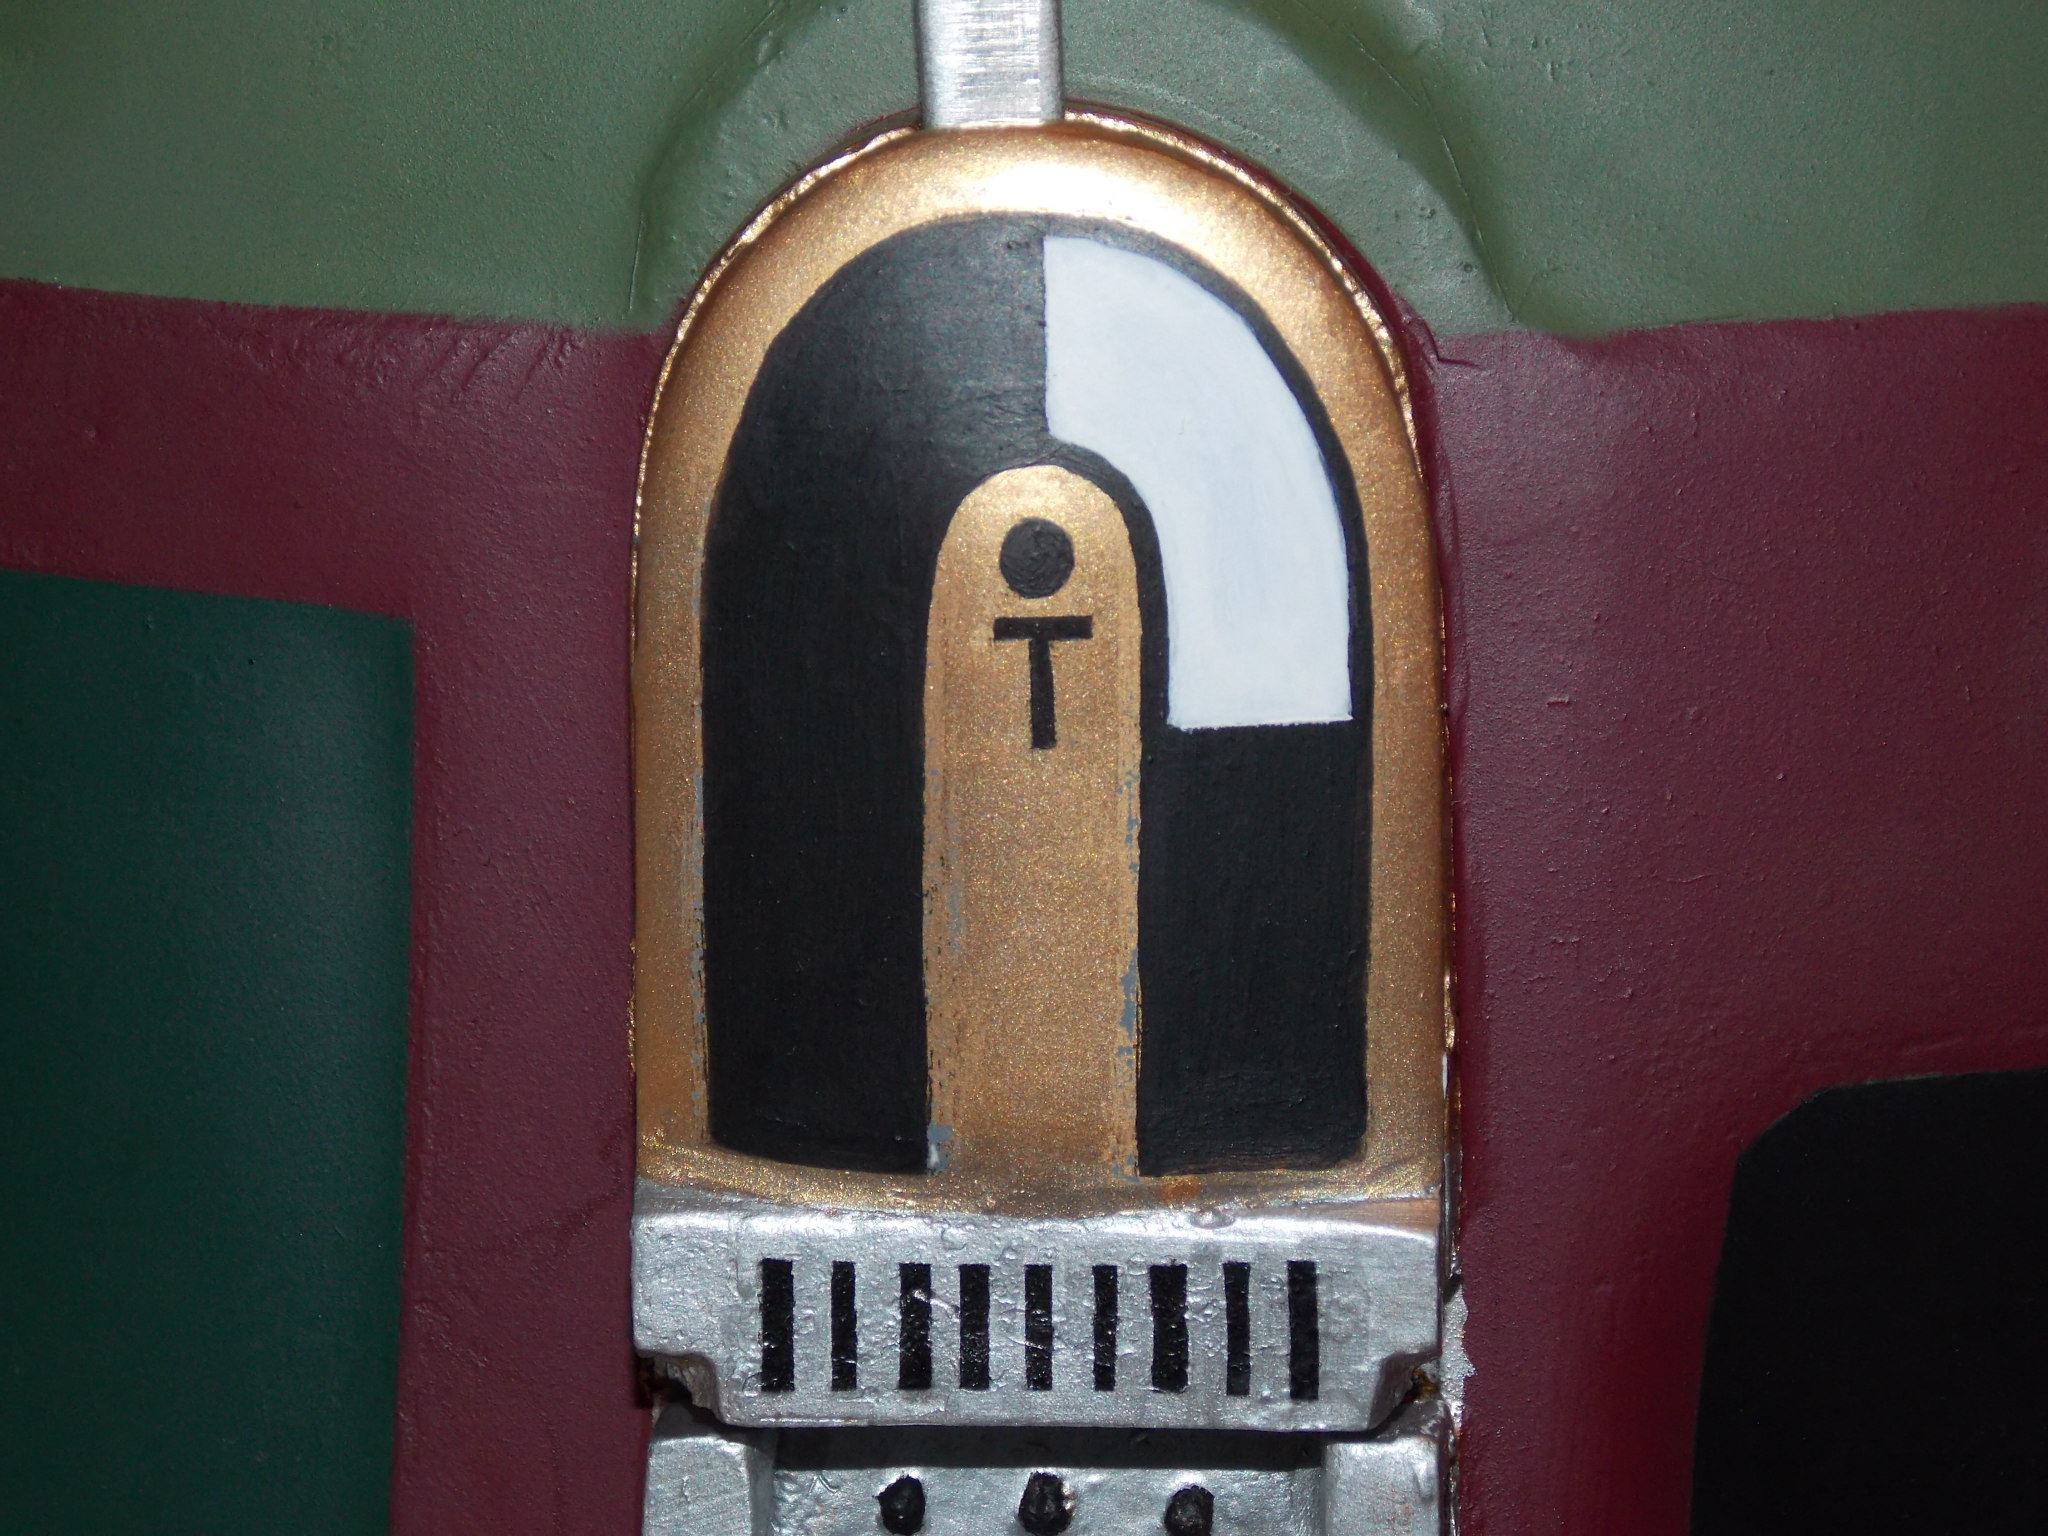
The right ear was airbrushed with a soft gold and the decals were hand painted onto the appropriate locations for both ears.
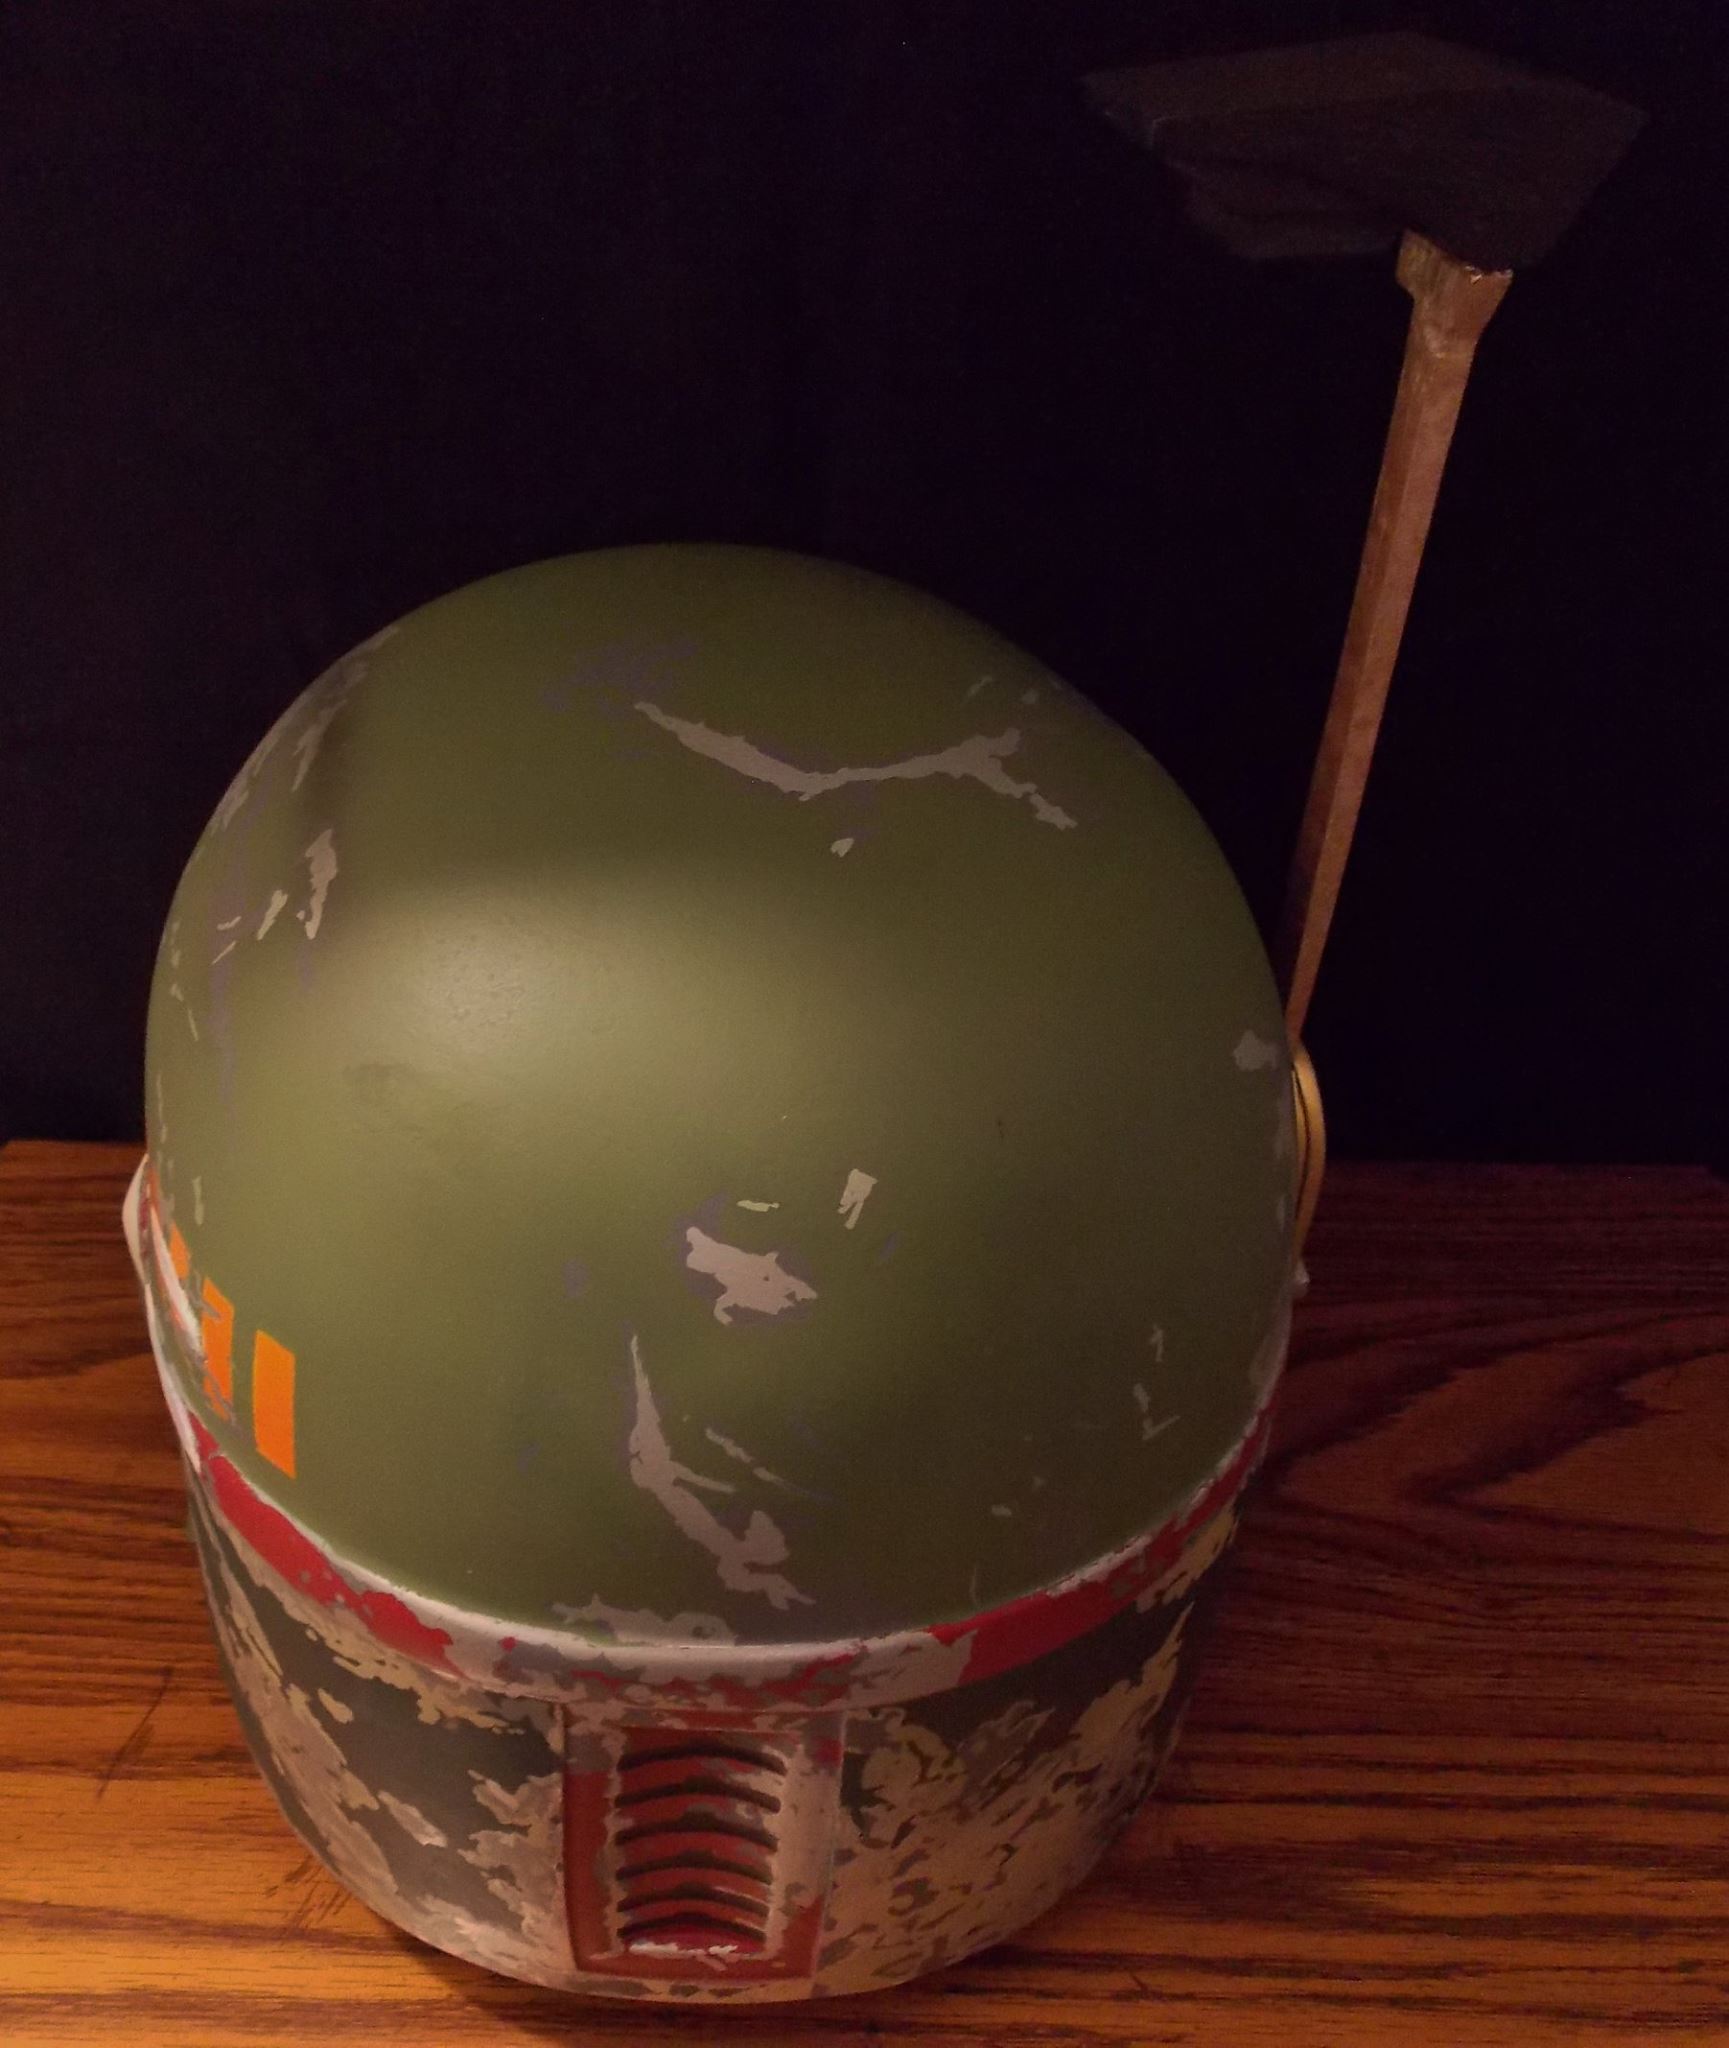
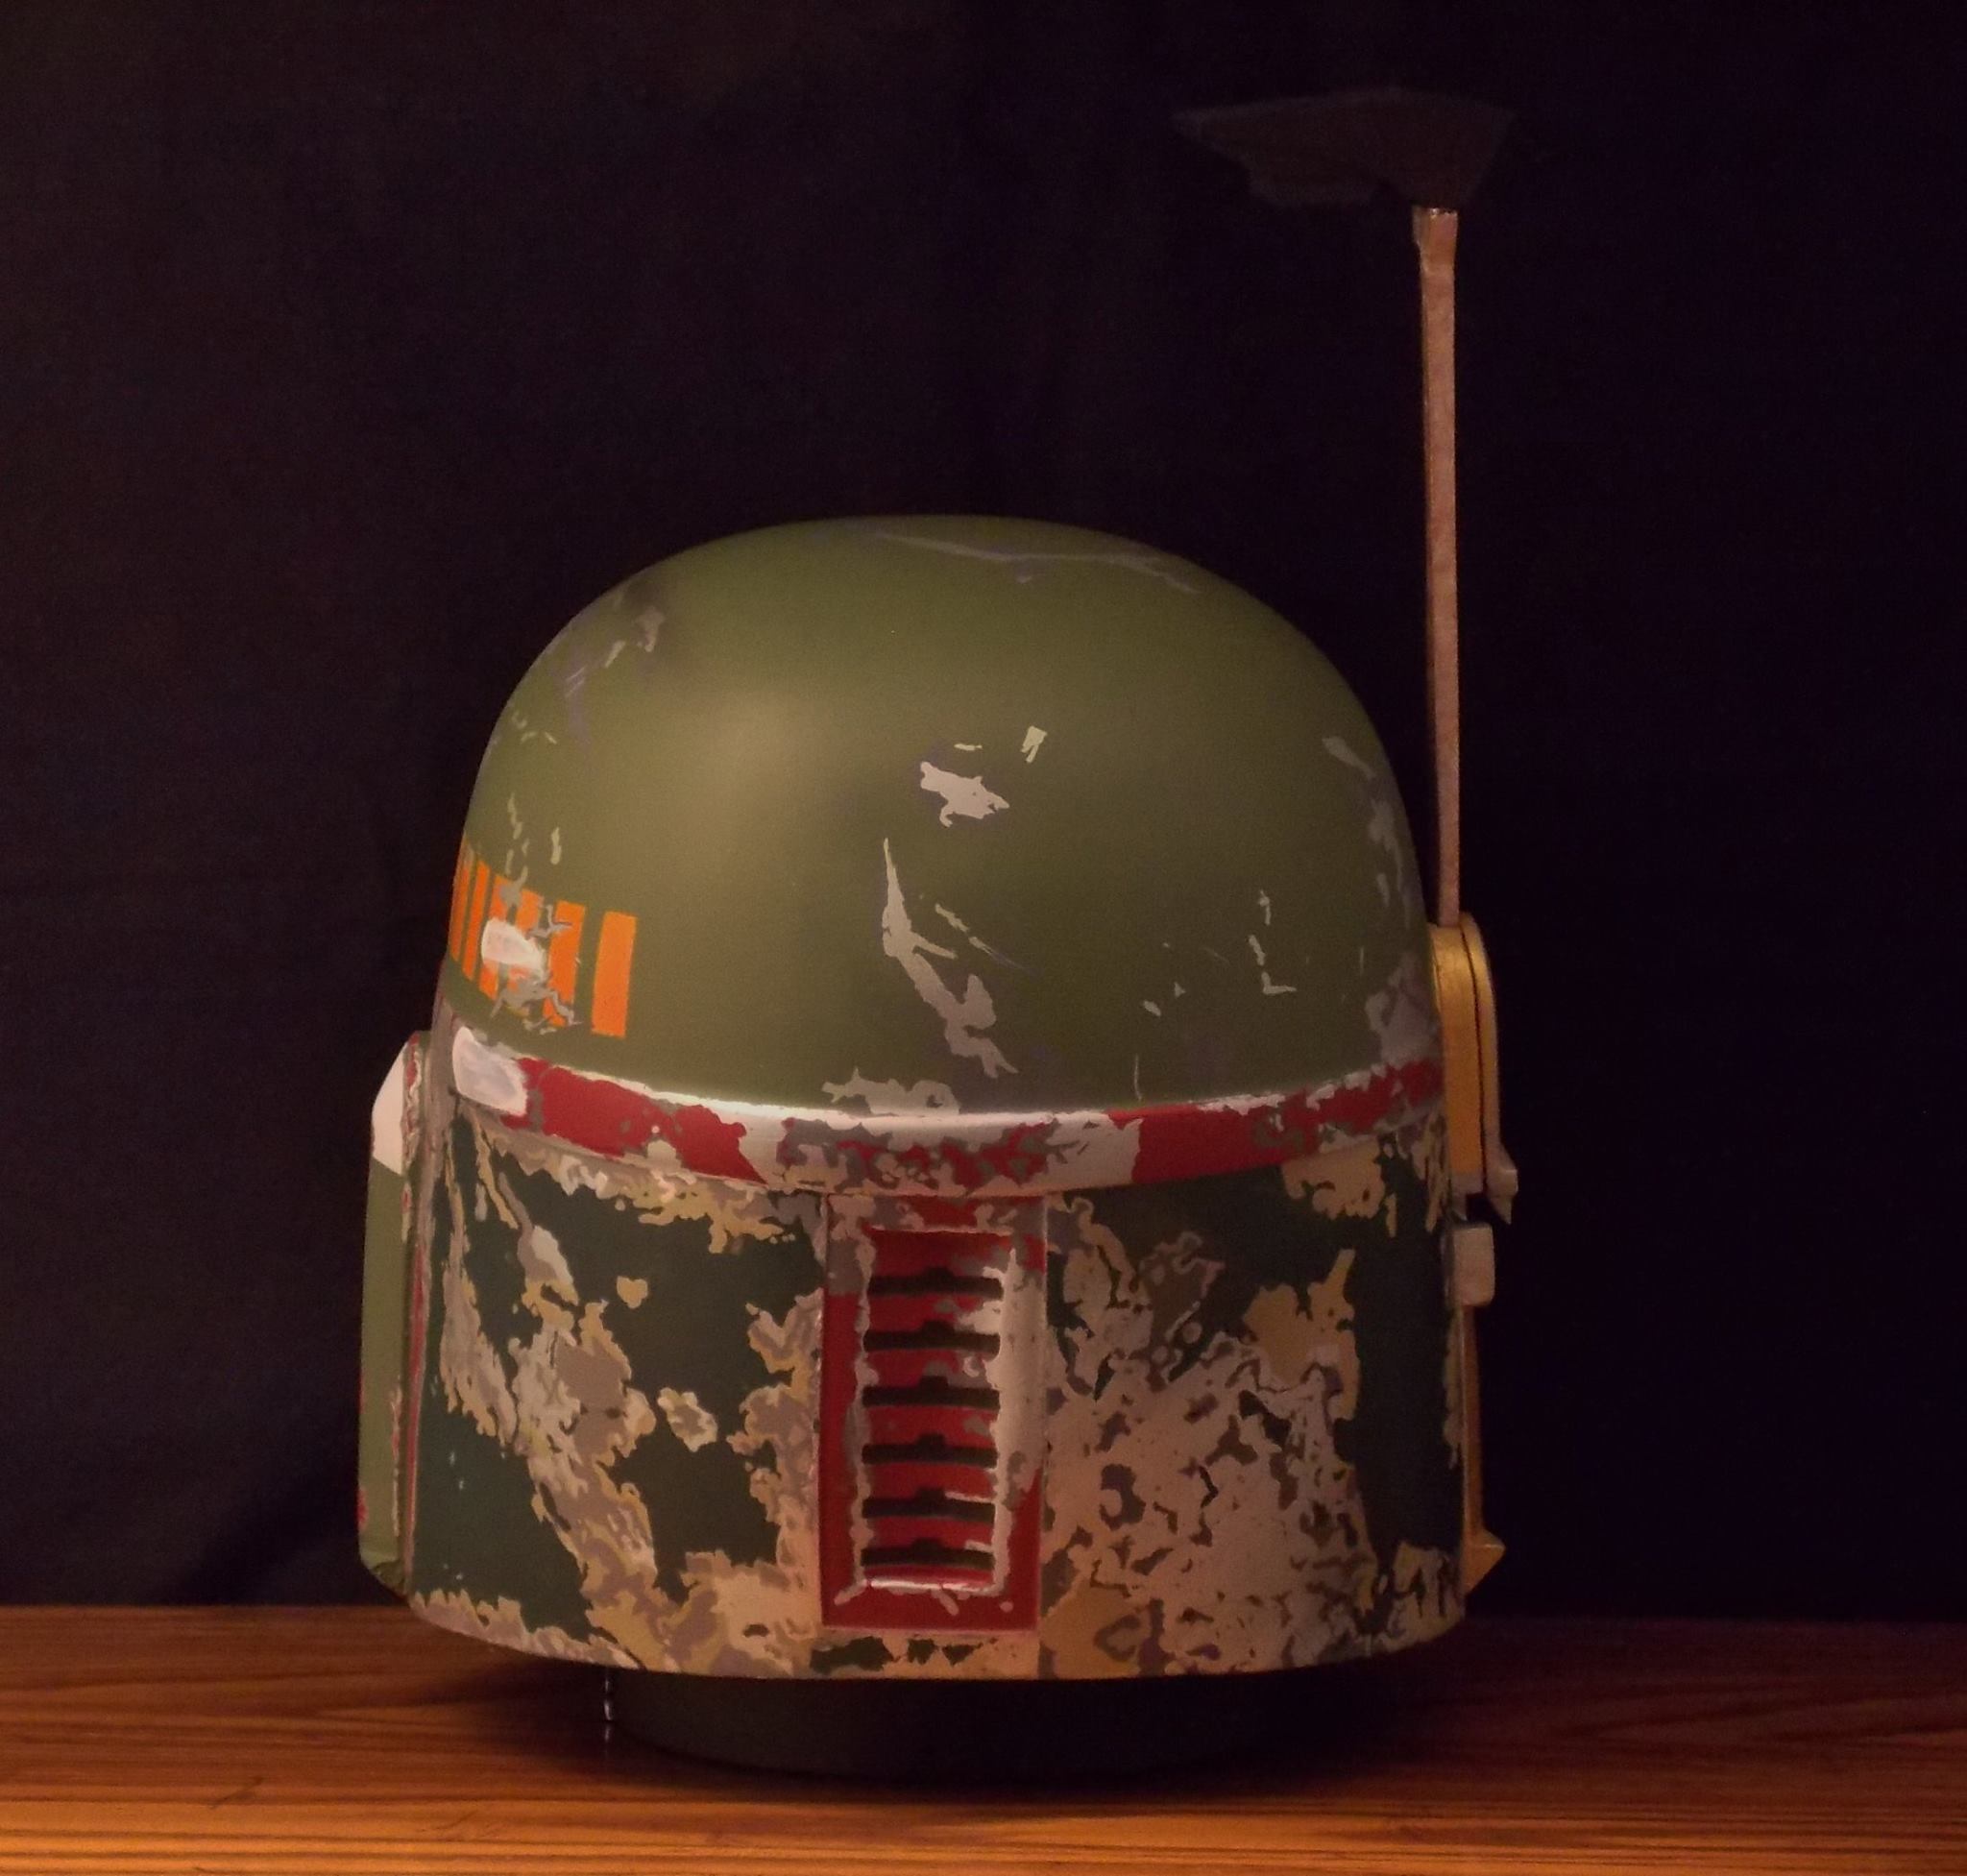
The kill stripes on the left side of the helmet were daunting to take on since I had to try and imagine where the battle damage would line up with the stripes. They were the last layer of paint applied to the dome by masking off bars with painters tape and airbrushing a yellow that faded from left to right into a medium orange.
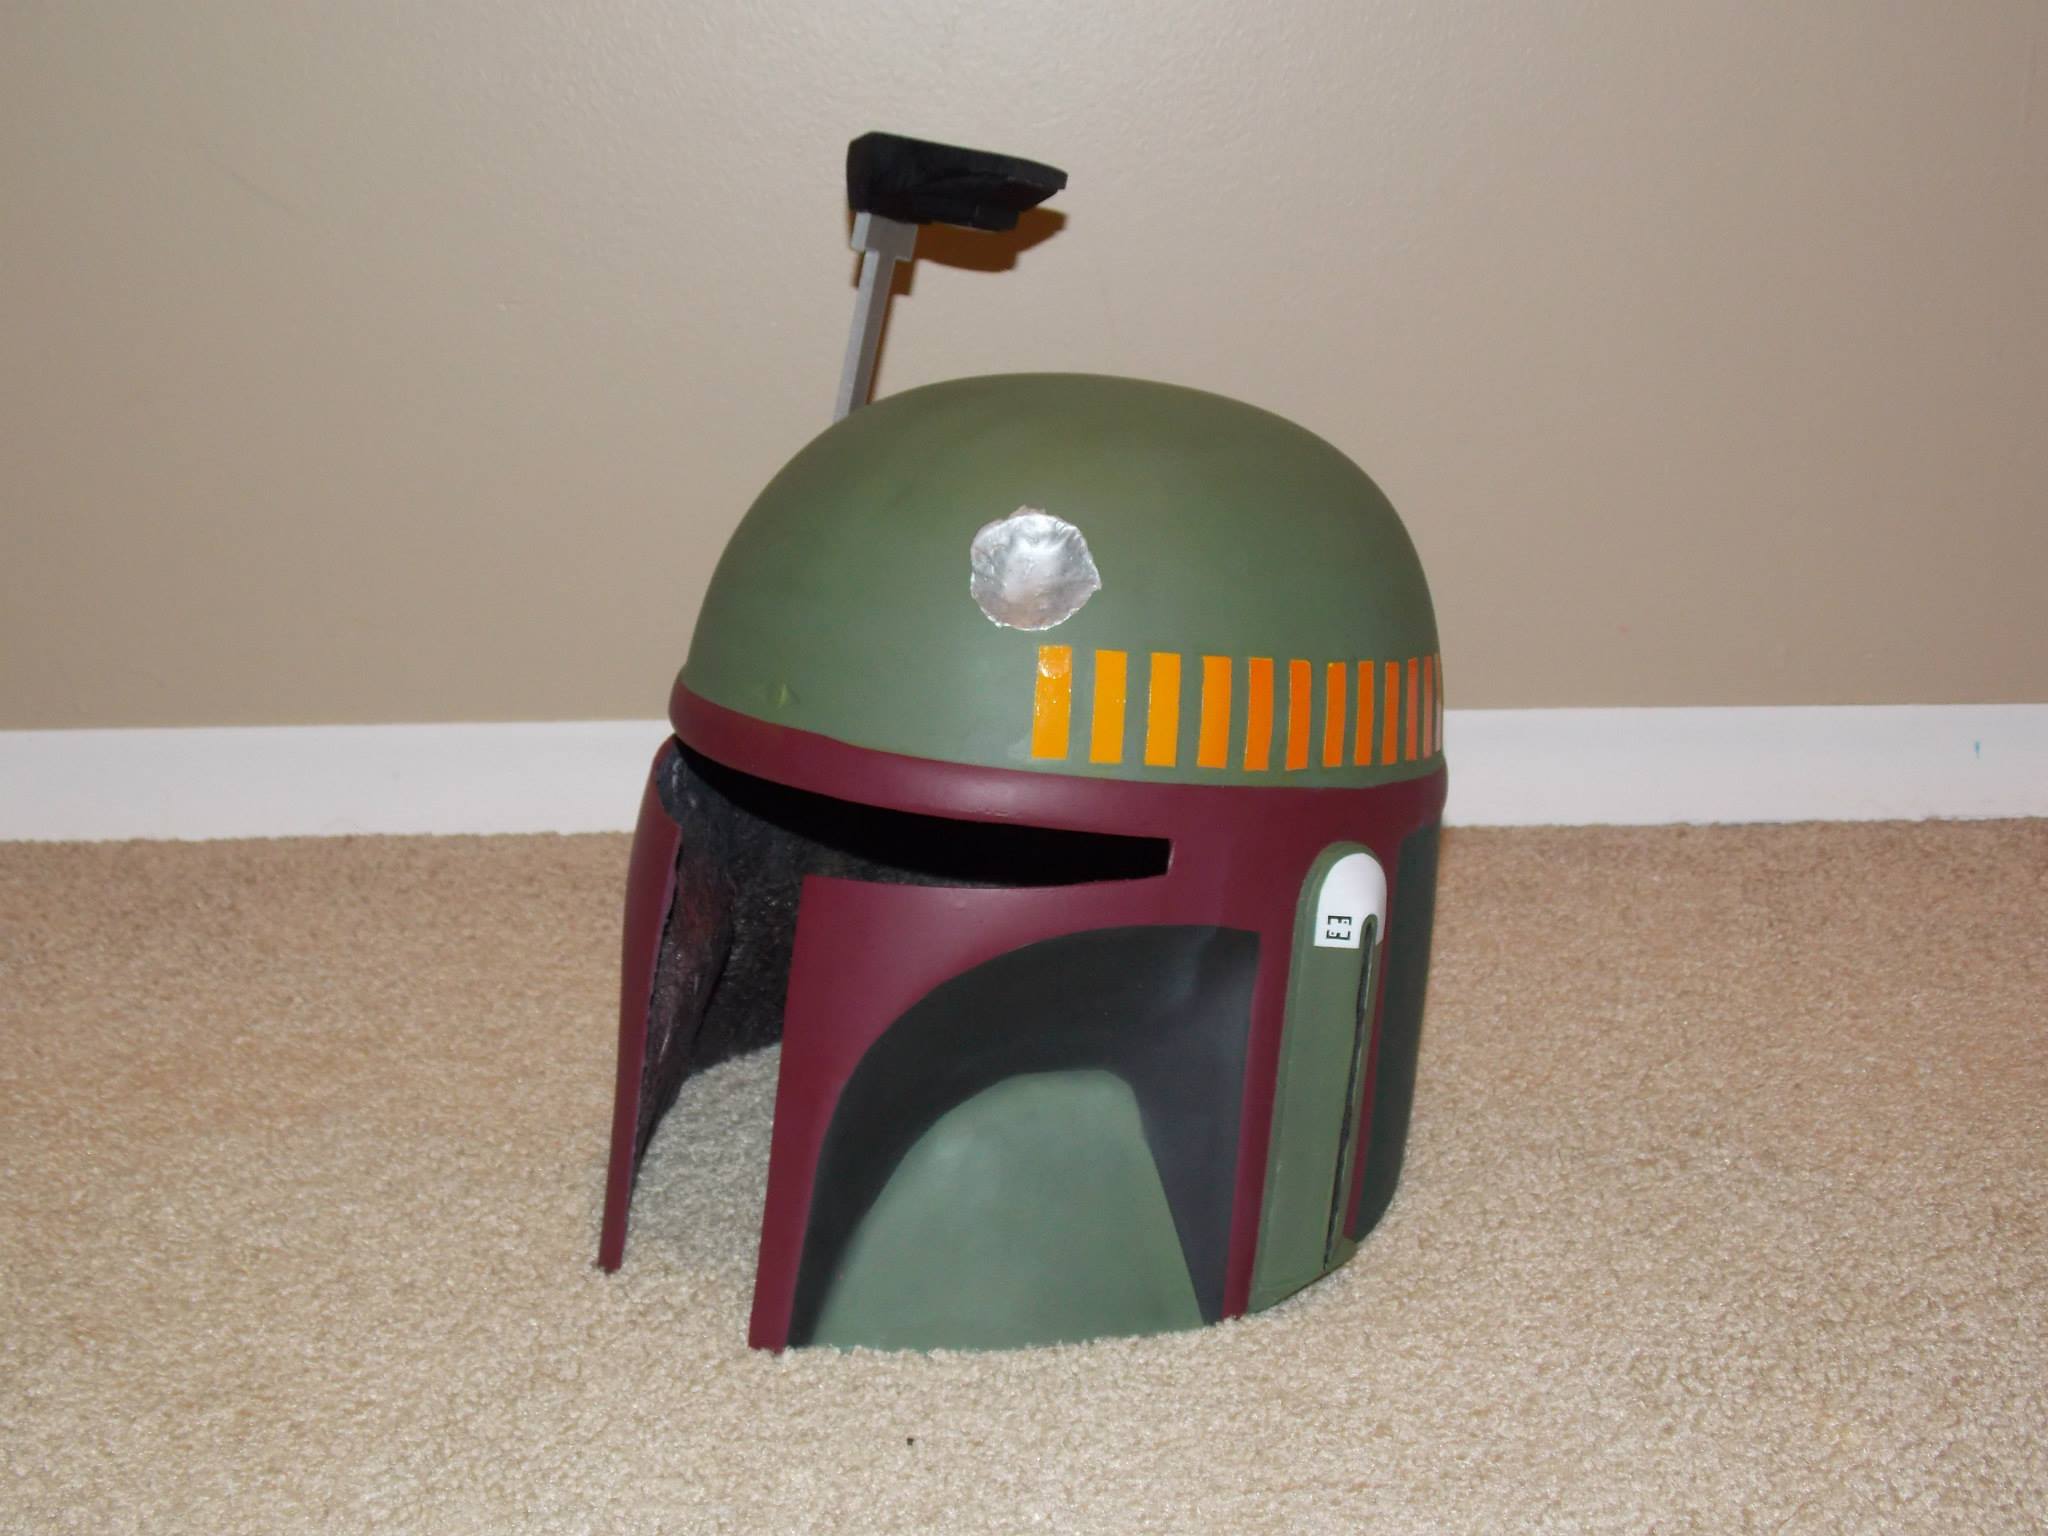
The famous dent that makes it not just any Mandolorian helmet, but Boba Fett’s, was given a sweeping mist of paint from my airbrush called ‘Exhaust.’ It was appropriately named and helped achieve the effect I wanted for such an iconic, eye catching focal point of the helmet.
Lastly were the thumb smudges that had been joked about but also regarded as screen accurate to the character. It was hard to let myself do it but it’s what Law asked for, so I smeared some white paint onto the two sections of the helmet where they had landed in production and dragged my thumb across both one after the next.
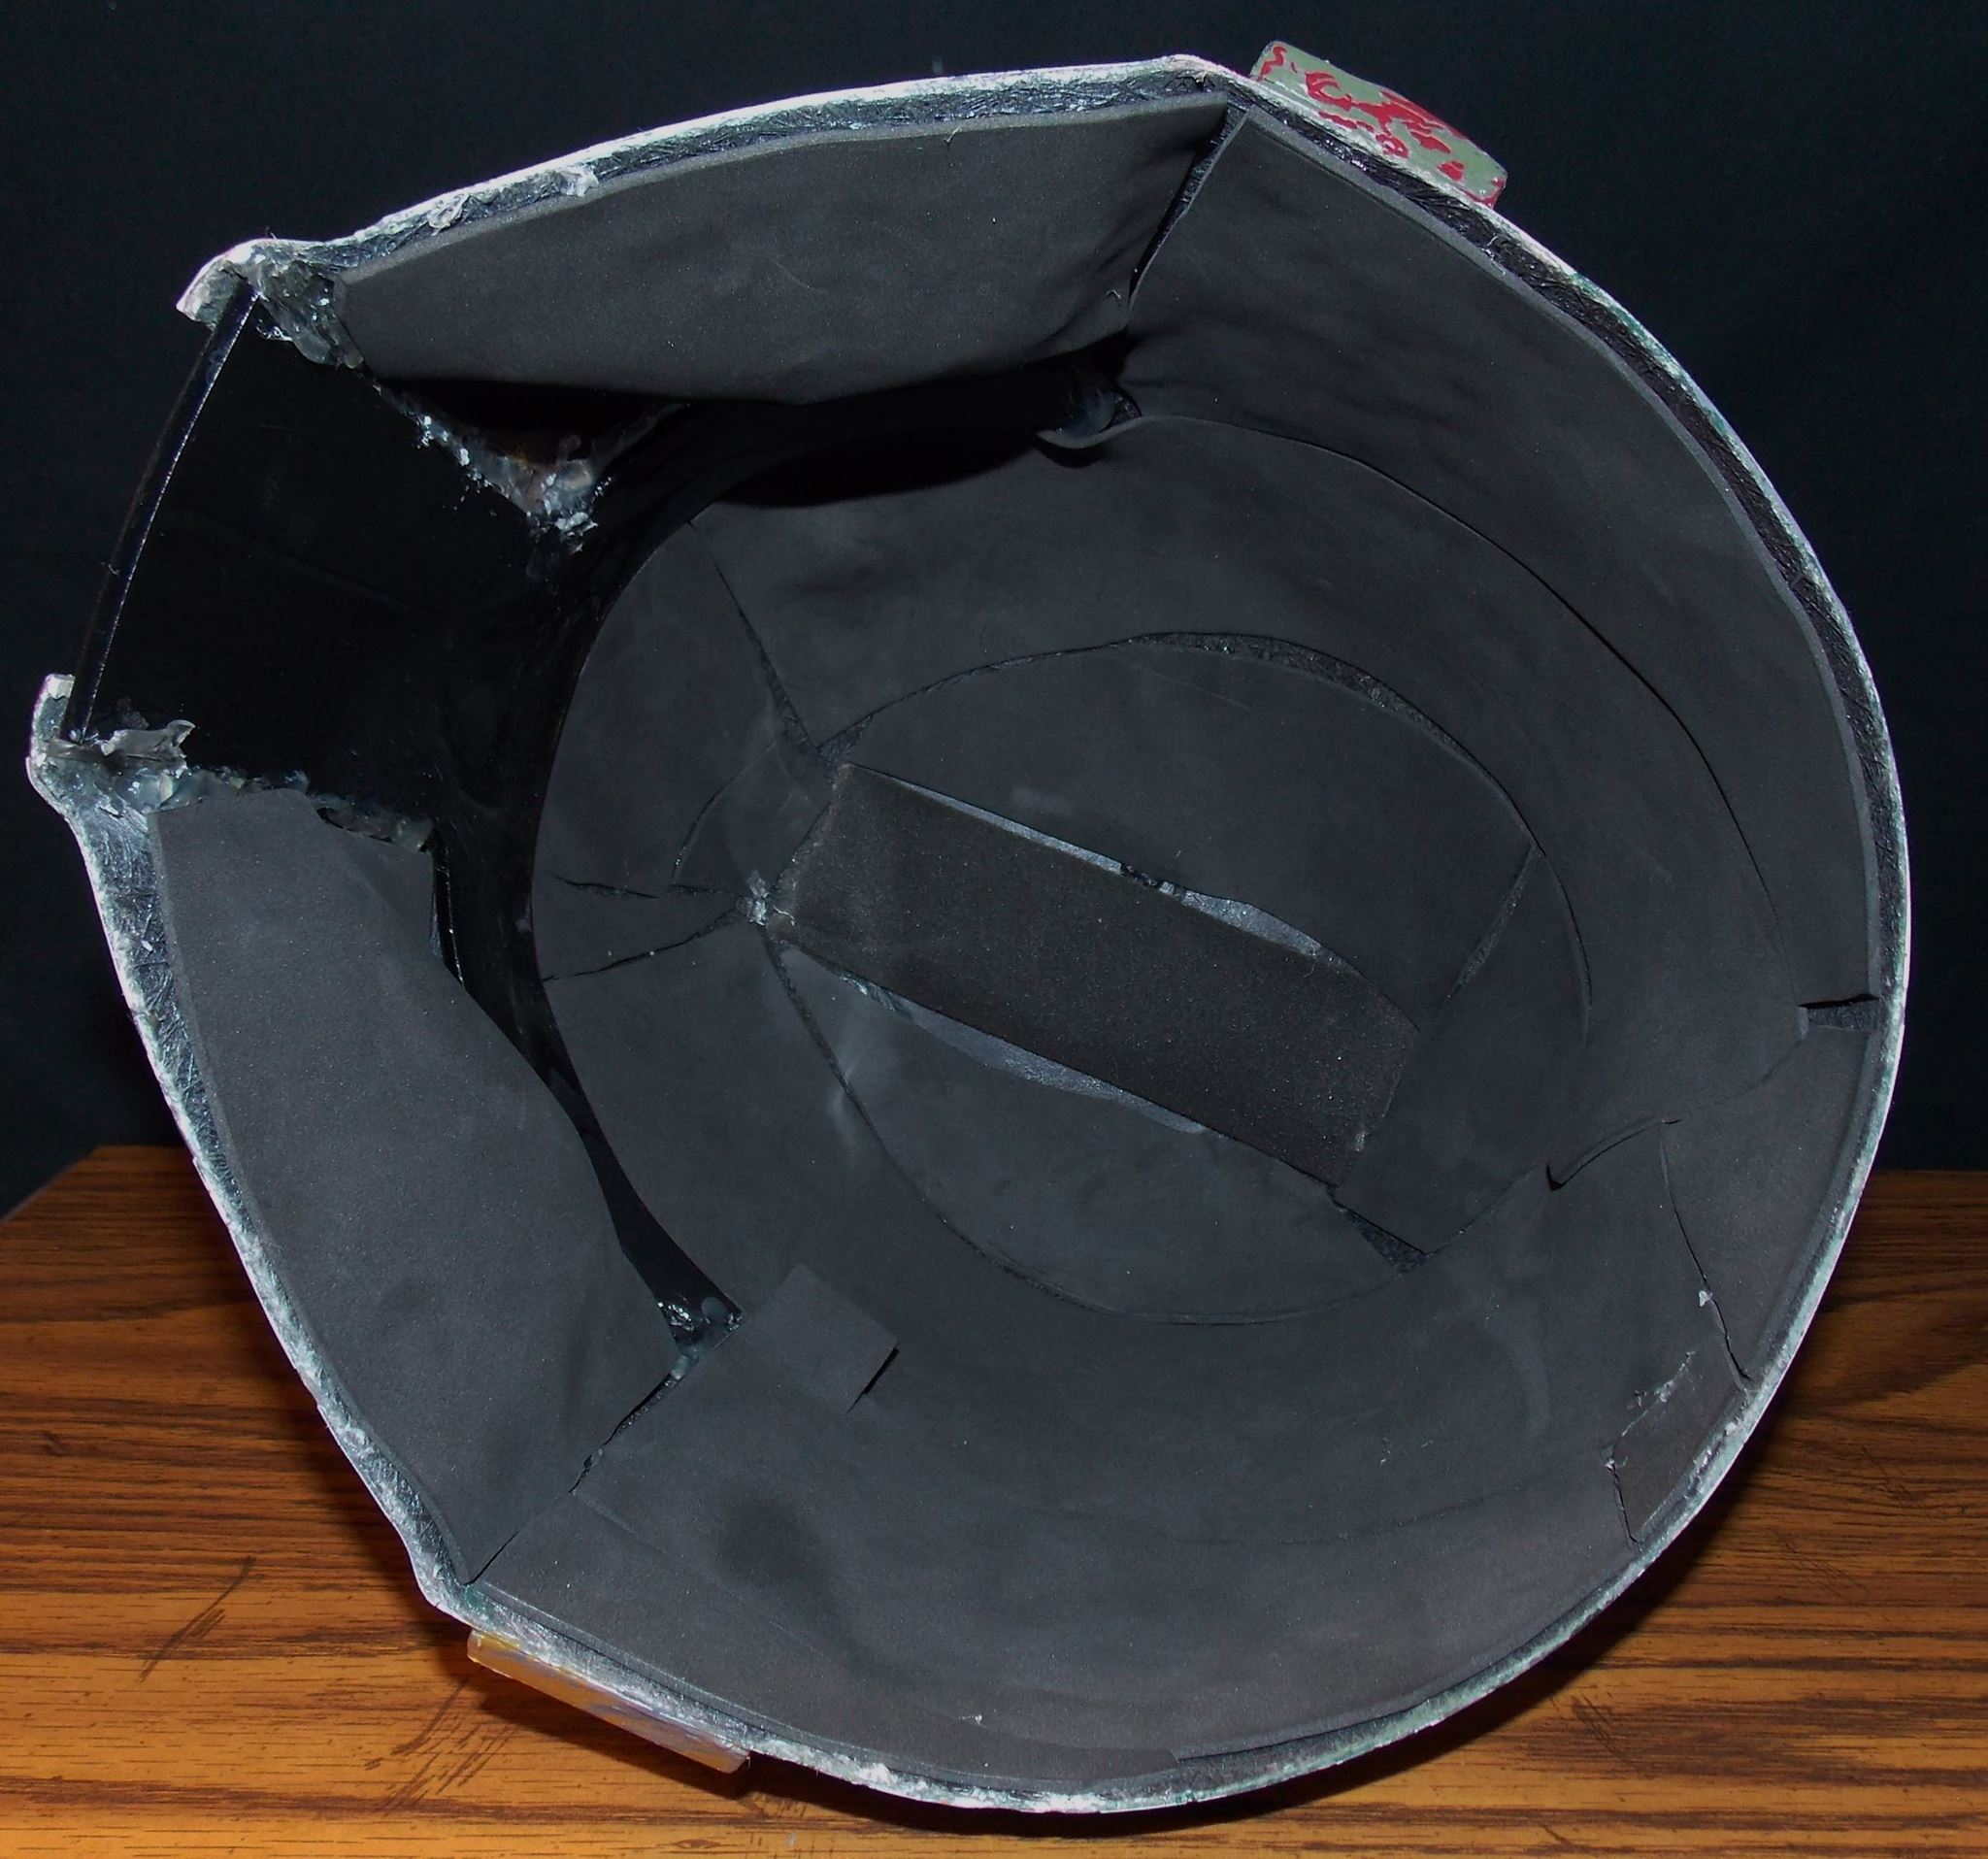
With that the painting process was finally complete but I still wasn’t finished. The helmet had been given to Law with nothing but a standard size strip of reticulated foam running across the center line (prime meridian) of the dome’s interior. The rest of the helmet interior was essentially exposed fiberglass.
I didn’t want to imagine Law or anyone for that matter putting on this helmet and removing it to reveal themselves covered in scrapes and blood. So I used a hot glue gun to line the entire interior of the helmet with soft but durable, black, foam sheeting. All of which was lined and applied after reinserting and attaching the laser cut visor that Law had provided since the original visor didn’t survive the acetone used during the first initial paint stripping process.
If you stuck through this entire thing I want to say thank you for taking the time to listen to what I had to say about this piece and that your interest in knowing what goes into my work means just as much to me as the appreciation and gratitude I receive for doing these projects.
Law, I hope you enjoy your helmet. And I certainly hope to see you complete your ensemble one day.
- Date December 3, 2017
- Tags Boba Fett, Star Wars